This Cookie Decorating Hack Makes Homemade Treats Look Professional
This one-minute cookie decorating hack has been a total game-changer for me this year and you will not believe how easy it is to do yourself! The best part is that this wreath design can be used throughout the year simply by swapping out the red berry accents with flower sprinkles.

One of my favorite shows to watch is “Christmas Cookie Challenge,” although I don’t have anywhere close to the expertise to make some of their amazing creations. This easy decorating trick makes me feel like I could at least daydream that I’m on that show! 🙂

Supplies Needed
You don’t even need to have homemade cookies or icing to pull off this cookie decorating hack. Here’s all you need!
- Any type of cookie (homemade, store-bought, or break-n-bake all work!)
- One can of cake frosting (you can also make your own frosting if preferred)
- Green icing (storebought icing works great, or you can dye some of the white frosting green using food coloring and apply with a piping bag.)
- Round red sprinkles for the berries (you can also use red icing)
Tip: Using both light and dark green icing for the wreath makes a beautiful effect!

Directions:
- Scoop about half of the canned frosting into a microwave safe bowl.
- Heat in microwave for 10-15 seconds so the frosting is a thinner consistency, then stir. (Heating the frosting makes it easier to work with.)
- Dip the top of the cookie into the icing or spread frosting evenly on top of the cookie using a spatula.
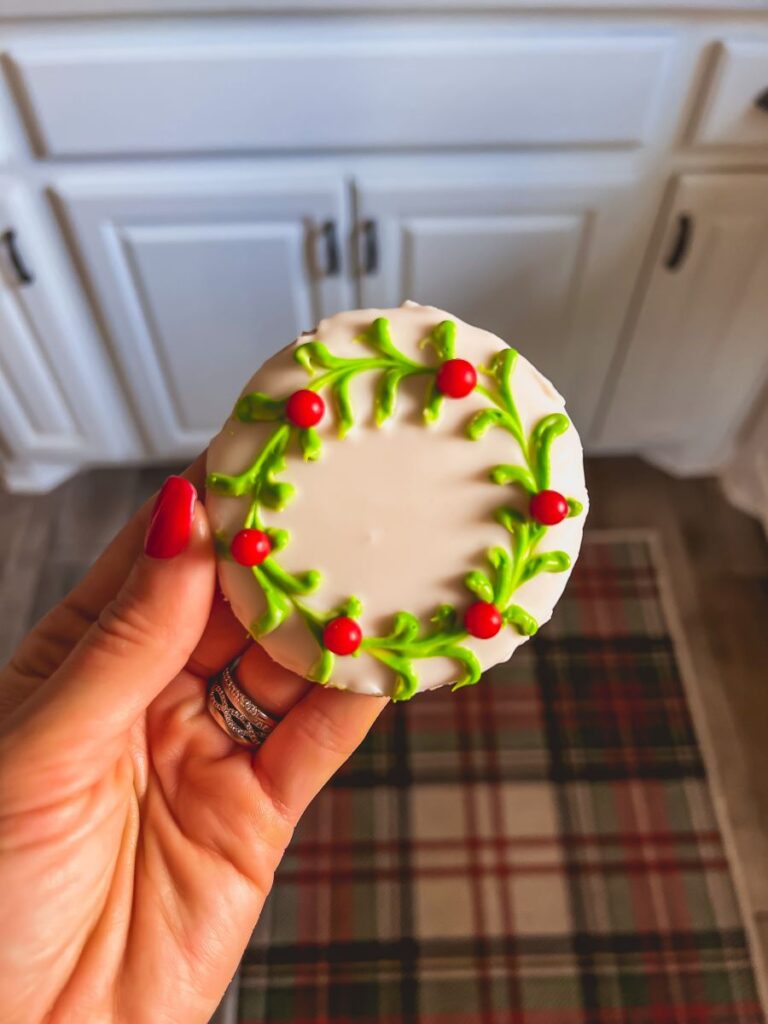
- With the green icing, make short vertical lines (about 3 cm each) around the perimeter of the cookie, closest to the edge. (I recommend alternating between light and dark green icing for a more natural look.)
- Once the lines of green icing are done, take a toothpick and drag it through the middle of each green line to make the wreath. (Tip: Make one continuous line throughout each green dash without lifting up the toothpick until you’ve gone all the way around.)
- Add berry accents using red sprinkles or dots of red icing.
Here’s a Quick Video Tutorial!
Can I Make These in Advance?
Yes! These will stay fresh for 2-3 days. Just store them carefully so the wreath design doesn’t get smudged. I’d recommend arranging them in a single layer in a Tupperware container, or on a plate covered carefully with Saran Wrap or aluminum foil.
Perfect Presentation Platters
Christmas Platters: These wreath cookies would be adorable on this wooden wreath serving board from Target, this Candy Cane Cookie Plate, a Christmas tree platter, or a Santa platter. I also love this Merry and Bright plate, this Happy Holidays platter, or this Pioneer Woman tray would also be perfect to hold a larger batch.
Wooden Serving Boards: I used this black wooden serving board and these cookies would also look beautiful on a brown wooden serving tray, this white-washed option, or this marble and wood choice. I also used this checkered wood serving board from MacKenzie-Childs in the video.
Cake Stands: Who says you can’t put cookies on a cake stand?! I love this wooden cake stand or this beaded cake stand from Antique Farmhouse. This two-tiered tray or this three-tiered tray would also be beautiful options year-round and can also double as a centerpiece!
Dessert Plates: These candy cane plates or holiday plates from Target would be perfect, or these MacKenzie Childs toyland plates would make for a nice higher-end choice.

Merry Christmas!
I hope this cookie decorating hack helps you also feel like a contestant on the “Christmas Cookie Challenge!” Have a wonderful holiday and please share your creations with me, I’d love to see them!
xoxo,
Leanna
PrintChristmas Cookie Decorating Hack

This one-minute decorating hack can make any homemade treat look professionally done!
Ingredients
- Any type of cookie (homemade, store-bought, or break-n-bake all work!)
- One can of cake frosting (you can also make your own frosting if preferred)
- Green icing (storebought icing works great, or you can dye some of the white frosting green using food coloring and apply with a piping bag.)
- Round red sprinkles for the berries (you can also use red icing)
Tip: Using both light and dark green icing for the wreath makes a beautiful effect!
Instructions
- Scoop about half of the canned frosting into a microwave safe bowl.
- Heat in microwave for 10-15 seconds so the frosting is a thinner consistency, then stir. (Heating the frosting makes it easier to work with.)
- Dip the top of the cookie into the icing or spread frosting evenly on top of the cookie using a spatula.
- With the green icing, make short vertical lines (about 3 cm each) around the perimeter of the cookie closest to the edge. (I recommend alternating between light and dark green icing for a more natural look.)
- Once the lines of green icing are done, take a toothpick and drag it through the middle of each green line to make the wreath. (Tip: Make one continuous line throughout each green dash without lifting up the toothpick until you’ve gone all the way around.)
- Add berry accents using red sphere sprinkles or dots of red icing.
Notes
This wreath design can be used year-round. Simply substitute the red berries for flower sprinkles for a spring or summer cookie.