Santa Cheesecake Cups
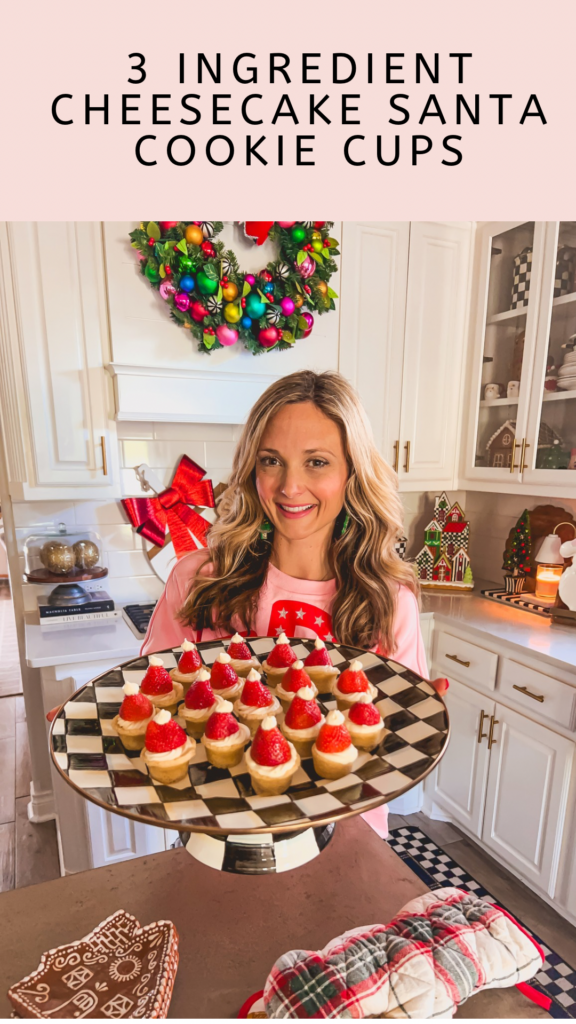
If you’re looking for a fun and festive Christmas dessert that couldn’t be easier to make, these 3-Ingredient Santa Cheesecake Cups are a must-try! Made with buttery sugar cookie cups, creamy no-bake cheesecake filling, and fresh strawberries, these adorable bite-sized treats look just like little Santa hats.

I love a holiday dessert that looks impressive but doesn’t require hours in the kitchen, and these mini Santa cheesecake cups are exactly that! Using just three store-bought ingredients, they’re incredibly simple to put together and perfect for Christmas parties, cookie exchanges, holiday dessert boards, or making with the kids.
The combination of soft sugar cookie crust, rich cheesecake filling, and juicy strawberries makes every bite delicious. Plus, you can prepare the cookie cups ahead of time, making these easy Christmas cheesecake bites one less thing to worry about during the busy holiday season!
Looking for more easy Christmas desserts? You’ll also love my Peanut Butter Reindeer Cups, Easy Christmas Tree Cupcakes, and Easy Christmas Dessert Board for even more festive holiday treats!
Why You’ll Love These Santa Cheesecake Cups
There are so many reasons to fall in love with this recipe — here are just a few:
- Only 3 ingredients. No long grocery list, no complicated steps — just cookie dough, cheesecake filling, and fresh strawberries.
- Fun for kids to help make. My kids love pressing the cookie dough into the muffin pan and adding the “Santa hats” on top!
- A show-stopping dessert with zero stress. They look bakery-level fancy, but you can whip them up in under 30 minutes.
- Perfect for every holiday occasion. From school parties to neighbor gifts, these travel well and hold their shape beautifully.
- Make ahead approved. You can prep the cookie cups and filling ahead of time, then assemble just before serving for a fresh finish.
- Customizable and versatile. Swap in different cookie dough flavors or fillings to match your family’s favorites.
Every year, I make these for our Christmas Eve dessert table, and there’s never a single one left by the end of the night. They’re festive, creamy, and irresistible — truly the easiest dessert that still feels special.
Ingredients You’ll Need
You won’t believe how simple this recipe is — just three easy ingredients create the cutest Christmas dessert you’ll ever make!
Here’s what you’ll need:
- Sugar cookie dough: You can use break-and-bake cookie dough or pre-rolled dough from the grocery store. These bake up into soft, buttery shells that hold the cheesecake filling perfectly.
- Philadelphia No Bake Cheesecake Filling: This ready-to-use cheesecake filling makes this recipe so easy — just open the tub and spoon or pipe it directly into your cooled cookie cups. No mixing, no mess, no fuss.
- Fresh strawberries: These become Santa’s signature red hats! Look for medium-sized berries that are firm and bright red for the best presentation.
✨ Pro Tip:
If you can’t find the Philadelphia No Bake Cheesecake Filling, don’t worry — you can easily make your own! Beat 8 ounces of softened cream cheese with ¼ cup powdered sugar and 1 teaspoon vanilla extract, then fold in 1 cup of whipped topping (like Cool Whip) until smooth and fluffy. Chill the mixture before piping for that same creamy, dreamy texture. This homemade version tastes just as rich and works perfectly in these Santa Cheesecake Cups!
Helpful tools:
- Mini muffin pan (silicone molds make it even easier)
- Ice cream scooper or tablespoon for shaping
- Piping bag (or a zip-top bag with the corner snipped) for clean, professional-looking filling
✨ Pro tip: Make sure your strawberries are completely dry before adding them on top of the cheesecake filling — excess moisture can make the tops slide or soften the filling.
Step By Step Directions
These Santa Cheesecake Cups come together in a few easy steps. Here’s exactly how to make them:
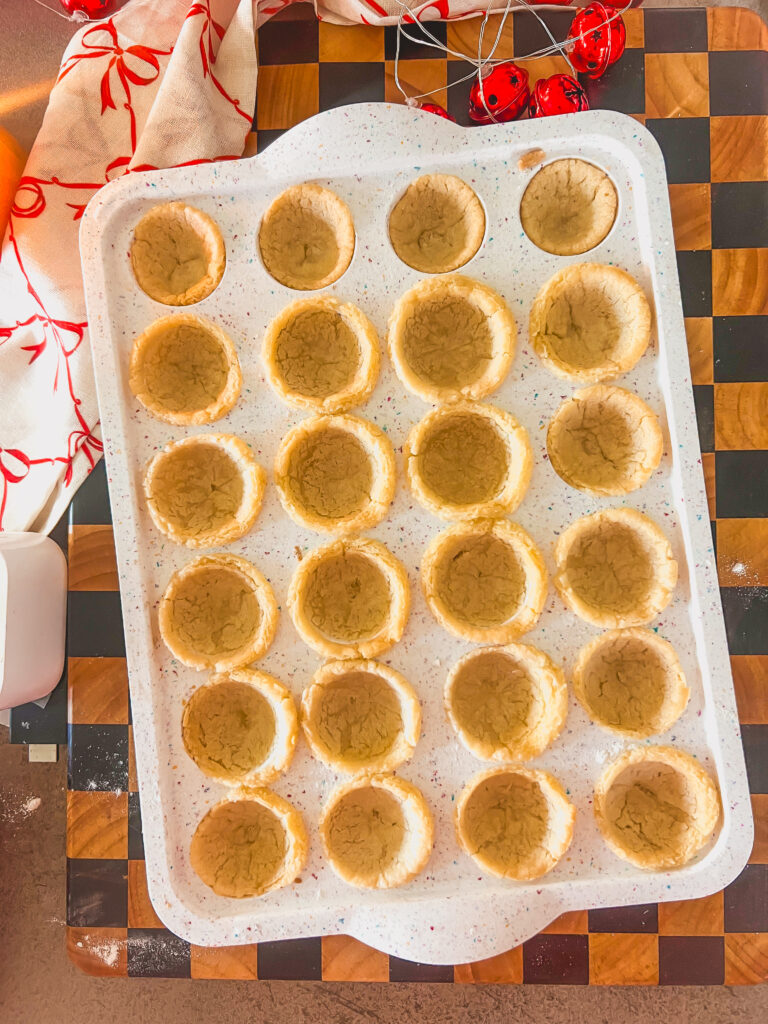
- Prep the cookie cups: Preheat your oven to 350°F. Lightly grease a mini muffin pan or use a silicone mold. Place one small ball (about 1 tablespoon) of cookie dough in each cavity.
- Shape the shells: Use the back of a rounded spoon or an ice cream scooper to press each dough ball down and up the sides slightly to form a small cup shape.
- Bake the shells: Bake according to the cookie dough package instructions, usually 12–14 minutes, until golden brown and slightly puffed.
- Reshape while warm: When they come out of the oven, immediately press the centers again with the back of a spoon to keep that “cup” shape. Allow to cool completely before filling.
- Assemble: Spoon or pipe the cheesecake filling into each cookie cup, filling nearly to the top.
- Add the strawberry hats: Remove the stems from your strawberries and pat them dry. Place one upside-down on each cheesecake cup to create Santa’s hat.
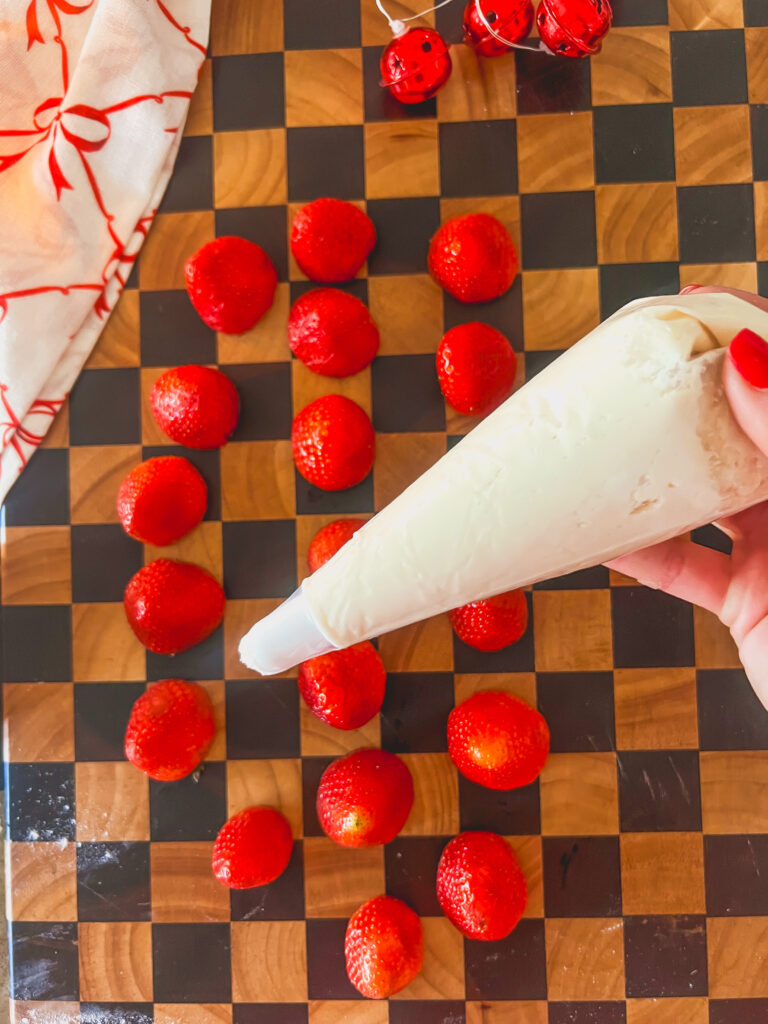
- Finish with the pom-pom: Pipe a tiny dot of cheesecake filling on the tip of each strawberry to complete the “Santa hat” look.
- Chill and serve: Refrigerate until ready to serve. The cheesecake filling will firm up slightly and taste even creamier once chilled.
Here’s a Quick Video Tutorial!
Expert Tips for the Best Santa Cheesecake Cups
- Use a mini muffin pan: A mini muffin pan creates perfectly sized, bite-sized cheesecake cups that are ideal for holiday parties.
- Press the centers while warm: Sugar cookie dough naturally rises as it bakes. Pressing the centers immediately after removing the cookies from the oven creates the perfect space for the cheesecake filling.
- Let the cookies cool completely: Adding cheesecake filling to warm cookies can cause it to soften and lose its shape.
- Choose the right strawberries: Medium-sized strawberries with pointed tops create the cutest Santa hats. Avoid oversized strawberries that might topple over.
- Dry the strawberries thoroughly: Excess moisture can make the cheesecake filling watery and cause the strawberries to slide.
- Use a piping bag: A piping bag makes filling the cookie cups easier and gives them a prettier, more professional finish.
- Decorate before serving: For the freshest strawberries and best presentation, assemble the Santa hats shortly before serving.
Easy Variations
While I love keeping these Santa Cheesecake Cups simple with just three ingredients, there are plenty of ways to customize them for your Christmas celebrations!
- Chocolate Cookie Cups: Swap the sugar cookie dough for refrigerated chocolate cookie dough for a chocolate cheesecake version.
- Gingerbread Cheesecake Cups: Use gingerbread cookie dough instead of sugar cookie dough for a festive holiday twist.
- Peppermint Cheesecake Filling: Add a small amount of peppermint extract to the cheesecake filling for a refreshing Christmas flavor.
- Homemade Cheesecake Filling: If you can’t find Philadelphia No Bake Cheesecake Filling, make a simple homemade filling with cream cheese, powdered sugar, vanilla, and whipped topping.
- Festive Cookie Cups: Add red and green holiday sprinkles to the sugar cookie dough before baking for an extra pop of Christmas color.
Make Ahead and Storage
One of my favorite things about this easy Christmas dessert is that you can prepare parts of it ahead of time, making holiday entertaining even easier!
Make Ahead: Bake the sugar cookie cups up to two days in advance. Once completely cooled, store them in an airtight container at room temperature. Add the cheesecake filling and strawberries on the day you plan to serve them.
Refrigerator: Store assembled Santa Cheesecake Cups in an airtight container in the refrigerator for up to three days. For the best texture and appearance, I recommend enjoying them within the first 24 hours after assembling.
Freezer: You can freeze the unfilled sugar cookie cups for up to two months. Allow them to thaw completely before adding the cheesecake filling and strawberries. I don’t recommend freezing the fully assembled cheesecake cups because the strawberries can become watery after thawing.
Serving Tip: Keep the cheesecake cups refrigerated until you’re ready to serve. Because they contain a dairy-based filling, they shouldn’t sit at room temperature for more than two hours.
Frequently Asked Questions
Can I make these cheesecake cups the night before?
Yes, you can absolutely make these the night before! In fact, they’re even better after a few hours of chilling because the flavors meld and the filling firms up nicely. Just be sure to keep them refrigerated and covered. I recommend adding the strawberries and the little “pom-pom” of cheesecake on top the next day so everything looks picture-perfect.
Can I use homemade cookie dough instead of store-bought?
Definitely! You can make your favorite sugar cookie dough recipe from scratch — just roll it into small balls and bake them in the mini muffin pan as directed. Homemade cookie dough often adds a richer, buttery flavor that tastes incredible with the cheesecake filling.
Can I make the cheesecake filling from scratch?
Yes — it’s so easy! In fact, if you don’t have a store-bought cheesecake mix, you can make a quick homemade version that tastes just as creamy. Beat 8 oz of softened cream cheese until smooth, mix in ¼ cup powdered sugar and 1 teaspoon vanilla extract, then fold in 1 cup whipped topping (like Cool Whip). Chill the mixture before piping — it’s fluffy, rich, and perfectly holds its shape in the cookie cups.
Can these sit out at a party?
They can safely sit out at room temperature for about 1–2 hours, depending on how warm it is in your space. If your home is warm or if they’ll be out longer than that, it’s best to serve them chilled on a tray placed over an ice pack or cold marble board.
What if my cookie cups collapsed or lost their shape?
Don’t worry! This happens if they rise too much in the oven or weren’t pressed deep enough. The trick is to re-press them gently with the back of a spoon immediately after baking while they’re still soft. If they crack slightly, you can still fill them — the cheesecake will hide any imperfections.
You’ll Also Love Recipes
- Donut Christmas Tree — Create a stunning centerpiece out of store-bought donuts! This donut Christmas tree looks bakery-level fancy but takes just minutes to put together. Perfect for brunches, dessert tables, or holiday breakfasts.
- Christmas Tree Spinach Dip Breadsticks — Warm, cheesy, and shaped like a Christmas tree, these pull-apart breadsticks are the perfect festive appetizer. Pair them with your Santa Cheesecake Cups for a sweet-and-savory holiday spread that everyone will love.
- Christmas Dessert Board — Build a beautiful dessert board filled with cookies, candies, chocolates, and festive treats. It’s the ultimate show-stopping platter for parties, cookie swaps, or cozy Christmas movie nights.
- Christmas Tree Cupcakes — Turn simple cupcakes into adorable edible Christmas trees with this quick and creative decorating trick. They’re perfect for school parties, family baking nights, or last-minute holiday treats.

3-Ingredient Santa Cheesecake Cups
Ingredients
- 1 16.5-ounce package refrigerated sugar cookie dough
- 1 24.3-ounce container Philadelphia No Bake Cheesecake Filling
- 24 medium fresh strawberries washed, hulled, and dried
Instructions
- Preheat the oven to 350°F, or according to the refrigerated cookie dough package directions. Lightly grease a 24-cup mini muffin pan.
- Divide the sugar cookie dough into 24 evenly sized balls. Place one ball into each muffin cavity.
- Bake for approximately 12–14 minutes, or until the edges are lightly golden and the cookies are baked through.
- Immediately after removing the cookies from the oven, use the back of a small spoon to gently press down the centers, creating a well in each cookie cup.
- Allow the cookies to cool in the pan until firm enough to remove. Transfer to a cooling rack and cool completely.
- Transfer the chilled cheesecake filling to a piping bag or use a spoon to fill each cooled sugar cookie cup.
- Place one hulled strawberry, cut side down, on top of each cheesecake cup, with the pointed tip facing upward.
- Pipe a small dollop of cheesecake filling onto the tip of each strawberry to create Santa’s hat pom-pom.
- Refrigerate until ready to serve. Enjoy chilled!