Christmas Tree Cookie Dippers
There’s something magical about holiday treats that are as adorable as they are delicious. These Christmas tree cookie dippers are one of my favorite holiday hacks — crunchy cookie bases topped with melted chocolate piped into tree shapes, adorned with festive sprinkles, and ready in just minutes. Whether you’re hosting a cozy holiday party, prepping treats for a holiday brunch, or looking for last-minute edible gifts, these beauties deliver holiday cheer and flavor with zero stress.
Because it only takes about 5 minutes to assemble plus some setting time, you can whip them up even on busy holiday mornings or right before guests arrive. Pair them with a mug of rich hot cocoa, or serve them on a dessert platter as part of your holiday cookie board. They’re simple, beautiful, and utterly festive!

Why You’ll Love This Recipe
- Ultra quick and low stress: From start to finish, you can have beautiful, holiday-themed cookie dippers done in about five minutes (plus a little set time). Perfect for busy holiday mornings or last-minute entertaining.
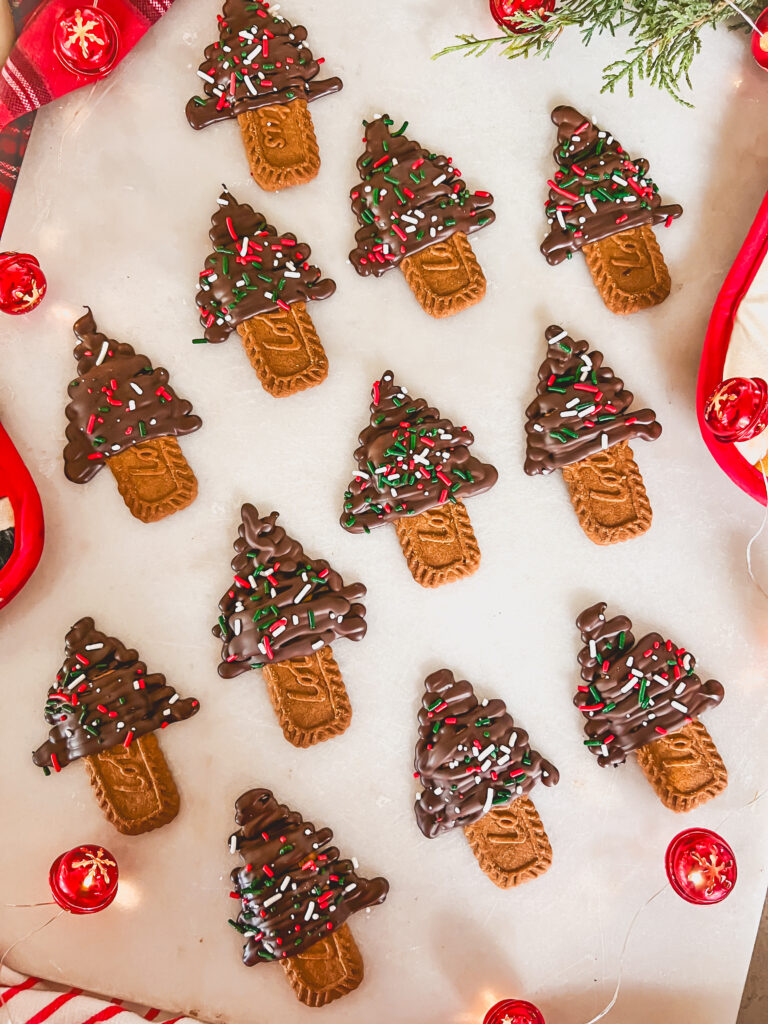
- Visually festive and charming: These look like mini edible Christmas trees — fun for kids, holiday parties, or even as edible gifts.
- Perfect pairing: Dunk them into hot cocoa, coffee, or even serve alongside a holiday hot cocoa bar. They add a crunchy sweet treat that complements warm drinks beautifully.
- Giftable & shareable: These cookie dippers keep well at room temperature and can be packaged in individual bags or gift boxes for neighbors, co-workers, or holiday guests.
- Kid-friendly fun: Kids can help decorate by adding sprinkles or piping the chocolate, making it a fun holiday activity.
What You’ll Need
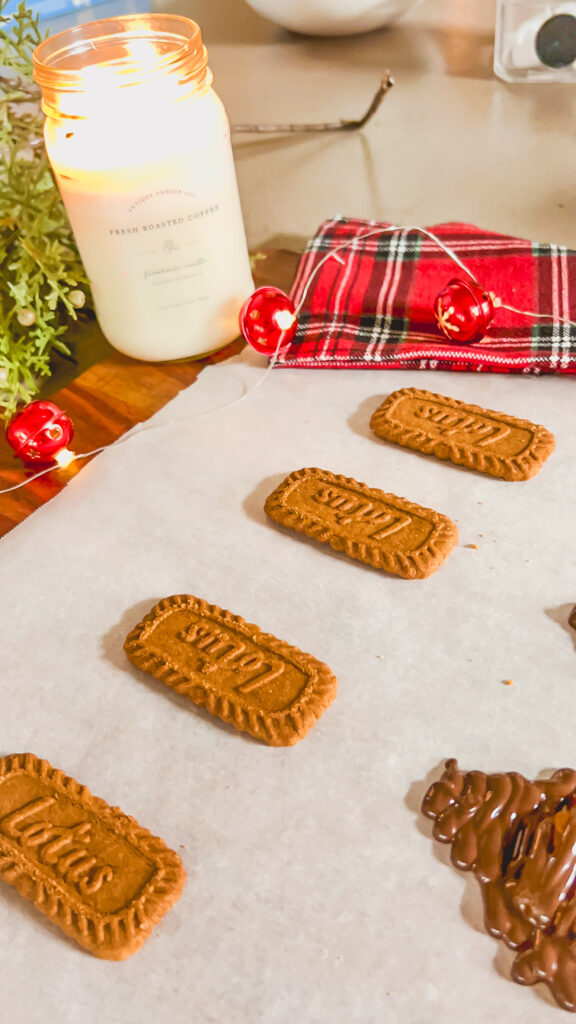
- Rectangular / trunk cookie: I used crispy Lotus Biscoff cookies as the cookie base/trunk. If those are unavailable, you can substitute with wafer cookies or any rectangular cookie that provides a straight “trunk” shape.
- Quality dark chocolate chips (or chopped dark chocolate) — melts smoothly and gives rich, deep flavor.
- Optional: coconut oil — helps make the chocolate melt more fluid and glossy, making piping easier.
- Festive holiday sprinkles: think green, red, white, gold, or star shapes. Sprinkle them on while the chocolate is still soft so they adhere well.
Step-by-Step: How to Make Christmas Tree Cookie Dippers
These adorable cookie dippers come together so quickly, but a few little steps make all the difference in getting that picture-perfect look! Below, I’ll walk you through exactly how I make them — and you can scroll down to the recipe card at the bottom of this post for the exact ingredient amounts and timing.
Step 1: Melt the Chocolate
Start by melting your chocolate chips (or chopped chocolate) with a touch of coconut oil until smooth and glossy. You can use a microwave-safe bowl and heat in 20-second intervals, stirring well between each burst, or melt gently over a double boiler on the stove.
The coconut oil helps thin out the chocolate slightly, making it easier to pipe and giving it that shiny finish once set.
Step 2: Prep Your Piping Bag
Once your chocolate is perfectly melted, pour it into a piping bag or a small zip-top bag. Snip just the tip of the bag — a tiny opening gives you more control when you’re piping your Christmas tree shapes.
Make sure to twist the top of the bag closed so the chocolate doesn’t spill out while you work.
Step 3: Arrange the Cookies
Lay out your rectangular cookies on a flat surface lined with parchment paper. The parchment not only keeps things tidy but also makes it easy to lift your cookies later once the chocolate has hardened.
Position the cookies so one end points down — that will act as the “tree trunk.”
Step 4: Pipe the Christmas Trees
Starting near the top of each cookie, pipe the chocolate in a zig-zag pattern to form a Christmas tree shape — wider at the bottom and narrowing toward the top.
If your chocolate feels too thick, warm the piping bag for just a few seconds in your hands or in warm water to soften it slightly before continuing.
Step 5: Add the Sprinkles
Before the chocolate sets, sprinkle on your festive toppings — red, green, white, gold, or even star-shaped sprinkles!
This step is where the magic happens, so let the kids help out if you’d like. It’s such a fun and creative way to make every tree unique.
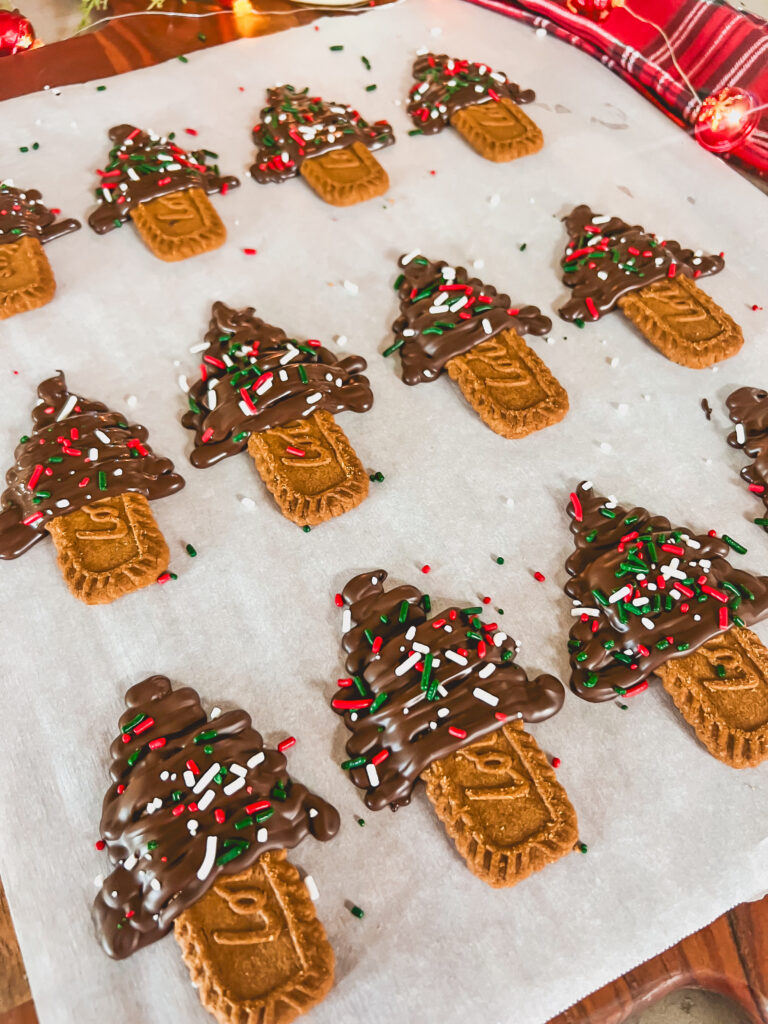
Step 6: Let Them Set
Now, allow the chocolate to harden. At room temperature, this usually takes around 5–10 minutes, depending on the temperature of your kitchen.
If you’re short on time, pop the tray into the refrigerator for a few minutes to speed things up.
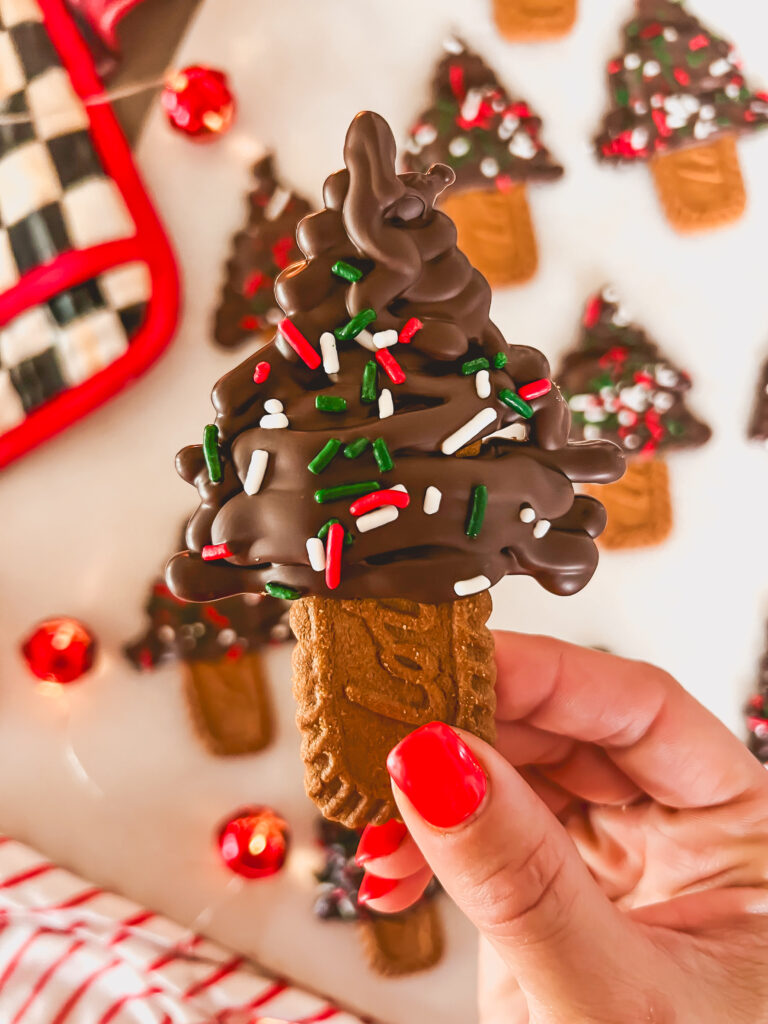
Step 7: Serve and Enjoy
Once the chocolate has completely set, gently lift each cookie off the parchment and transfer to a serving platter or airtight container.
These dippers are perfect alongside hot cocoa, coffee, or holiday dessert boards — and they make such a festive addition to any holiday party spread!
Here’s a Quick Video Tutorial!
Tips for Making the Best Christmas Tree Cookie Dippers
- Use high-quality chocolate: It melts smoother, pipes easier, and sets with a glossy finish that looks beautiful on camera and in person.
- Add a little coconut oil: Stir in ½ teaspoon per cup of chocolate chips to make the chocolate easier to drizzle or pipe.
- Pipe on parchment paper: It keeps cleanup easy and helps the dippers lift cleanly once the chocolate hardens.
- Chill before piping: Pop the cookies in the fridge for a few minutes before decorating — it helps the chocolate firm up faster without melting the cookie base.
- Work quickly with sprinkles: Add your sprinkles right after piping so they stick before the chocolate sets.
- Snip a tiny piping bag tip: A smaller opening gives you more control to create neat, tree-shaped zigzags.
- Double the batch: These disappear fast — and they’re perfect for gifting, so it’s always smart to make extras!
- Use a cooling rack under your parchment: It keeps air circulating and helps the chocolate set evenly.
Fun Variations to Try
- Gift-Ready: Wrap each cookie in a small cellophane bag with ribbon — an easy, edible gift idea for teachers, neighbors, or party guests.
- White Chocolate Trees: Swap dark chocolate for white, or tint it green with gel food coloring for a “frosted tree” look.
- Milk Chocolate Lovers: Use milk or semi-sweet chocolate if you prefer a sweeter, softer flavor.
- Add crunch: Sprinkle crushed candy canes, mini marshmallows, or chopped nuts (like pistachios or almonds) before the chocolate sets.
- Holiday Flavors: Mix a drop of peppermint extract or cinnamon into the melted chocolate for a festive twist.
- Gluten-Free Option: Use gluten-free wafer cookies or rectangular biscuits for the trunk.
- Colorful Drizzle: Once set, drizzle with contrasting chocolate (like white over dark) for an extra decorative touch.
Frequently Asked Questions About Christmas Tree Cookie Dippers
Q: What kind of cookies work best for the base?
I love using Lotus Biscoff cookies because they’re sturdy and have that warm, caramelized flavor that pairs perfectly with chocolate. But really, any rectangular or oval-shaped cookie works! Try shortbread fingers, wafer cookies, graham cracker rectangles, or even gluten-free alternatives. The key is to choose a cookie that’s flat, firm, and doesn’t crumble easily when you pipe the chocolate on top.
Q: How do I melt chocolate so it’s smooth and not clumpy?
The trick is low and slow heat! Always melt your chocolate in short 20-second microwave bursts, stirring well each time to prevent burning. You can also use a double boiler for extra control. Adding a small amount of coconut oil or shortening helps create that glossy, pourable consistency that’s perfect for piping your Christmas trees. Avoid adding water — even a drop can cause the chocolate to seize and harden.
Q: Can I use candy melts instead of real chocolate?
Yes! Candy melts are an easy, mess-free option and come in festive holiday colors like green, red, and white — no food coloring needed. They also harden quickly and are great for kids to decorate with. If you prefer a richer flavor, though, real chocolate (dark, milk, or white) gives a deeper, more decadent taste. It really depends on whether you want convenience or that true chocolate flavor.
Q: Can I make these gluten-free or dairy-free?
Yes, and it’s simple! Just swap the cookie base for a gluten-free rectangular cookie or wafer. For dairy-free, choose a dairy-free chocolate brand such as Enjoy Life or Hu Kitchen and skip the butter or coconut oil if needed. The taste and look will be just as festive!
Q: How should I serve them?
These Christmas tree cookie dippers are adorable served next to a hot cocoa bar, on a holiday dessert board, or even tucked into a charcuterie-style platter alongside candies and chocolate-covered pretzels. They add a festive, handmade touch to any table and make a great conversation starter.
Storage & Make-Ahead Tips
These Christmas Tree Cookie Dippers aren’t just cute — they’re also incredibly practical for the holidays. Whether you’re prepping ahead for a party, packaging them up for gifts, or saving extras for later, here’s exactly how to keep them tasting fresh and looking beautiful.
- Freeze: If you want to prepare them even further in advance, these cookie dippers freeze surprisingly well. Arrange them in a single layer on a parchment-lined baking sheet and freeze until solid. Once frozen, transfer to a freezer-safe container or bag with parchment between each layer to prevent smudging. They’ll keep for up to one month in the freezer. When you’re ready to enjoy them, let the cookies thaw at room temperature for about 30 minutes. You can also freeze the plain cookie bases and decorate after thawing for the freshest presentation and flavor.
- Make Ahead: These cookie dippers are perfect for making a few days before your holiday get-together. Once the chocolate has fully hardened, simply layer them in an airtight container with parchment paper between each cookie to keep them from sticking. Store the container in a cool, dry place away from heat or sunlight so the chocolate stays glossy and firm. You can easily make them 1–3 days ahead of time, which makes them ideal for entertaining or gifting. When you’re ready to serve, just set them out at room temperature — no last-minute prep needed!
- Storage: Keep your finished cookie dippers fresh by storing them at room temperature in an airtight container for up to five to seven days. If your kitchen tends to be warm, you can refrigerate them instead — just remember to let them sit out for about 15 minutes before serving so the chocolate softens slightly. To protect their shape and decoration, add a sheet of parchment or wax paper between layers if you’re stacking them. They’ll look just as cute and festive days later as they did when you made them!
You’ll Also Love These Recipes
If you loved these Christmas Tree Cookie Dippers, you’ll adore these other festive and family-friendly holiday treats! They’re quick to make, full of charm, and guaranteed to spread a little extra holiday cheer. 🎄✨
- Mint Christmas Crack Dessert – A crunchy, minty holiday treat made with toffee-covered crackers and mint baking chips. This recipe is easy to make, perfect for gifting or adding to a festive dessert board.
- Christmas Tree Fruit Board – A stunning, healthy holiday display using fruit and foam cones to create edible Christmas tree shapes. Simply arrange your favorite fruit around the trees for a shows stopping brunch or party platter.
- Festive Rudolph Dessert Board – A playful dessert board styled like Rudolph using frosting, sweets, and antler cookies. Great for kids, holiday parties, or festive gatherings, and can be prepped ahead of time.
- Christmas Tree Cupcake Hack– A clever hack where upside-down cones turn cupcakes into festive Christmas trees. Pipe green frosting for branches and add sprinkles for ornaments. Ideal for kids or holiday bake sales.
- Christmas Tree Brownies – Fudgy brownies cut or decorated to resemble Christmas trees. These make a rich and festive dessert that pairs beautifully with holiday drinks or dessert tables.
Christmas Tree Cookie Dippers

These quick and festive Christmas tree cookie dippers are perfect for dunking into your hot cocoa this season!
Ingredients
-
- 12 Biscoff cookies (if these are not available, you can also use wafer cookies or any preferred rectangular cookie for the tree “trunk”)
-
- 1/2 cup dark chocolate chips
-
- 1 tbsp coconut oil (optional)
-
- Holiday sprinkles
Instructions
-
- Melt chocolate with coconut oil (if using) in microwave for 20-second intervals, stirring until smooth.
- Transfer melted chocolate to a piping bag. Pipe a Christmas tree shape on each cookie, using part of the cookie as the trunk.
- Sprinkle holiday sprinkles on the chocolate while still soft.
- Let set for 5 minutes at room temp or refrigerate for quicker results.
- Dunk into hot cocoa and enjoy!

In your commentary you say: Add a little coconut oil: Stir in ½ teaspoon per cup of chocolate chips to make the chocolate easier to drizzle or pipe.
Then the recipe calls for 1 tablespoon.
Which is it?