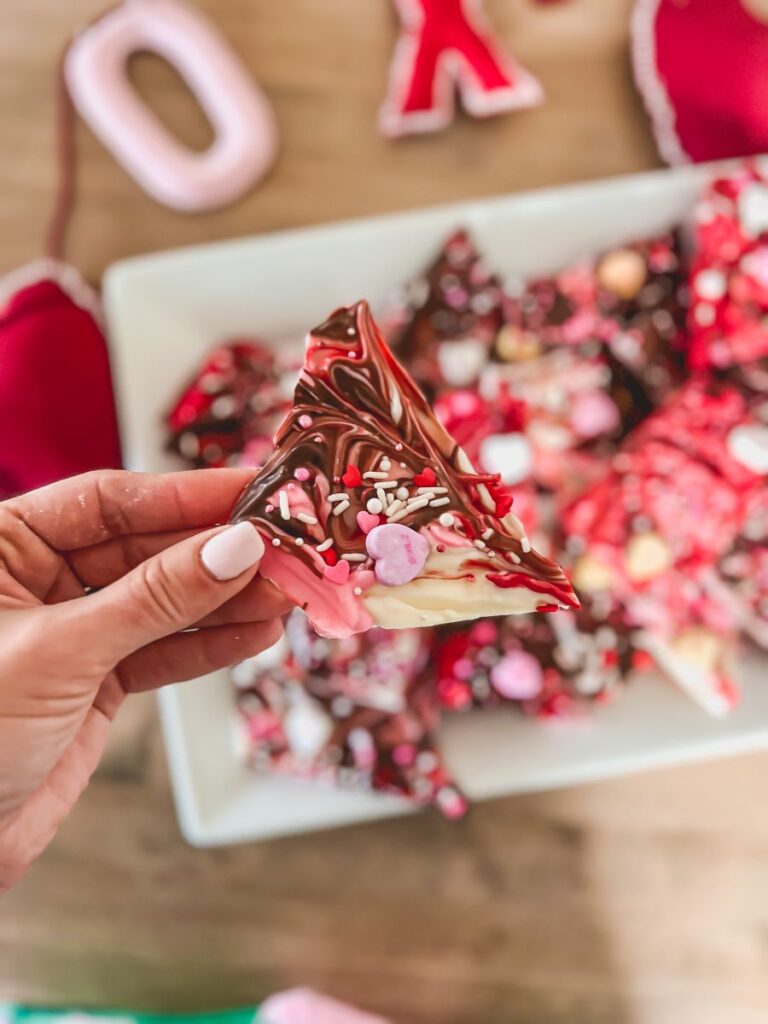
The Simple Hack for Candy Heart Chocolate Bark
This Candy Heart Chocolate Bark makes a great gift or treat for Valentine’s Day and is so quick and easy with this simple hack!

Y’all know that I love any hacks to make life easier and this is my new favorite trick! I couldn’t believe how quickly this came together and how easy it to make this adorable Candy Heart Chocolate Bark.
Ingredients
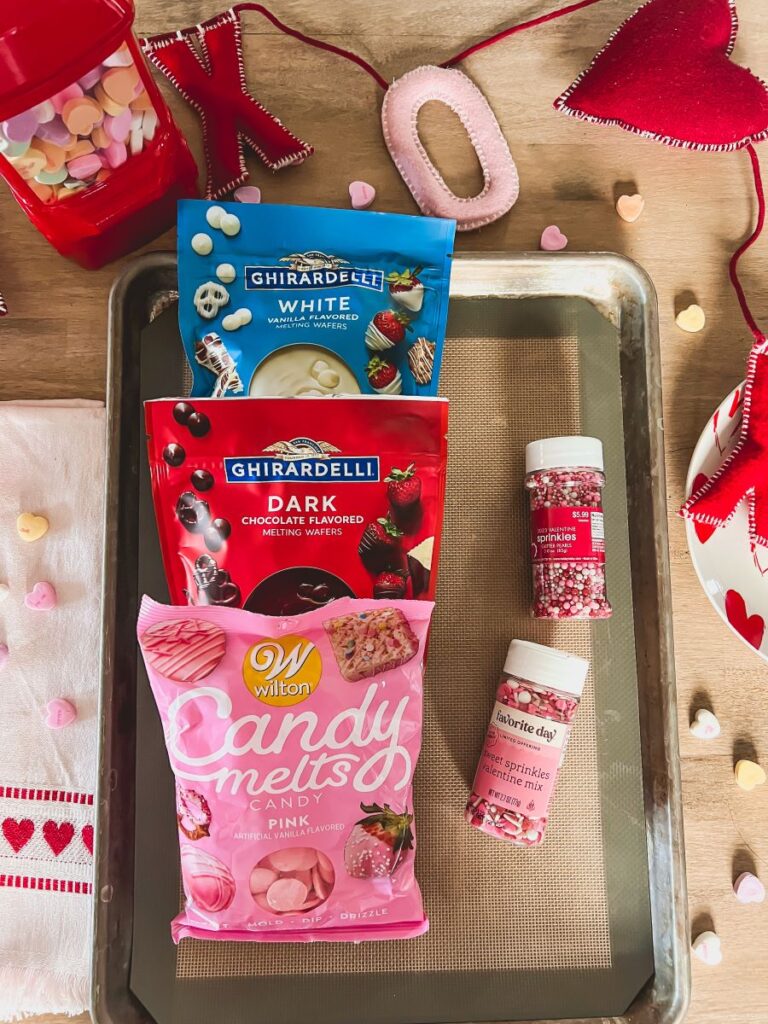
A lot of this can be up to you! Melting chocolate works best and I used a combination of pink, red, and dark chocolate for Valetine’s Day, topped with festive sprinkles. (All of these supplies can be found at Walmart!)
- One bag (12 oz) pink Wilton Candy Melts
- One bag (10 oz) Ghiradelli Dark Chocolate Melting Wafers
- One bag (10 oz) Ghiradelli White Chocolate Melting Wafers
- Candy Hearts
- Valentine’s Day Sprinkles

Directions
- Preheat oven to 200 degrees and line a baking sheet with parchment paper or a silicone mat.
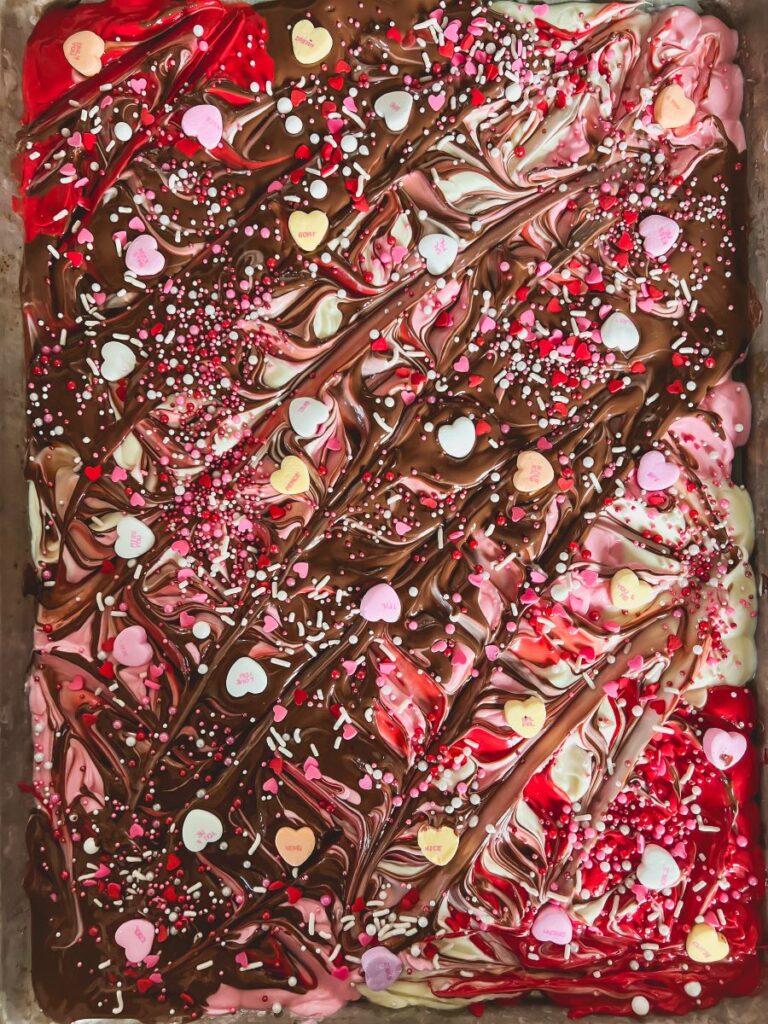
- Arrange the melting chocolates in rows (approximately 2 inches wide) by color diagonally, starting at the corner.
- Place in oven for approximately 7 minutes, until the chocolate melts are soft (they do not need to be completely melted.)
- Use a metal spatula or knife to stir the chocolates in a zig zag motion, which will create a swirl pattern. (Mixing the chocolates will also help them melt completely.)
- Immediately add sprinkles or candy to the chocolate before it dries.
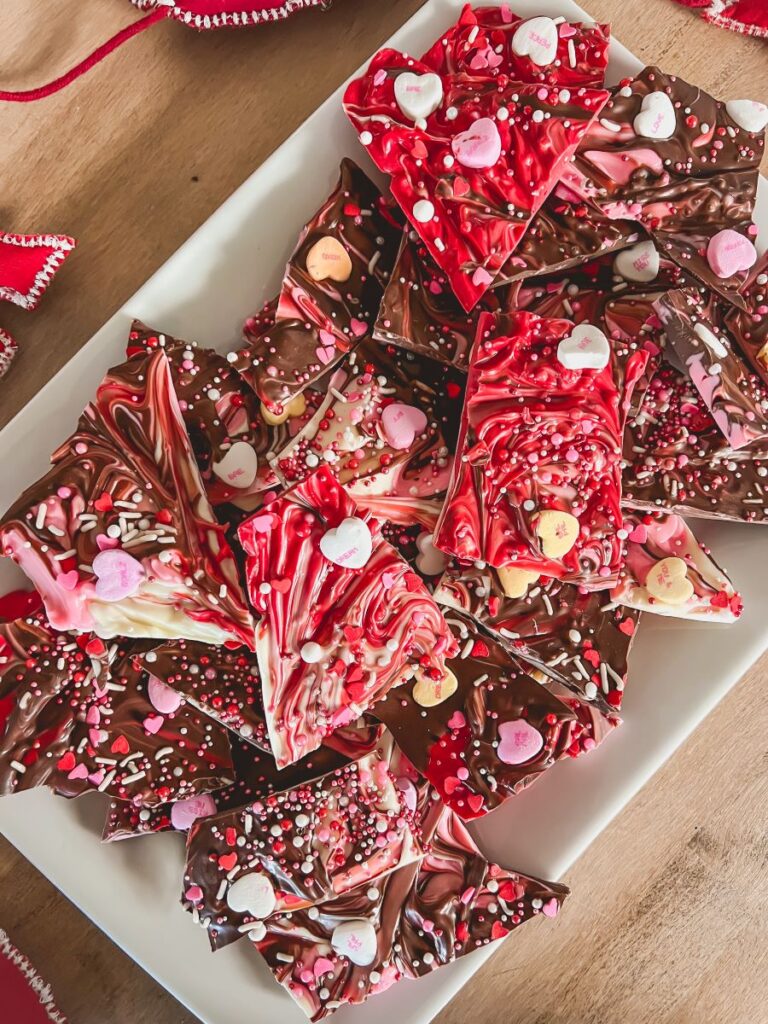
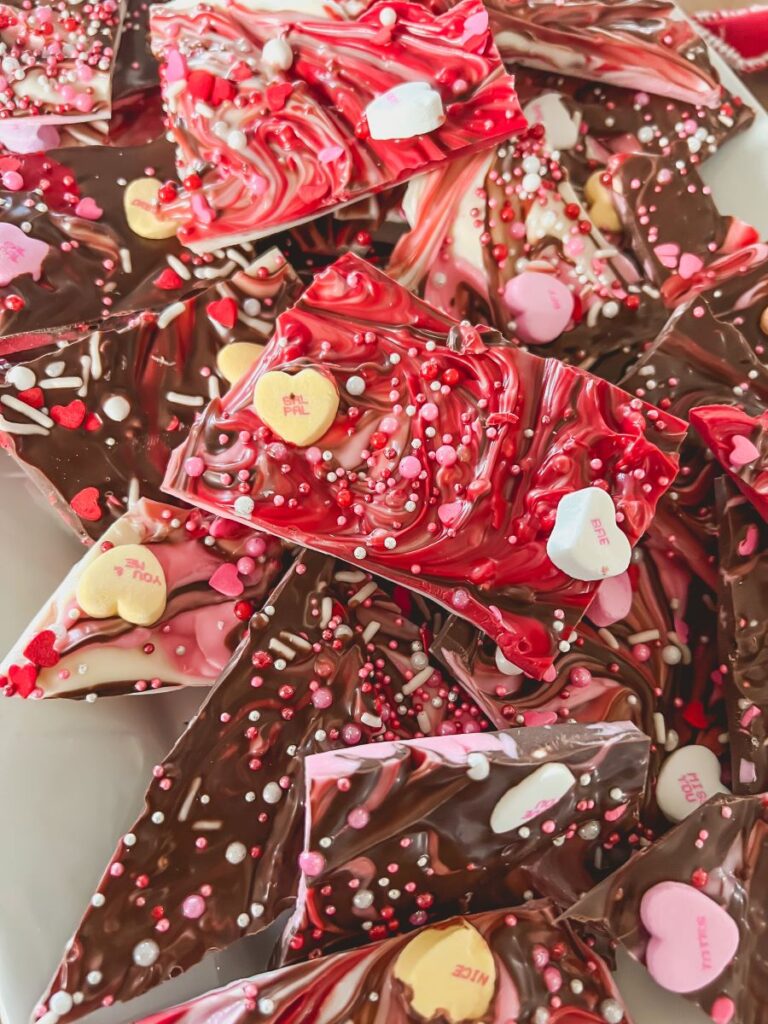
- Let the chocolate cool and harden completely before breaking it in smaller pieces.
Note: If you use a silicone mat, you may need a slightly longer baking time for the chocolates.

You can also change up the chocolate colors and candy per holiday, such as rainbow colors for St. Patrick’s Day, orange and white for Halloween or red and green for Christmas!
Here’s a Quick Video Tutorial!
Perfect Presentation Platters
This Candy Heart Chocolate Bark looks cute on anything! For a Valentine’s Day theme, here are some fun options:
Valentine’s Day Plates: This heart-shaped pink platter is a great find, as well as this rectangular dish with hearts, or these pink scalloped dessert plates. (All from Target.) Williams-Sonoma also has this beautiful watercolor heart platter made from stoneware from, this round marble LOVE cheeseboard, this heart-shaped cheeseboard, or this set of 4 cute heart plates that you could reuse every year.
For a matching set, you could also get these watercolor mugs, tea towels, or placemats from Williams-Sonoma as well!
Everyday Platters: If you’d prefer to have platters that aren’t holiday themed, I’ve got you covered! For a fun option you could use all year, I used this set of two white porcelain platters. I also love this beaded wooden cake stand, this gold hammered tray, this wooden serving tray, or this round agate cheeseboard.
Can I Make This Ahead of Time?
Absolutely! These also make adorable gifts, so you can place them in individual gift bags or cookie tins to give to teachers, coworkers, friends, etc.
Storing the Candy Heart Chocolate Bark
Store in a Ziploc bag or Tupperware container at room temperature, where they should last for several weeks.
XOXO
I hope this recipe was a fun and easy hack for you this Valentine’s Day and I can’t wait to try this for other holidays! Have a wonderful week, friends!

Candy Heart Chocolate Bark

This simple hack makes it so easy to make this fun treat, which is also a great Valentine’s Day gift!
Ingredients
- One bag (12 oz) pink Wilton Candy Melts
- One bag (10 oz) Ghiradelli Dark Chocolate Melting Wafers
- One bag (10 oz) Ghiradelli White Chocolate Melting Wafers
- Candy Hearts
- Valentine’s Day Sprinkles
Instructions
- Preheat oven to 200 degrees and line a baking sheet with parchment paper or a silicone mat.
- Arrange the melting chocolates in rows (approximately 2 inches wide) by color diagonally, starting at the corner.
- Place in oven for approximately 7 minutes, until the chocolate melts are soft (they do not need to be completely melted.)
- Use a metal spatula or knife to stir the chocolates in a zig zag motion, which will create a swirl pattern. (Mixing the chocolates will also help them melt completely.)
- Immediately add sprinkles or candy to the chocolate before it dries.
- Let the chocolate cool and harden completely before breaking it in smaller pieces.
If you use a silicone mold, you may need a slightly longer baking time for the chocolates.
Notes
Tip: You can change up the chocolates and candy per holiday, such as orange and white for Halloween or green and white for Christmas!

I never knew making chocolate bark could be so easy and fun until now. Also, I found another blog with similar thoughts on this topic. I want to know your opinion on this. https://menuwars.com/food-blog/valentines-day-chocolate-making/