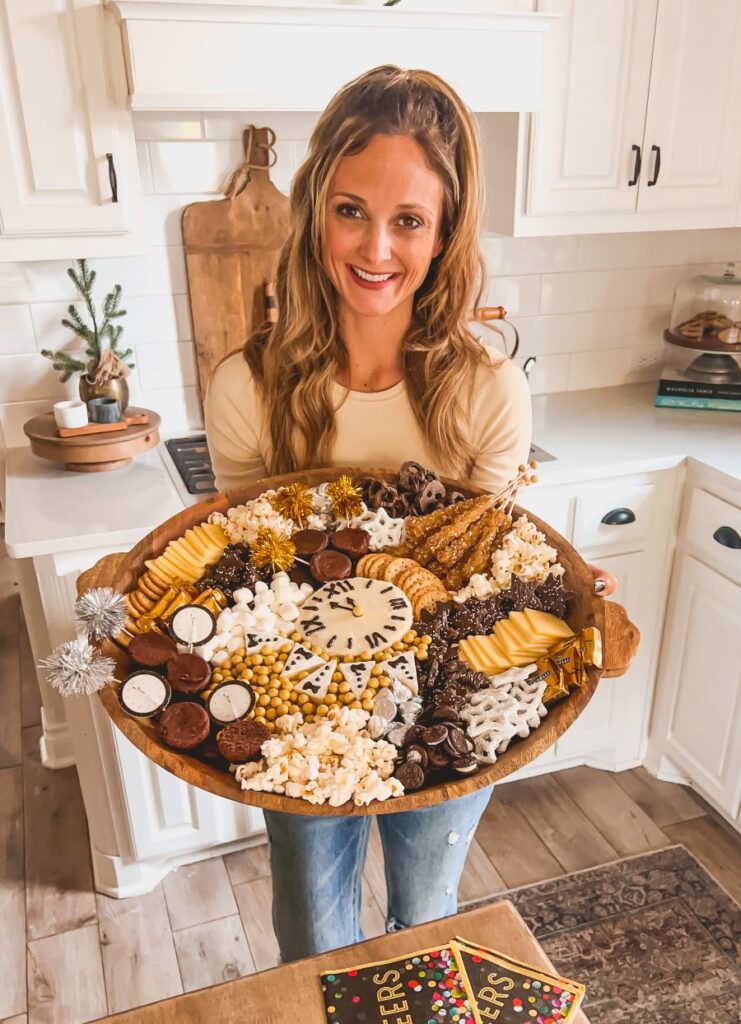
Epic Dessert Board for New Year’s Eve (or Any Occasion!)
This dessert board is so easy to put together and can be completed using any items you’d like! I added New Year’s Eve accents, but you can easily swap them out for any occasion.

As a busy mom, any recipe or presentation that’s easy to put together is right up my alley! What I love about this dessert board like these is that you can use just about anything you’d like and only need a few extra touches to make it special and festive.
You can use storebought or homemade items, or a mix of both! (Mine are almost all storebought.) 🙂
Ingredients for Dessert Board
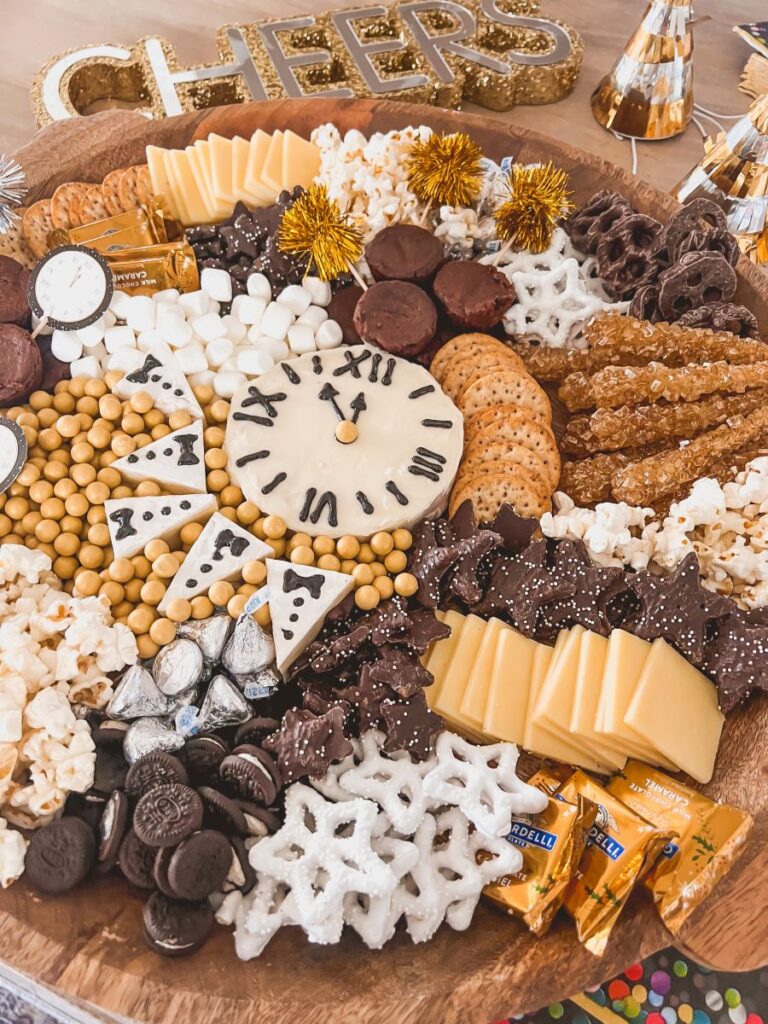
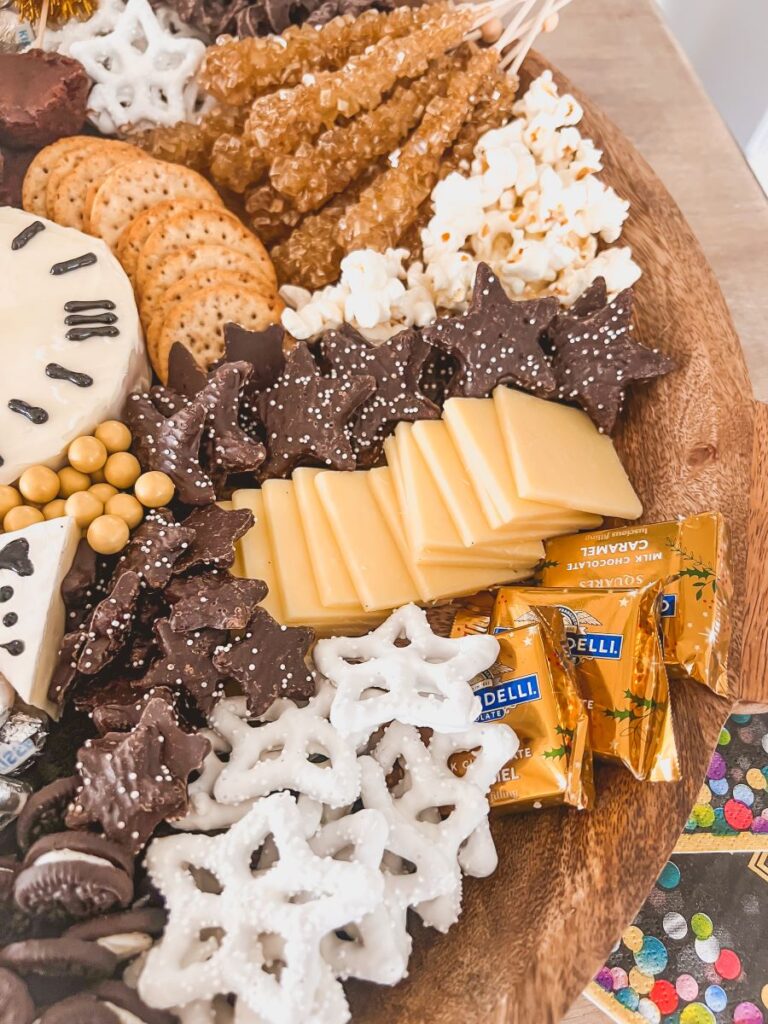
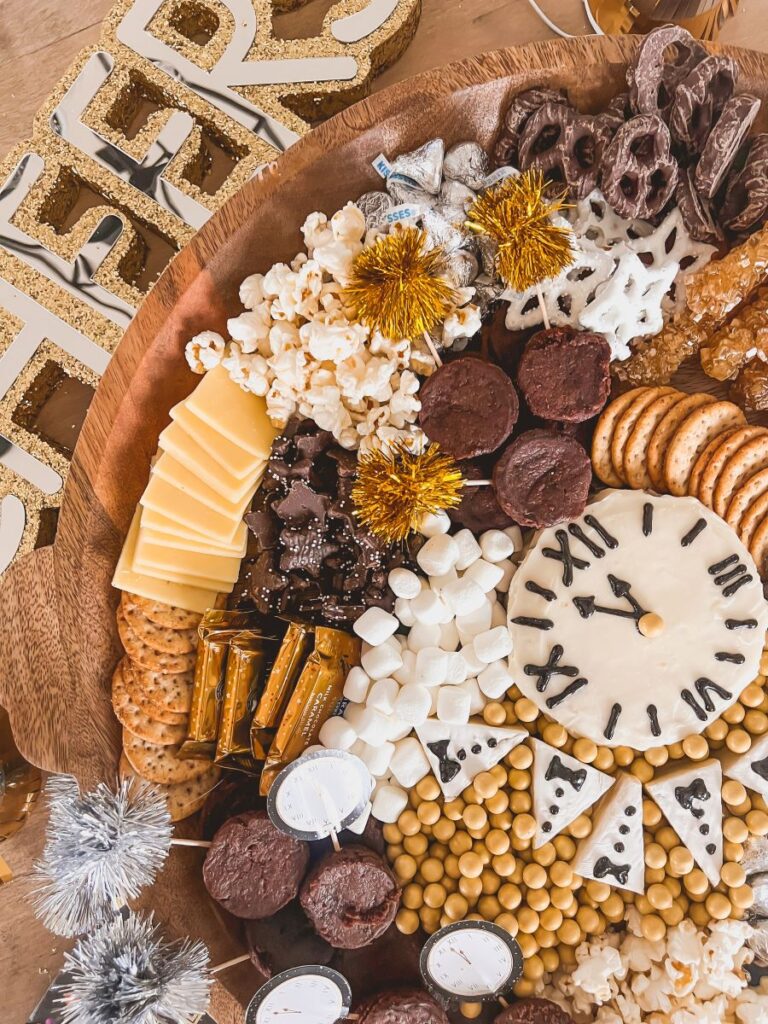
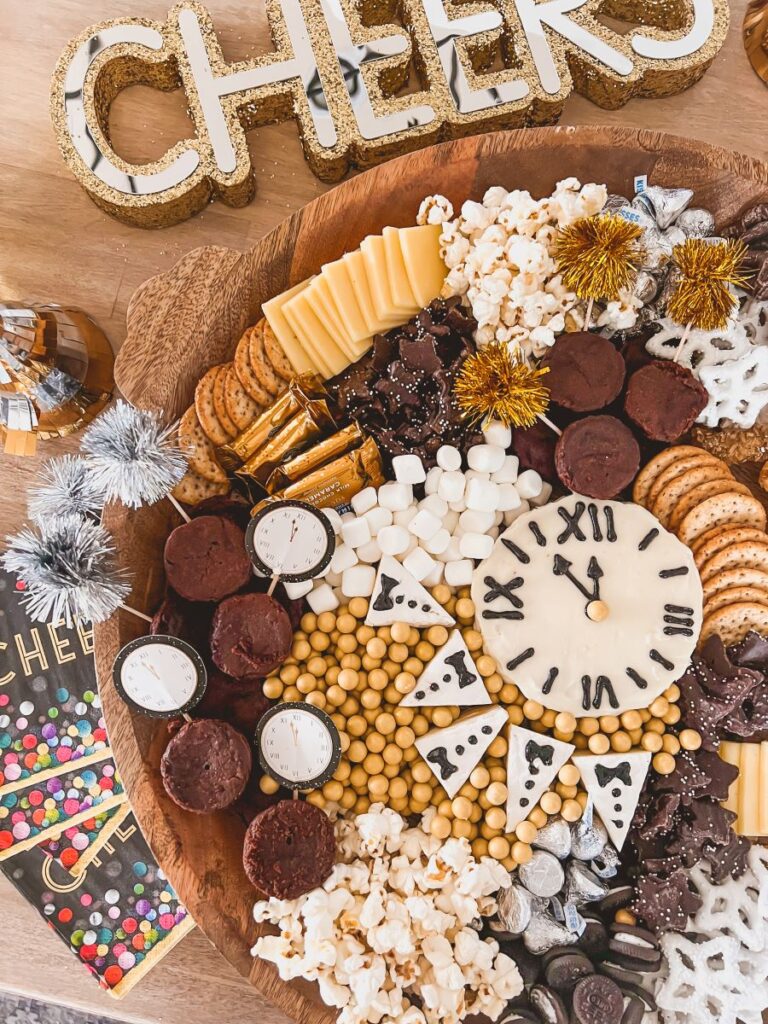
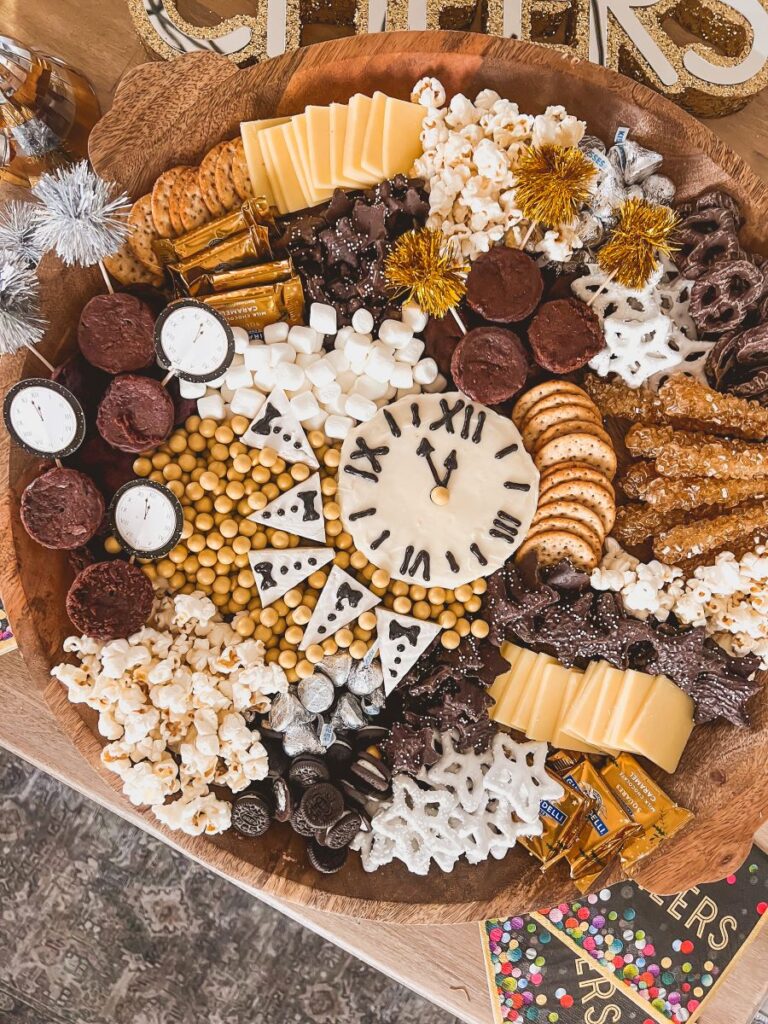
This is really up to you! I did a dessert board with some cheese and crackers sprinkled in, but you can easily do a fruit board, veggie board, or a mix of sweet and salty. I stuck with foods that were black-and-white, plus some neutral tones so the other colors popped.
Suggested goodies for dessert board:
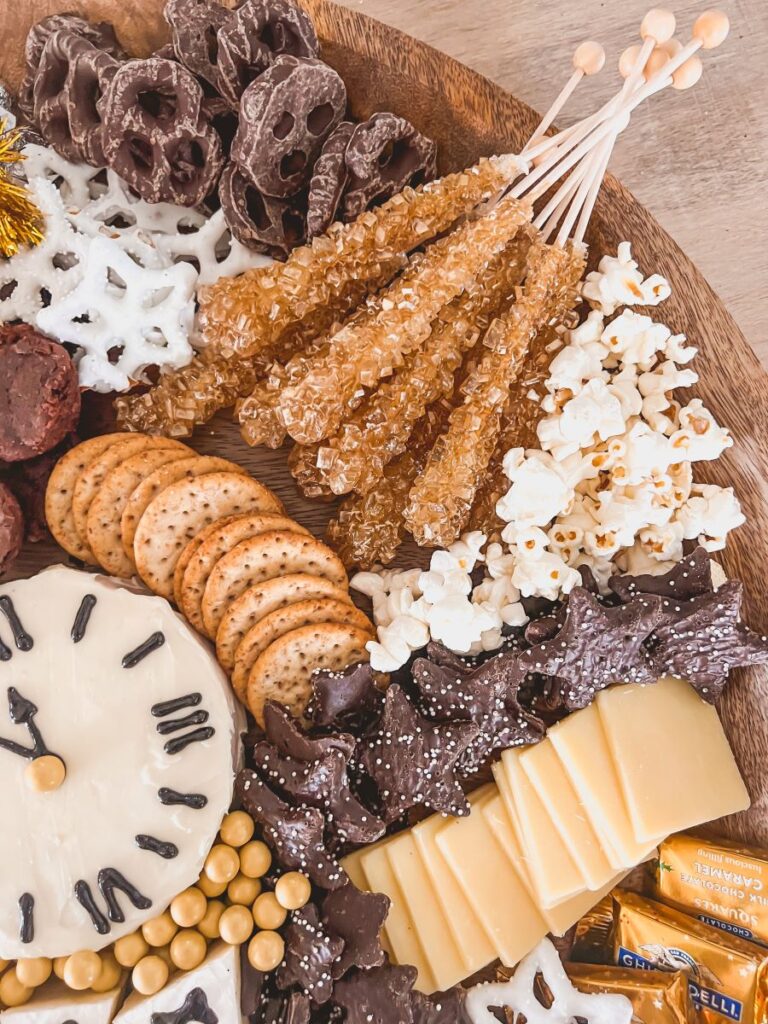
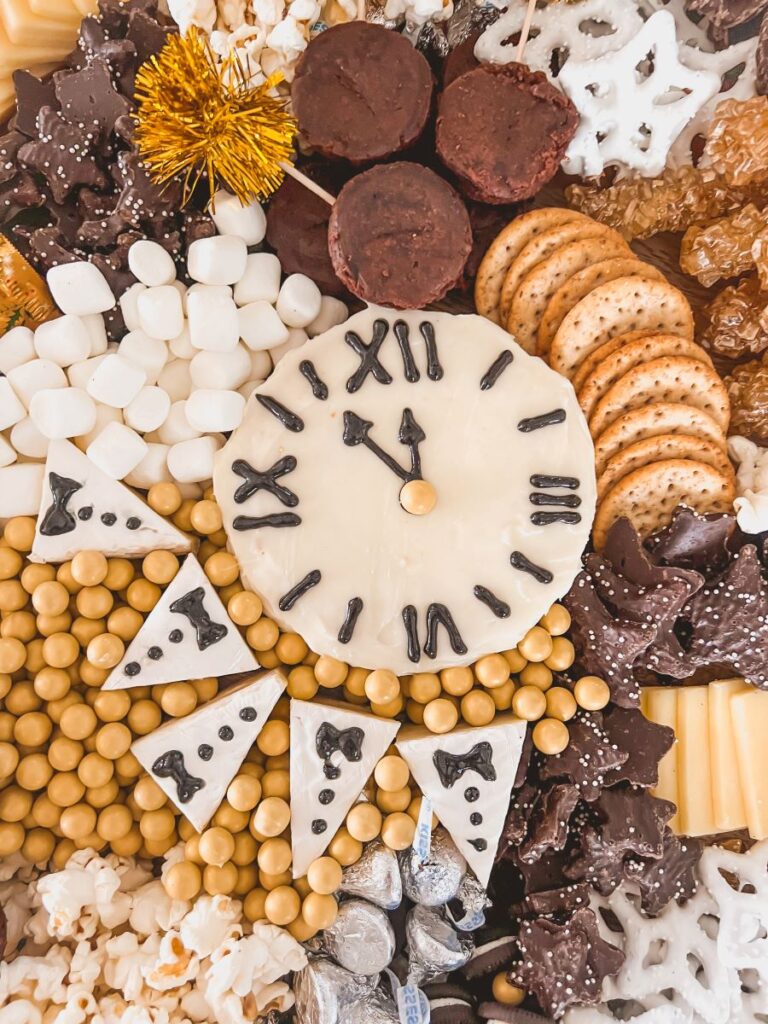
- Pretzel rods (you can dip them in white melting chocolate and gold/silver sprinkles)
- Premade brownie bites
- Hershey Kisses
- Gold Color-It Candy
- Gold rock candy
- Oreos
- Popcorn
- Cheeses
- Ghirardelli Chocolate Caramels
- Chocolate-covered pretzels
- Chocolate-covered white snowflakes
- Chocolate stars (from Trader Joe’s)
- Marshmallows
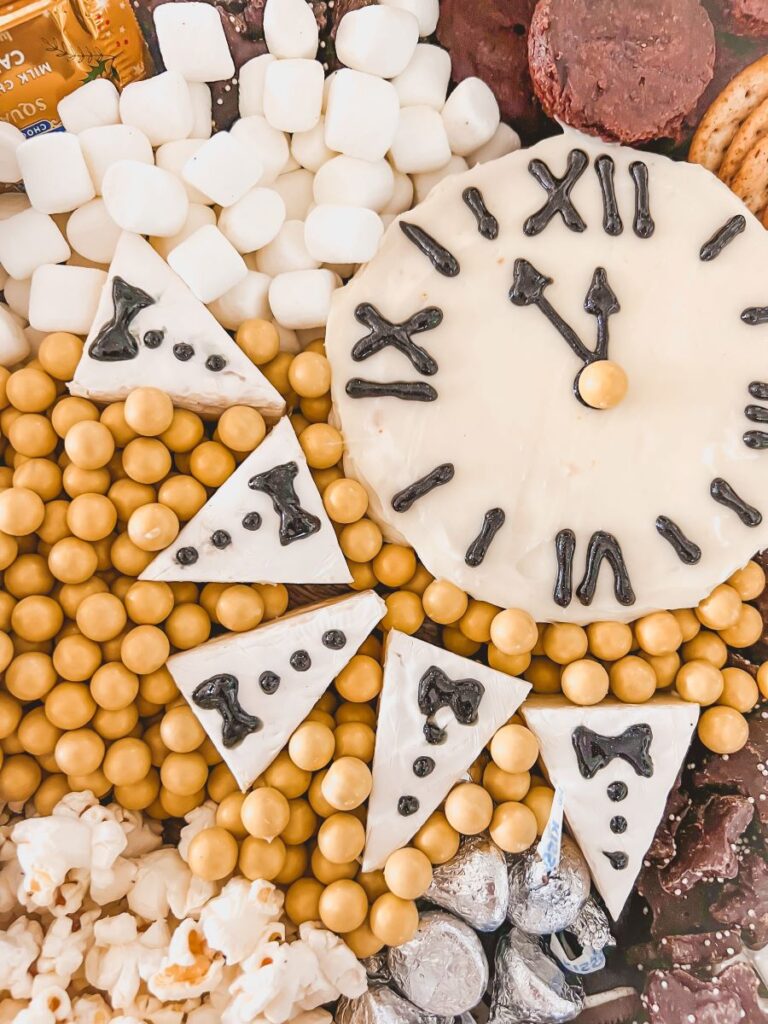
- Brie cheese or mini cake for center clock (if you use a cake, get white frosting)
- Black icing (to make clock and tuxedo accents)
Optional Decorations: Cake toppers, cupcake toppers, and “Cheers” sign. These can easily be swapped out for any holiday or occasion so you can enjoy a dessert board year-round!
Directions
- First, start with a serving tray. I prefer this circular wooden tray from Target because it has a bit of a rim to keep the items from spilling off the edge.
- If using a mini cake, follow instructions on box to bake. (For mini cake baking pans, you can use a small spring-form pan, silicone mold, or round cookie cutter.)
- Using black icing, add clock numbers on a circular piece of brie cheese or a mini cake and set aside so it doesn’t get smudged. I loved the look of Roman Numerals for a vintage clock look!
- Also with the black icing, add tuxedo accents to brie triangle wedges and set aside. I did a simple bowtie with three buttons below it.
- Place an upside-down bowl in the center of the board to hold the place of the clock cake/cheese.
- Fill in the board as desired with treats. Try to separate by color so they don’t blend together.
- Place cake/cheese clock in center of the board and add in brie tuxedo accents.
- Decorate with cupcake toppers, sprinkles, etc.
You Can Watch a Quick Video Tutorial Below!
Perfect Presentation Platters
Besides my round wooden Target tray, you could also use so many options for a dessert board that you can get use out of all year. I love this beaded wooden tray, this wooden tray from JC Penney, or this gold hammered tray (that would also tie in so well with the gold accents!)
For a higher-end choice and larger tray, I love my MacKenzie-Childs checkered party tray.
Can I Make This Ahead of Time?
Yes! You can prep much of this dessert board in advance. The candy should all keep for several days, just cover with Saran Wrap. I’d recommend waiting to add the cheese and crackers until closer to serving time so the cracker don’t get soggy. (If you do add cheese, be sure to refrigerate.)
I’d also recommend waiting to decorate the tuxedo wedges and clock until close to serving time, so the icing doesn’t smudge.
Storing Leftovers
Keep any cheese in the refrigerator in a Ziploc bag or Tupperware container. I save some of the candy boxes so I can just put the leftover items back, or just place them in a plastic bag.
Happy New Year!
I hope you enjoyed this dessert board as much as I did! Cheers to you and thank you for being here!
Epic Dessert Board for New Year’s Eve (or Any Occasion!)

This dessert board is so easy to put together and can be completed using any items you’d like! I added New Year’s Eve accents, but you can easily swap them out for any occasion.
- Prep Time: 15 minutes
- Total Time: 15 minutes
- Category: Appetizer, Dessert
Ingredients
- Pretzel rods (you can dip them in white melting chocolate and gold/silver sprinkles)
- Premade brownie bites
- Hershey Kisses
- Gold Color-It Candy
- Gold rock candy
- Oreos
- Popcorn
- Cheeses
- Ghirardelli Chocolate Caramels
- Chocolate-covered pretzels
- Chocolate-covered white snowflakes
- Chocolate stars (from Trader Joe’s)
- Marshmallows
- Brie cheese or mini cake for center clock (if you use a cake, get white frosting)
- Black icing (to make clock and tuxedo accents)
Instructions
- First, start with a serving tray. I prefer this circular wooden tray from Target because it has a bit of a rim to keep the items from spilling off the edge.
- If using a mini cake, follow instructions on box to bake. (For mini cake baking pans, you can use a small spring-form pan, silicone mold, or round cookie cutter.)
- Using black icing, add clock numbers on a circular piece of brie cheese or a mini cake and set aside so it doesn’t get smudged. I loved the look of Roman Numerals for a vintage clock look!
- Also with the black icing, add tuxedo accents to brie triangle wedges and set aside. I did a simple bowtie with three buttons below it.
- Place an upside-down bowl in the center of the board to hold the place of the clock cake/cheese.
- Fill in the board as desired with treats. Try to separate by color so they don’t blend together.
- Place cake/cheese clock in center of the board and add in brie tuxedo accents.
- Decorate with cupcake toppers, sprinkles, etc.
Notes
For a healthier option, swap out the desserts for fruits, cheese, or veggies!