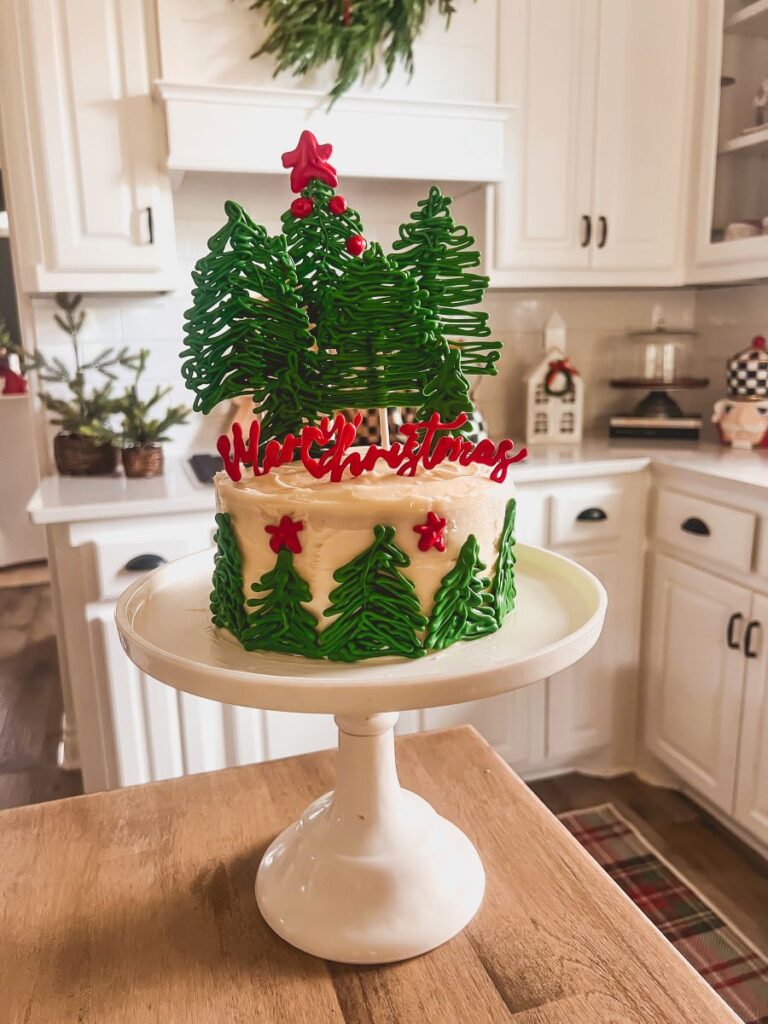
The Easy Hack to Turn a Plain Cake into a Stunning Christmas Dessert
This trick can turn any store-bought or homemade cake into a beautiful Christmas dessert with just a few tweaks!

I’m going to be totally honest with a confession that may surprise you: I don’t love to bake. I’d much rather make meals and appetizers, so finding any dessert hack is as helpful for me as it is for you! That’s why I love this simple trick for turning any cake into a gorgeous Christmas dessert! You can use a homemade cake or a storebought cake, then just add the chocolate embellishments!
What Supplies Do I Need?
For this cake hack, you’ll just need:
- Tipless piping bags
- Wax or parchment paper (This is necessary to be able to peel the chocolate decorations off without them breaking)
- Green melting chocolate (Tip: You can layer two different shades of green for a more realistic effect)
- Red melting chocolate (or any other color you’d like for the words)
- White cake pop sticks or pretzel sticks for the tree trunks
- Store-bought cake of any size. You can also make your own cake if you’d like! (A taller cake works best so you can decorate the outside, so I’d recommend four 8 or 9-inch cake pans stacked together.)
- Optional: Holiday sprinkles for tree “ornaments”
- Optional: White paper with “Merry Christmas” written or printed out in your favorite font to trace over with chocolate. You can also freehand!
Where Do I Find Tipless Piping Bags?
These from Amazon are my absolute favorite to have on-hand and last such a long time! This option also has a few more helpful tools. You can usually find these in your local craft stores like Hobby Lobby or Michaels as well. They are also great for adding royal icing to sugar cookies.
Tips for Melting the Chocolate
Place a couple of handfuls of melting chocolate in a microwave-safe cup. Microwave for 20-second intervals, stirring in between each. You won’t want to microwave them for too long at once or else they can burn.
Easy Trick for Getting the Chocolate Into the Piping Bag
This trick is a life-saver so you don’t make a mess! All you have to do is place the piping bag in a tall cup or glass and roll the top of the piping bag over the rim of the cup. Then, the melted chocolate can pour easily directly into the bottom of the piping bag. Squeeze out any access air and make a knot in the top of the bag so the chocolate doesn’t leak. Then just cut a small hole in the bottom of the piping back and you are ready to go!
Tip: The melted chocolate dries and hardens quickly, so you’ll want to start making the creations right away so it doesn’t get too stiff in the piping bag. Hold off on melting the chocolate until you are ready to pipe right away.
Making the Trees for the Christmas Dessert
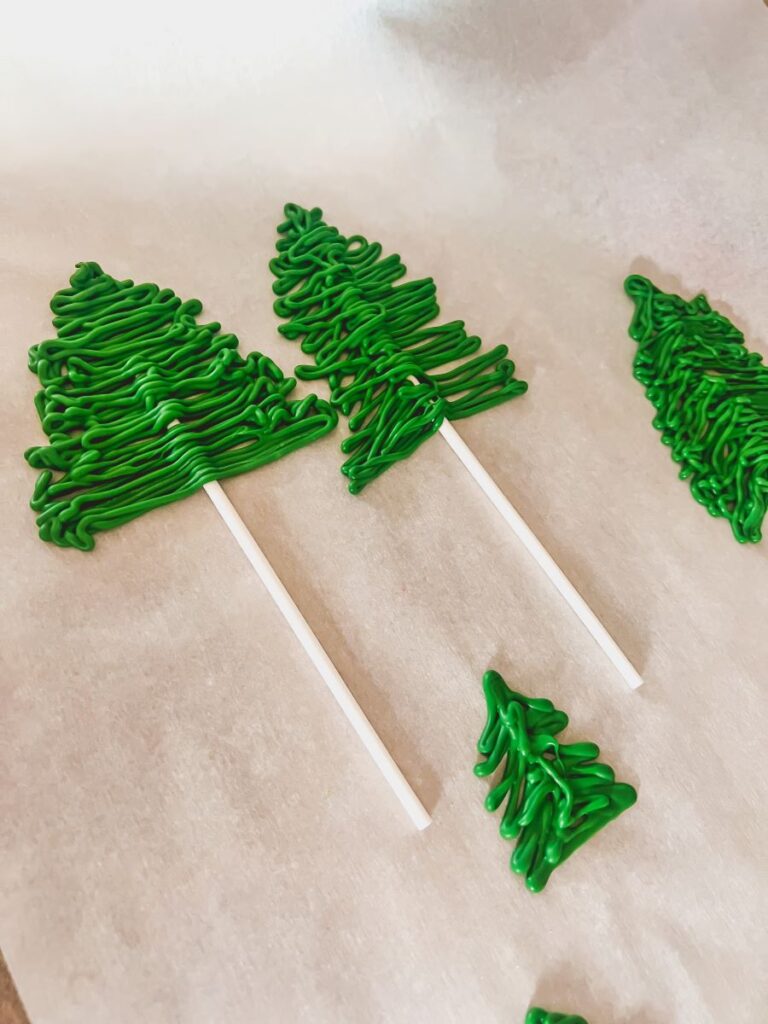
- First, cover a baking sheet with wax or parchment paper. (This is important so the chocolate creations don’t break as you try to peel them up.)
- Then, place the cake pop stick or pretzel stick on top of the wax paper as the tree trunk. (This is for trees that stick on the top of the cake. You can also skip this step if you’d prefer not to have a “tree trunk.”)
- Starting at the top of the tree, start drizzling back and forth in rows that get progressively wider. I usually do 2-3 layers so the tree is nice and thick. If they are too thin, it’s easier for them to break as you peel them up.
- If you’d like to add more details, you can layer it with a different shade of green, sprinkles for ornaments (do this while the chocolate is still wet so it sticks), or ornaments piped on with melting chocolate in a different color.
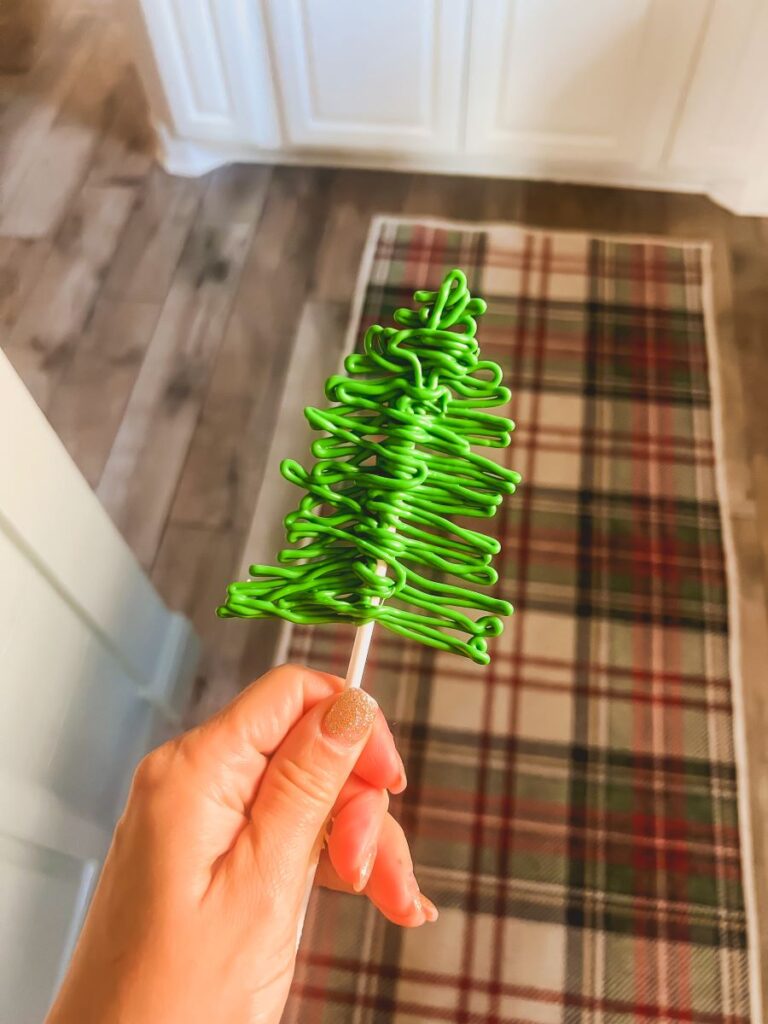
- Let cool in the fridge for 10-15 minutes before peeling off the wax/parchment paper.
- Decorate the tree as desired.
Tip: It’s okay if the trees aren’t all perfectly uniform. I think it looks more realistic when they are different shapes and sizes! This Christmas dessert is very forgiving for chocolate novices like myself. 🙂
Making the Chocolate Words and Embellishments
The nice thing about wax paper is that you can see or trace virtually anything underneath it. I just printed out “Merry Christmas” in a pretty font and placed it under the wax paper so I could trace it. This makes my handwriting look much fancier than it actually is!
This tip works with anything, like “Happy Birthday” or “Happy Anniversary!” The sky is the limit!


You Can Watch a Video Tutorial Here:
just apply before the chocolate dries and hardens so they adhere to the chocolate.

Decorating the Cake
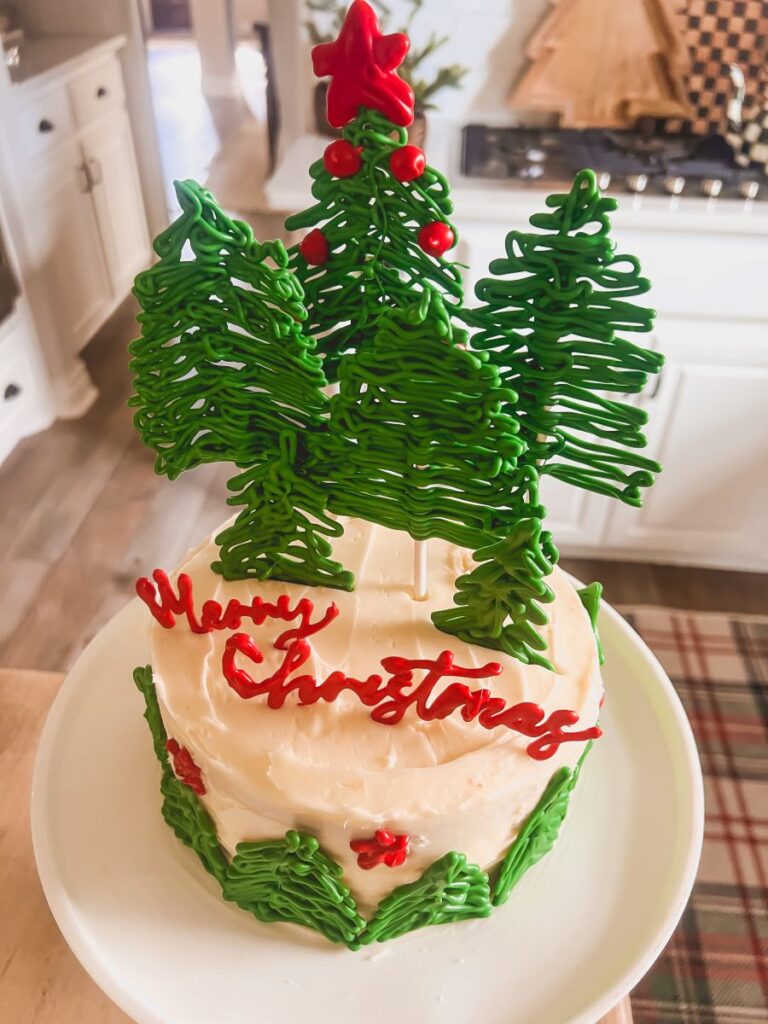
This is where your own creativity and style can shine! I like to place the trees all around the outside edge of the cake first. Then, I arrange them on top of the cake in varying heights. You could also sprinkle on powdered sugar when all of the decorations are on so it looks like snow!
Another fun option for the side of the cake is placing two mini candy canes together to make the shape of a heart. Any of these options would be beautiful to make this festive Christmas dessert.
Perfect Presentation Platters
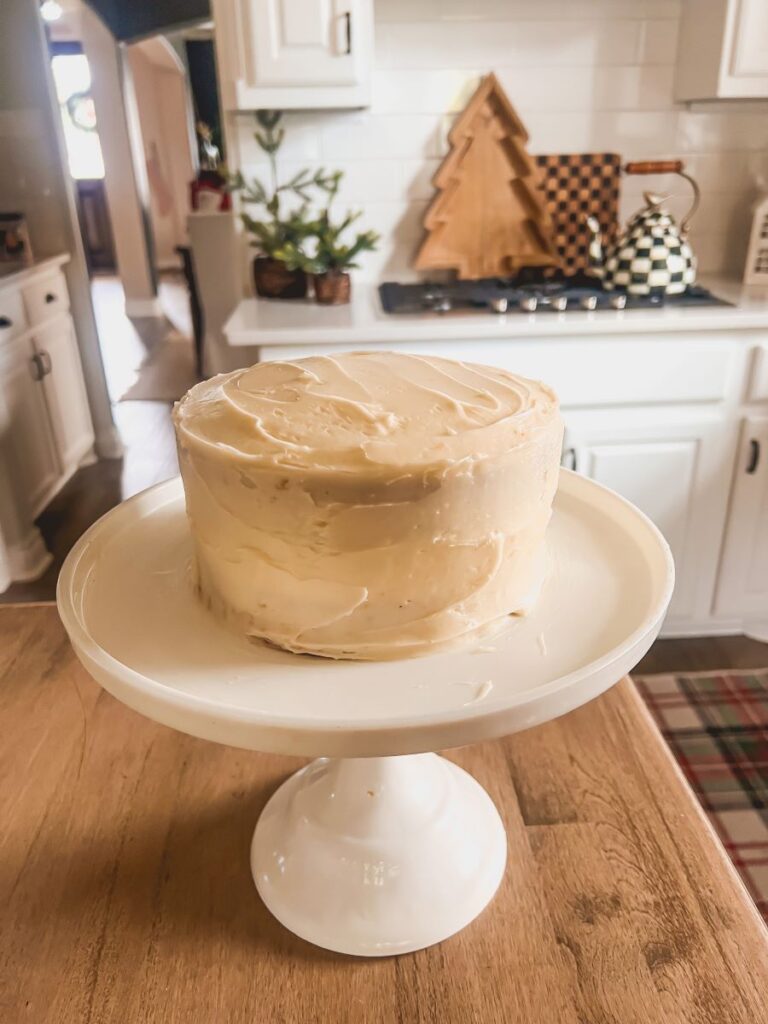
I used one of my favorite cake stands from Magnolia Market. For a similar look, you could use this stoneware cake platter from Target, which also has a version with a glass lid. If you prefer a wooden cake stand, this is also a beautiful option. The mixed materials using marble and wood on this look is also very unique!
Storing the Cake
If you have any leftovers, I recommend storing it in a Tupperware container, which should last several days. If your cake has any filling, store it in the refrigerator. The chocolate pieces can last for weeks – just store them in a Ziploc bag!
Happy Holidays!
I hope this trick can help make your holidays simpler, festive, and more enjoyable. I’d love to see your Christmas dessert creations if you try this – pleas DM or tag me on Instagram with a picture! Cheers, friends!
Love,
Leanna
Christmas Cake Creation

This trick can transform a plain store-bought or homemade cake into a beautiful holiday dessert!
Ingredients
- Tipless piping bags
- Wax or parchment paper (This is necessary to be able to peel the chocolate decorations off without them breaking)
- Green melting chocolate (Tip: You can layer two different shades of green for a more realistic effect)
- Red melting chocolate (or any other color you’d like for the words)
- White cake pop sticks or pretzel sticks for the tree trunks
- Store-bought or homemade cake of any size. (A taller cake works best to fit the trees around the side.)
- Optional: Holiday sprinkles for tree “ornaments”
- Optional: White paper with “Merry Christmas” written or printed out in your favorite font to trace over with chocolate. You can also freehand!
Instructions
- Start with a plain store-bought or homemade cake with white frosting.
- Cover a baking sheet with wax or parchment paper. (This is important so the chocolate creations don’t break as you try to peel them up.)
- Then place the cake pop stick or pretzel stick on top of the wax paper as the “tree trunk.” (This is for trees that stick on the top of the cake. You can also skip this step if you’d prefer not to have a “tree trunk.”)
- Melt chocolate in the microwave at 20-second intervals and stirring in between. Pour into piping bag and start piping right away so the chocolate doesn’t harden.
- Starting at the top of the tree, start drizzling back and forth in rows that get progressively wider. I usually do 2-3 layers so the tree is nice and think. If they are too thin, it’s easier for them to break as you peel them up.
- If you’d like to add more details, you can layer it with a different shade of green, sprinkles for ornaments (do this while the chocolate is still wet so it sticks), or ornaments piped on with melting chocolate in a different color.
- Let cool in the fridge for 10-15 minutes before peeling off the wax paper.
- Decorate the tree as desired
Creating Words or Other Embellishments
- Place a piece of paper with printed out words underneath the wax or parchment paper. You can also freehand.
- Trace with melted chocolate to create a beautiful message.
- Repeat as desired for other decorations like snowflakes, swirls, etc.