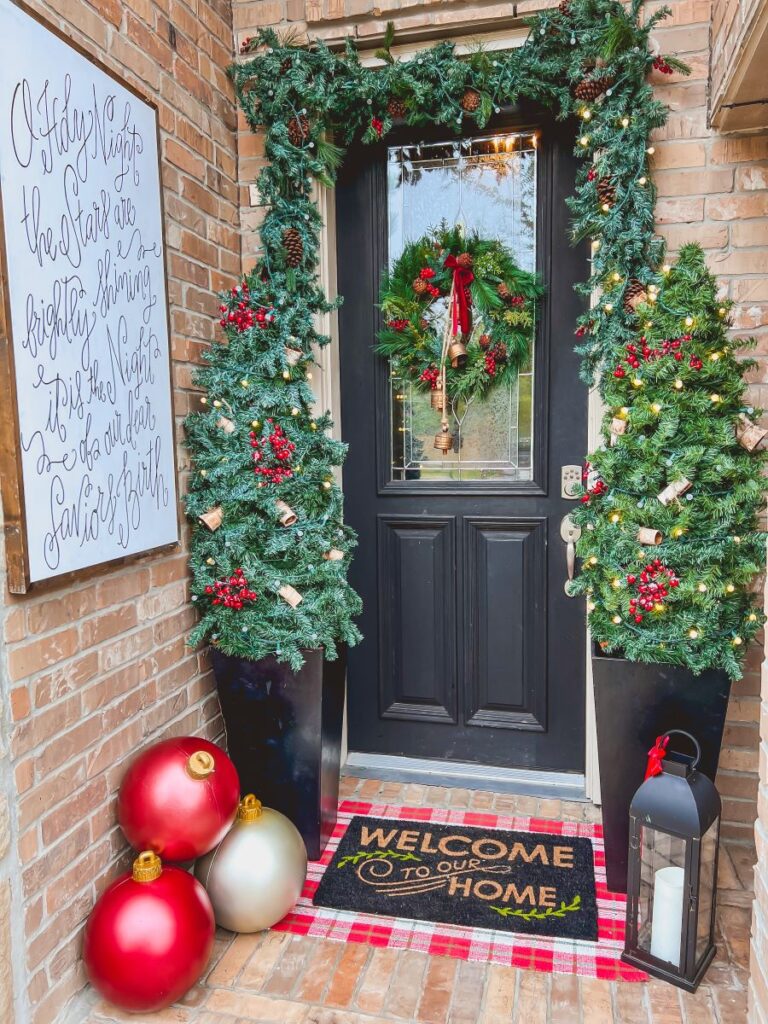
How to Create Stunning DIY Tree Planters on a Budget
These beautiful DIY tree planters can be made for under $20 with a tomato cage and garland!

I love decorating the outside of my home for Christmas, but outdoor planters can get really expensive! Here is how you can create your own DIY tree planters that make a beautiful statement without breaking the bank.

What I especially love about this DIY tree planter is that you can still keep it out for the rest of winter. Just remove the lights and ornaments and you have a beautiful evergreen decoration until spring!
Supplies Needed
You only need a handful of supplies to create the tree, then you can decorate and style however you’d like:
- Two planters with soil (I used what I already had on-hand)
- Two tomato cages for each planter (I layered two for each planter so they were sturdier.) You can get these at Loew’s or Home Depot! ($4 each)
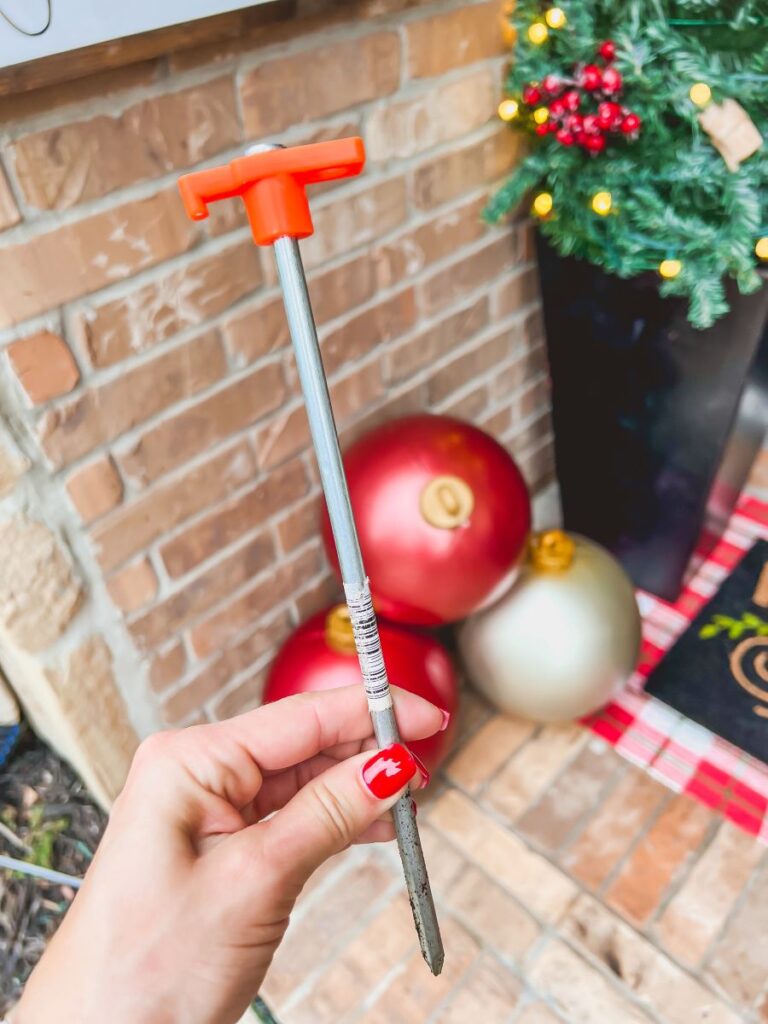
- Stakes to hold down tomato cage (I used two per planter but would recommend more if your tree is more exposed or if you live in an area prone to higher winds) ($2.50 for a 10-pack)
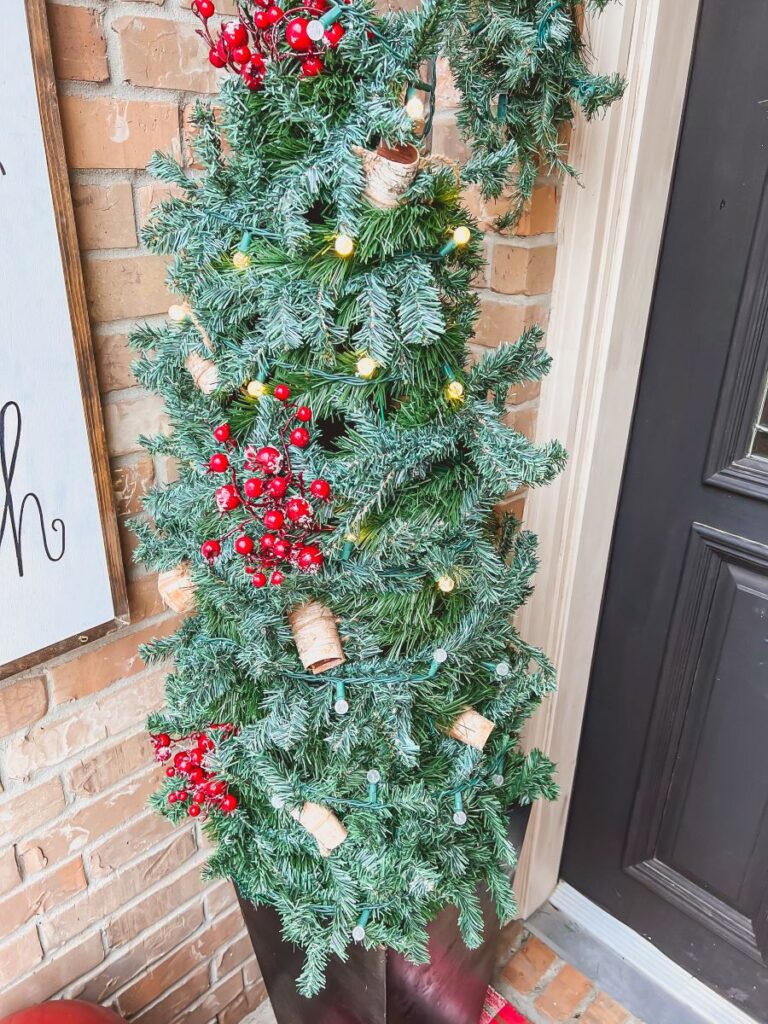
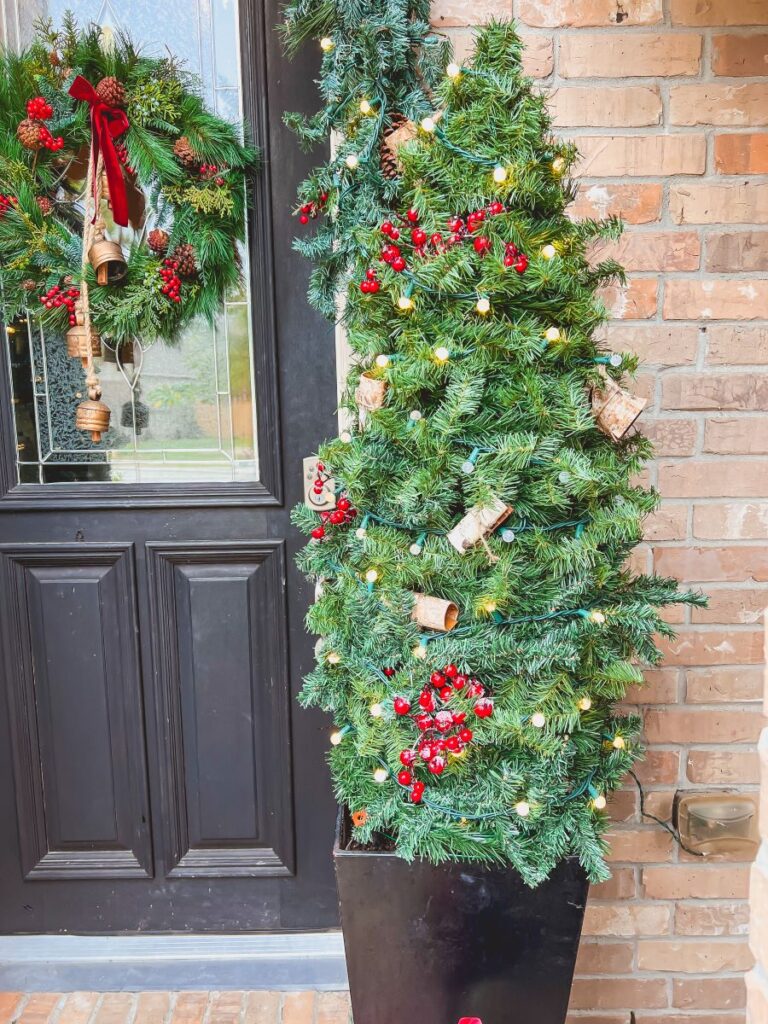
- Two garlands per planter (you can use more if you’d like the tree to look fuller.)
- Optional Lights or Ornaments
Optional Decorations
This is really up to you! If you have an outlet nearby, you can add lights or use a light-up garland. I also added in some pretty berry accents, such as these from Hobby Lobby or Michael’s. (Both about $2!) Finally, I made the ornaments using scraps of birch tree.
Base Garland Recommendations: I’d suggest starting with a very plain and inexpensive garland for the base like this to fully cover the tomato cage. Or, this option is just $15 for 33 feet, so you’ll have plenty of extra!
Top Layer Garland Recommendations: Once you have the tomato cage covered, then you can layer it with a more detailed garland of your choice. This garland with pinecones or this evergreen and eucalyptus option are both lovely and from Target. You could also go with a more decorated garland like this with berries, ornaments, and lights already attached. If you’d prefer to use a simple evergreen style, this is also a great choice.
Other Accents: You could also wrap bells around your garland trees, such as these from Kirklands. I also love these or these from options Target. The sky is the limit!
Directions
- First, layer the two tomato cages and tie the top with a string or rubber band to create a cone shape.
- Add stakes to secure the tomato cages into the planter.
- Starting at the base of the tomato cage, wrap a plain garland around to fully cover the cage.
- Add additional or more decorative garlands of your choice
- Decorate as desired
Here Is a Quick Video Tutorial!
Additional Products
I completed my front porch look with other festive accents to create a cozy, welcoming vibe. Here are some similar items!
- Sign: I made my own sign, so I can’t link the exact one! Here is a similar option.
- Doormat: This Joy welcome mat or this snowman are both adorable!
- Wreath: I love this berry and pinecone wreath from Michaels, this ribbon option from Walmart, or this and this choice with a pretty bell from Target.
- Lanterns: For an outdoor set, these from JC Penney can be used year-round! This single lantern is also beautiful, or you could go with a holiday vibe with this red choice.
Happy Holidays!
I hope this DIY inspires you to create your own outdoor planters! I’d love to see pictures of your creations – please send them my way!
Merry Christmas!
Leanna