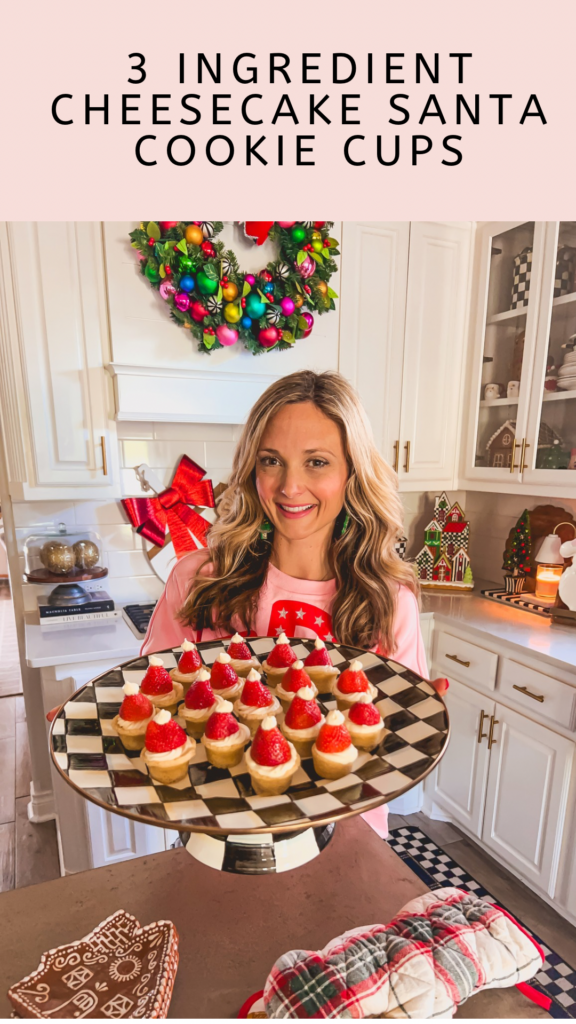
Santa Cheesecake Cups
If you’ve been following me for a while, you already know I’m all about little effort, lots of flavor — and these 3-ingredient Santa Cheesecake Cups are the perfect example!
Every holiday season, I find myself juggling kids’ school parties, Christmas recitals, cheer events, and family gatherings. I love showing up with something that looks homemade and festive — without spending hours in the kitchen. These mini cheesecake cups check all the boxes: they’re adorable, delicious, and unbelievably easy to make.
Each bite combines a buttery sugar cookie shell, a creamy cheesecake filling, and a juicy strawberry that looks just like Santa’s hat. They’re cute enough for a Christmas dessert table but simple enough for a weekday treat. And the best part? You only need three ingredients!
Whether you’re hosting a cookie exchange, a holiday dinner, or a Christmas Eve movie night, these Santa Cheesecake Cups will disappear fast. They’re kid-approved, make-ahead friendly, and the kind of dessert that earns compliments every single time.

Why You’ll Love These Santa Cheesecake Cups
There are so many reasons to fall in love with this recipe — here are just a few:
- Only 3 ingredients. No long grocery list, no complicated steps — just cookie dough, cheesecake filling, and fresh strawberries.
- Fun for kids to help make. My kids love pressing the cookie dough into the muffin pan and adding the “Santa hats” on top!
- A show-stopping dessert with zero stress. They look bakery-level fancy, but you can whip them up in under 30 minutes.
- Perfect for every holiday occasion. From school parties to neighbor gifts, these travel well and hold their shape beautifully.
- Make ahead approved. You can prep the cookie cups and filling ahead of time, then assemble just before serving for a fresh finish.
- Customizable and versatile. Swap in different cookie dough flavors or fillings to match your family’s favorites.
Every year, I make these for our Christmas Eve dessert table, and there’s never a single one left by the end of the night. They’re festive, creamy, and irresistible — truly the easiest dessert that still feels special.
Ingredients You’ll Need
You won’t believe how simple this recipe is — just three easy ingredients create the cutest Christmas dessert you’ll ever make!
Here’s what you’ll need:
- Sugar cookie dough: You can use break-and-bake cookie dough or pre-rolled dough from the grocery store. These bake up into soft, buttery shells that hold the cheesecake filling perfectly.
- Philadelphia No Bake Cheesecake Filling: This ready-to-use cheesecake filling makes this recipe so easy — just open the tub and spoon or pipe it directly into your cooled cookie cups. No mixing, no mess, no fuss.
- Fresh strawberries: These become Santa’s signature red hats! Look for medium-sized berries that are firm and bright red for the best presentation.
✨ Pro Tip:
If you can’t find the Philadelphia No Bake Cheesecake Filling, don’t worry — you can easily make your own! Beat 8 ounces of softened cream cheese with ¼ cup powdered sugar and 1 teaspoon vanilla extract, then fold in 1 cup of whipped topping (like Cool Whip) until smooth and fluffy. Chill the mixture before piping for that same creamy, dreamy texture. This homemade version tastes just as rich and works perfectly in these Santa Cheesecake Cups!
Helpful tools:
- Mini muffin pan (silicone molds make it even easier)
- Ice cream scooper or tablespoon for shaping
- Piping bag (or a zip-top bag with the corner snipped) for clean, professional-looking filling
✨ Pro tip: Make sure your strawberries are completely dry before adding them on top of the cheesecake filling — excess moisture can make the tops slide or soften the filling.
Step By Step Directions
These Santa Cheesecake Cups come together in a few easy steps. Here’s exactly how to make them:
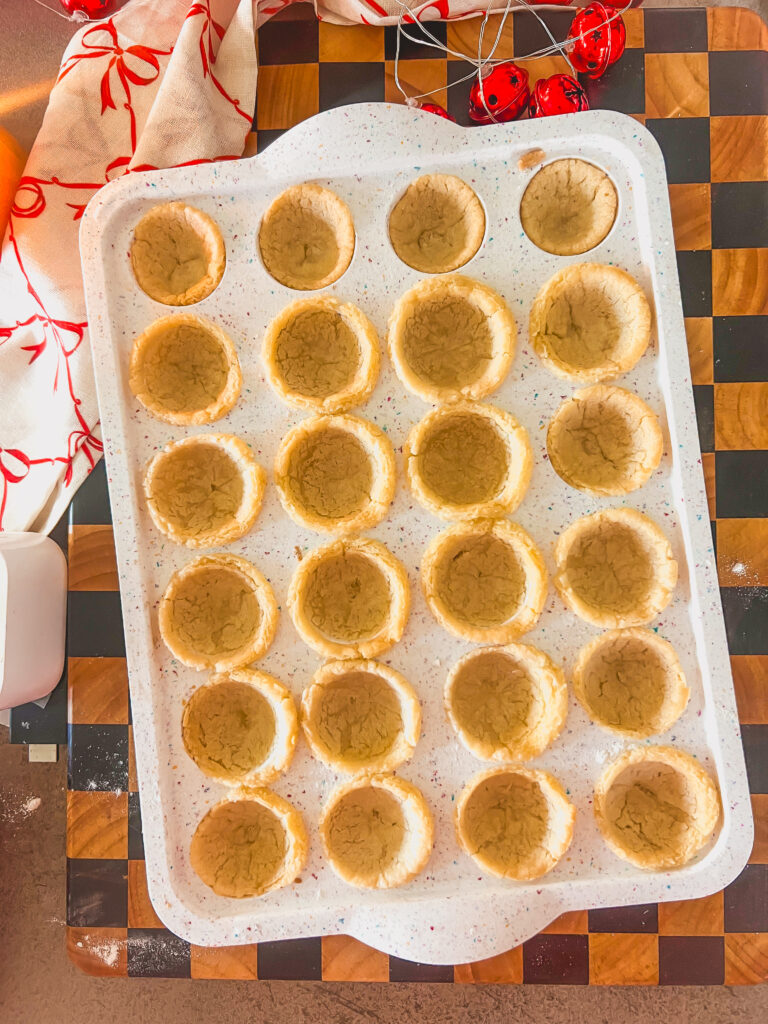
- Prep the cookie cups: Preheat your oven to 350°F. Lightly grease a mini muffin pan or use a silicone mold. Place one small ball (about 1 tablespoon) of cookie dough in each cavity.
- Shape the shells: Use the back of a rounded spoon or an ice cream scooper to press each dough ball down and up the sides slightly to form a small cup shape.
- Bake the shells: Bake according to the cookie dough package instructions, usually 12–14 minutes, until golden brown and slightly puffed.
- Reshape while warm: When they come out of the oven, immediately press the centers again with the back of a spoon to keep that “cup” shape. Allow to cool completely before filling.
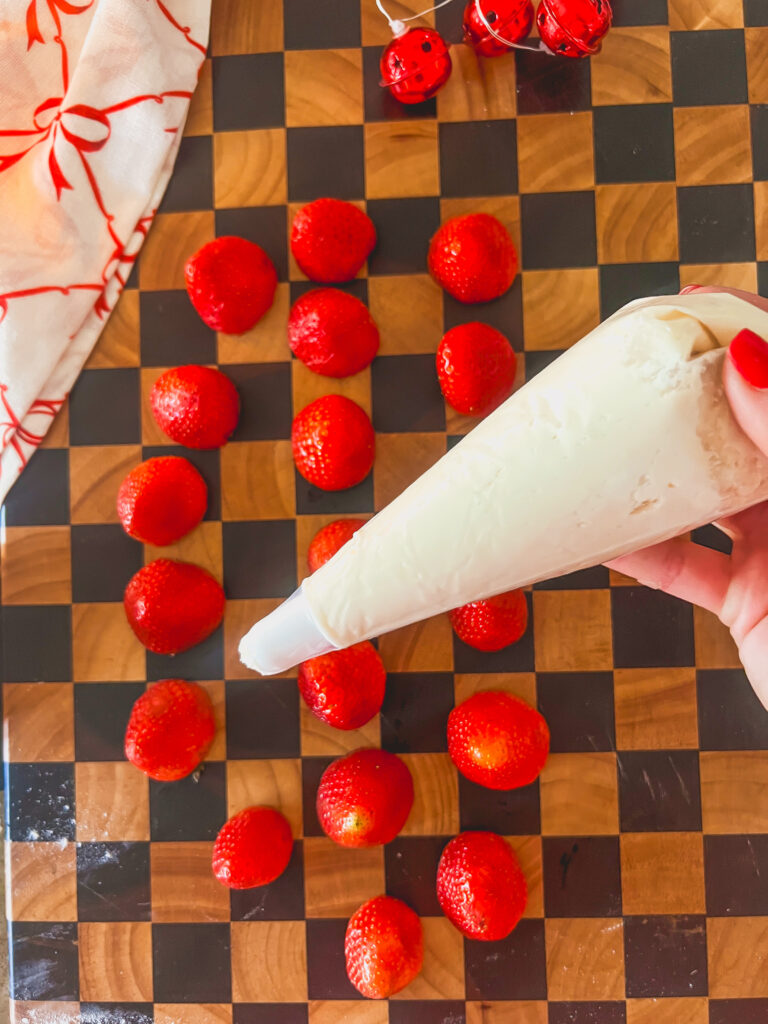
- Assemble: Spoon or pipe the cheesecake filling into each cookie cup, filling nearly to the top.
- Add the strawberry hats: Remove the stems from your strawberries and pat them dry. Place one upside-down on each cheesecake cup to create Santa’s hat.
- Finish with the pom-pom: Pipe a tiny dot of cheesecake filling on the tip of each strawberry to complete the “Santa hat” look.
- Chill and serve: Refrigerate until ready to serve. The cheesecake filling will firm up slightly and taste even creamier once chilled.
Here’s a Quick Video Tutorial!
Tips & Variations
Even though these 3-Ingredient Santa Cheesecake Cups are nearly foolproof, a few extra tips and creative variations can take them from simple to spectacular. Whether you’re baking them for a holiday party, school event, or cozy family night, these tricks ensure perfect results every time and help you put your own festive spin on the recipe.
Pro Tips for the Perfect Santa Cheesecake Cups
- Use a silicone mini muffin pan for easy release. Metal pans can work, but silicone molds make it so much easier to pop out the cookie cups without breaking the delicate edges. If you only have metal, a quick spritz of nonstick spray and a gentle twist with a butter knife works wonders.
- Press the dough twice for perfect cups. The first press shapes the dough before baking, and the second press (right after they come out of the oven) gives you a clean, deep well for the cheesecake filling. This little step makes all the difference for presentation.
- Cool completely before filling. Warm cookie cups will melt your cheesecake mixture and cause the strawberries to slide. Let them cool to room temperature so the filling stays fluffy and holds shape beautifully.
- Dry your strawberries thoroughly. After rinsing, blot them with a paper towel. Any leftover water will cause slipping or make the filling soggy. You can even let them air dry while you prep the cookie cups.
- Uniform strawberries = picture-perfect desserts. Choose berries that are similar in size and shape so all your Santa hats match. Medium-sized strawberries work best — not too tall, not too wide.
- Serve chilled for best flavor and texture. The cool, creamy cheesecake paired with the soft cookie shell is pure magic when slightly cold from the fridge.
Creative Variations & Flavor Ideas
One of the best parts about this recipe is how easy it is to customize. With just a few swaps, you can create totally new versions that fit your holiday vibe, flavor preferences, or dietary needs.
- Sugar-Cookie Sprinkle Cups: Mix colorful Christmas sprinkles into your cookie dough before baking for extra festive fun.
- Homemade Cheesecake Filling (if you don’t have store-bought):
If you can’t find a premade no-bake cheesecake mix or want something a little more homemade, make your own in minutes! In a medium mixing bowl, beat 8 oz of softened cream cheese until creamy and smooth. Add ¼ cup powdered sugar and 1 teaspoon vanilla extract, then gently fold in 1 cup of whipped topping (like Cool Whip) until the mixture is light and airy. Chill for at least 30 minutes before piping. This version has that classic tangy-sweet cheesecake flavor and a smooth, dreamy texture that holds up beautifully in the cookie cups. - Festive Flavor Twists:
- Peppermint Cheesecake Cups: Add a few drops of peppermint extract and top with crushed candy canes for a holiday-mint vibe.
- Chocolate Santa Cups: Stir in melted chocolate or cocoa powder to the cheesecake filling for a rich, chocolatey version.
- Gingerbread Santa Cups: Swap sugar cookie dough for gingerbread dough — the warm spices pair perfectly with the creamy cheesecake filling.
Make Ahead, Storage & Freezing Tips
When it comes to holiday baking, one of my favorite things about these 3-Ingredient Santa Cheesecake Cups is that you can make them ahead of time — which means less stress on the day of your party and more time to actually enjoy the celebration!
These no-fuss cheesecake cups are a busy mom’s dream because they’re easy to prep in stages: you can bake the cookie shells early, mix your filling in advance, and simply assemble everything the day you plan to serve them. Here’s how to get that perfect make-ahead balance while keeping every bite as fresh and creamy as possible.
How to Make Ahead
- Bake the cookie cups in advance: You can bake and fully cool the sugar cookie shells up to two days ahead. Once cooled, store them in an airtight container at room temperature. If your home is warm, you can refrigerate them — just make sure to let them come to room temperature before filling.
- Assemble before serving: For best texture and presentation, fill the cookie cups and add strawberries no more than 6–8 hours before serving. The cookie base stays soft yet sturdy, and the cheesecake holds its shape perfectly when chilled.
- Add the “Santa hat pom-poms” last: Pipe the little dot of cheesecake filling on top of the strawberry right before serving for a clean, fresh look that holds up beautifully for photos.
Storage Tips for Leftovers
Even though these Santa Cheesecake Cups rarely last long (trust me, they disappear fast!), here’s how to store them properly if you do have extras:
- Refrigerate: Store any leftover cups in an airtight container in the fridge for up to 3 days. Because of the cheesecake filling and strawberries, refrigeration is essential to maintain freshness.
- Avoid stacking: If storing multiple layers, place a piece of parchment or wax paper between layers to prevent the strawberries from squishing or the filling from smearing.
- Keep them chilled until serving: The cold temperature helps the cookie cup maintain its shape and keeps the cheesecake firm and creamy.
- Refreshing leftovers: If the cookie softens a bit after refrigeration, you can pop them in the fridge uncovered for 30 minutes before serving to help them firm up again.
Freezing Instructions
If you’re really planning ahead, you can absolutely freeze part of this recipe:
- Freeze the cookie shells: Bake, cool, and freeze the sugar cookie shells (without the filling) for up to 2 months. When ready to use, thaw them at room temperature for about 1 hour, then fill and decorate as usual.
- Avoid freezing assembled cups: Because of the fresh strawberries and no-bake cheesecake filling, the texture won’t hold well after thawing. The strawberries can release moisture and the filling can separate — so it’s best to freeze just the cookie base.
Pro Tip for Parties & Travel
If you’re making these for a holiday gathering or cookie exchange, transport them in a shallow airtight container with a flat lid. Chill them for at least 30 minutes before traveling — the filling will set, the strawberries won’t slide, and they’ll arrive looking bakery-perfect.
🎅 The beauty of this recipe is flexibility — you can prep in stages and still serve a dessert that looks like you spent hours in the kitchen!
Frequently Asked Questions
Because this recipe is so simple, readers often ask how to customize it, store it, or swap ingredients. Below are the most common questions (and detailed answers) to help you make these Santa Cheesecake Cups perfectly every single time — whether it’s your first batch or your tenth!
Can I make these cheesecake cups the night before?
Yes, you can absolutely make these the night before! In fact, they’re even better after a few hours of chilling because the flavors meld and the filling firms up nicely. Just be sure to keep them refrigerated and covered. I recommend adding the strawberries and the little “pom-pom” of cheesecake on top the next day so everything looks picture-perfect.
Can I use homemade cookie dough instead of store-bought?
Definitely! You can make your favorite sugar cookie dough recipe from scratch — just roll it into small balls and bake them in the mini muffin pan as directed. Homemade cookie dough often adds a richer, buttery flavor that tastes incredible with the cheesecake filling.
Can I make the cheesecake filling from scratch?
Yes — it’s so easy! In fact, if you don’t have a store-bought cheesecake mix, you can make a quick homemade version that tastes just as creamy. Beat 8 oz of softened cream cheese until smooth, mix in ¼ cup powdered sugar and 1 teaspoon vanilla extract, then fold in 1 cup whipped topping (like Cool Whip). Chill the mixture before piping — it’s fluffy, rich, and perfectly holds its shape in the cookie cups.
Can these sit out at a party?
They can safely sit out at room temperature for about 1–2 hours, depending on how warm it is in your space. If your home is warm or if they’ll be out longer than that, it’s best to serve them chilled on a tray placed over an ice pack or cold marble board.
What if my cookie cups collapsed or lost their shape?
Don’t worry! This happens if they rise too much in the oven or weren’t pressed deep enough. The trick is to re-press them gently with the back of a spoon immediately after baking while they’re still soft. If they crack slightly, you can still fill them — the cheesecake will hide any imperfections.
You’ll Also Love These Festive Christmas Recipes
If you loved these 3-Ingredient Santa Cheesecake Cups, here are a few more easy and festive holiday recipes your family will adore. Each one is simple to make, beautifully themed for Christmas, and guaranteed to bring extra cheer to your holiday table:
- Donut Christmas Tree — Create a stunning centerpiece out of store-bought donuts! This donut Christmas tree looks bakery-level fancy but takes just minutes to put together. Perfect for brunches, dessert tables, or holiday breakfasts.
- Christmas Tree Spinach Dip Breadsticks — Warm, cheesy, and shaped like a Christmas tree, these pull-apart breadsticks are the perfect festive appetizer. Pair them with your Santa Cheesecake Cups for a sweet-and-savory holiday spread that everyone will love.
- Christmas Dessert Board — Build a beautiful dessert board filled with cookies, candies, chocolates, and festive treats. It’s the ultimate show-stopping platter for parties, cookie swaps, or cozy Christmas movie nights.
- Christmas Tree Cupcakes — Turn simple cupcakes into adorable edible Christmas trees with this quick and creative decorating trick. They’re perfect for school parties, family baking nights, or last-minute holiday treats.
3-Ingredient Santa Cheesecake Cups!

These 3-Ingredient Santa Cheesecake Cups are the easiest and cutest Christmas dessert you’ll make all season! A buttery sugar cookie base is filled with creamy Philadelphia No Bake Cheesecake Filling and topped with juicy strawberries to look just like Santa hats. They come together in minutes — no mixing or baking stress required — and make the perfect festive bite-sized treat for holiday parties, cookie swaps, or classroom celebrations. Light, creamy, and irresistibly adorable, these little cheesecake cups are proof that the best holiday desserts don’t have to be complicated!
Ingredients
-
1 (16.5-oz) package refrigerated sugar cookie dough (such as Pillsbury or store brand)
-
1 (24.3-oz) tub Philadelphia No Bake Cheesecake Filling, chilled
-
12–15 medium strawberries, hulled and dried
Instructions
-
Preheat the oven to 350°F (or as directed on your cookie dough package). Lightly grease a mini muffin pan or use a silicone mold for easy release.
-
Form the cookie cups. Roll the dough into small balls (about 1 tablespoon each) and place them in each muffin cavity. Press gently with your fingers or the back of a spoon to create a shallow cup shape.
-
Bake for 12–14 minutes, or until golden brown and slightly puffed.
-
Reshape while warm. Immediately after baking, use the back of a spoon or a small rounded tool to press down the centers again, forming a perfect little well. Allow the cookie cups to cool completely before filling.
-
Fill with cheesecake. Spoon or pipe the Philadelphia No Bake Cheesecake Filling directly from the tub into each cooled cookie cup, filling just below the rim.
-
Add the Santa hats. Place one strawberry upside down on top of each cheesecake cup to resemble Santa’s hat.
-
Finish with the pom-pom. Add a tiny dot of cheesecake filling on the tip of each strawberry to complete the look.
-
Chill and serve. Refrigerate until ready to serve — they taste best cold when the filling is firm and creamy.
Notes
-
Use silicone molds for easy removal and perfectly shaped cups.
-
Dry strawberries completely before assembling to prevent slipping or sogginess.
-
The Philadelphia filling is ready to use straight from the fridge — no mixing needed!
-
For a bakery-style finish, pipe the cheesecake filling with a star-tip bag for beautiful swirls.
If you can’t find Philadelphia No Bake Cheesecake Filling, make your own quick version:
-
8 oz cream cheese, softened
-
¼ cup powdered sugar
-
1 teaspoon vanilla extract
-
1 cup whipped topping (like Cool Whip)
Beat cream cheese, powdered sugar, and vanilla until smooth, then fold in whipped topping. Chill for 30 minutes before using.