DIY Resin Phone Case – Girls Easy Craft Night
This DIY resin phone case girls craft night is one of the cutest and trendiest party ideas for tweens, teens, birthdays, sleepovers, or girls nights at home. Between the custom resin phone cases, cozy girl dinner setup, and the gorgeous Sky Check hosting pieces from MacKenzie-Childs, this entire night felt like the perfect mix of creative and elevated.

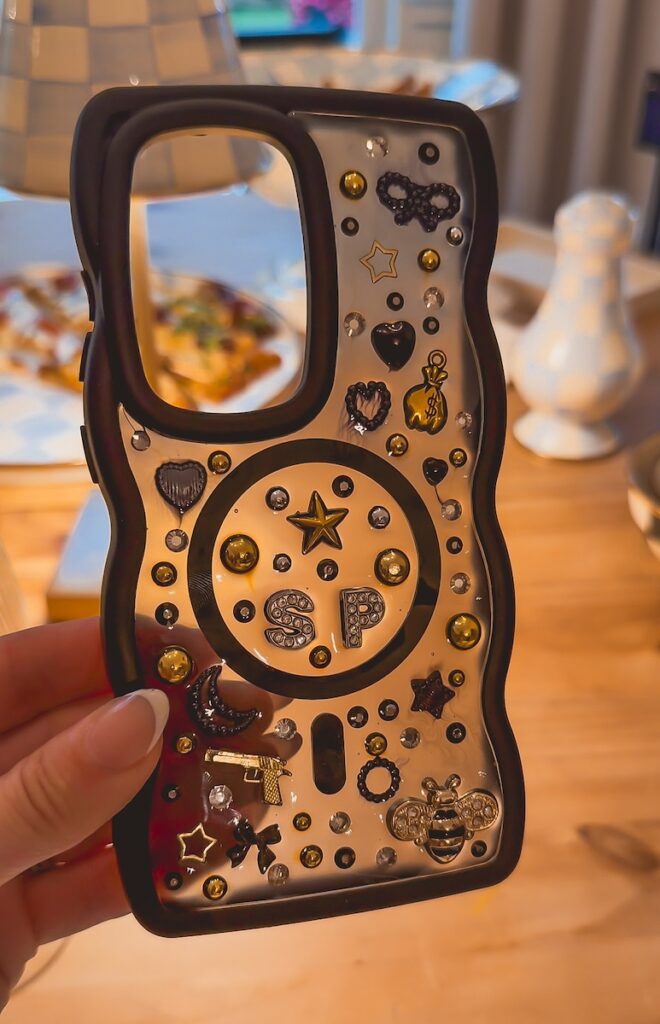
Lately I’ve been loving hosting hands-on girls nights because they feel so much more memorable than a traditional get together. Everyone gets to relax, snack, chat, and create something personalized to take home. These DIY resin phone cases ended up being such a hit and honestly looked like boutique-style cases once they were finished.
I found the UV resin kit, clear phone cases, and all of the resin charms on Amazon and linked everything in a shoppable list in my storefront to make it easy to recreate. I used a huge mix of dried flowers, pearls, rhinestones, letter charms, glitter, and mini seashells so everyone could completely customize their design.
For the setup, I styled everything using pieces from the new Sky Check collection from MacKenzie-Childs and it made the entire craft table feel extra girly and elevated. I’ll also be sharing links to my favorite Sky Check pieces throughout the post.
Why You’ll Love This Girls Craft Night Idea
- Perfect for all ages – This resin phone case craft works for tween birthday parties, teen sleepovers, girls nights, or even bachelorette weekends.
- Everyone leaves with something custom – Instead of a regular party favor, guests leave with a personalized phone case they actually want to use.
- Easy to prep ahead – Most of the setup can be done before guests arrive which makes hosting stress free.
- Super aesthetic and trendy – The finished resin phone cases honestly look expensive and boutique-inspired.
- Works for any theme – You can customize the embellishments and colors depending on the vibe of the party.
- Creates the cutest party setup – Between the charms, resin supplies, snacks, and hosting decor, the entire table photographs beautifully.
Supplies You’ll Need
For the Phone:
- Clear phone cases – Make sure everyone knows their phone model ahead of time so you can order the correct cases.
- Resin charms – pick a variety of charms to fit everyones personality and style.
- Letter charms – Perfect for initials or custom names.
- Pearls and rhinestones – Gives the cases that glam, trendy look.
- Glitter and foil flakes – Helps add sparkle and dimension to the designs.
Crafting Tools
- UV resin kit – I used a beginner-friendly UV resin kit from Amazon that included the UV light needed to cure the cases.
- Tweezers – Makes placing tiny embellishments much easier.
- rhinestone applicator – makes adding rhinestones easier.
- Silicone applicators – Helpful for spreading the resin evenly.
- Disposable gloves – Recommended for easier cleanup.
Step-by-Step Tutorial: How to Make Resin Phone Cases
Step 1: Pick Out Your Charms and Create a Mockup
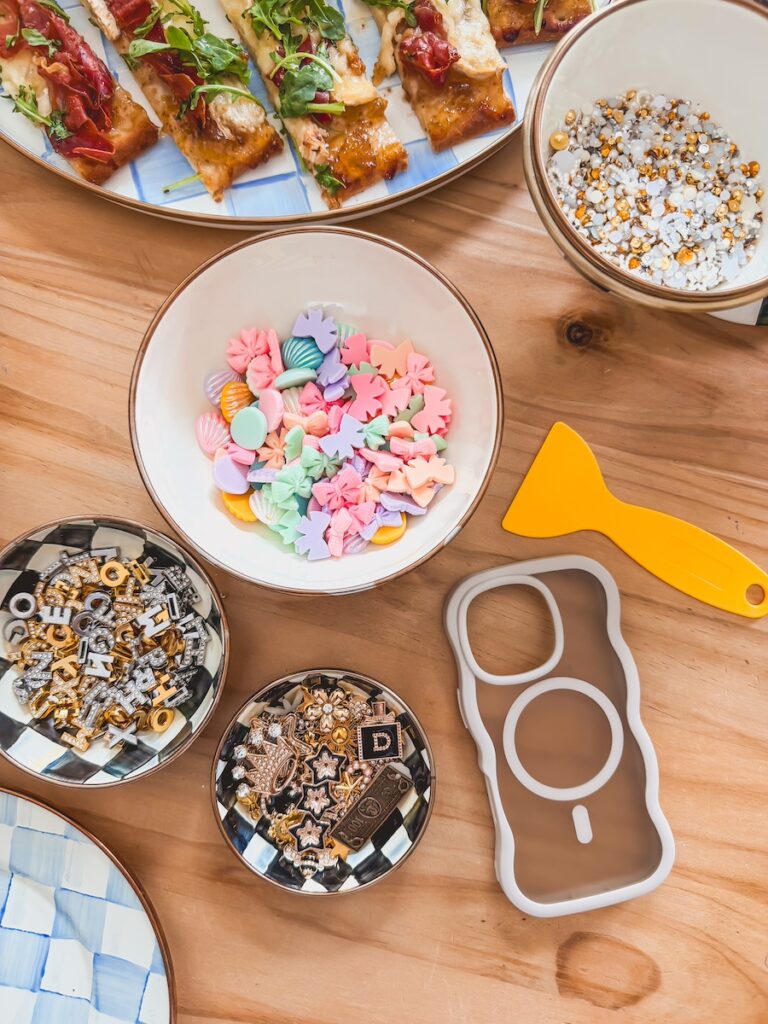
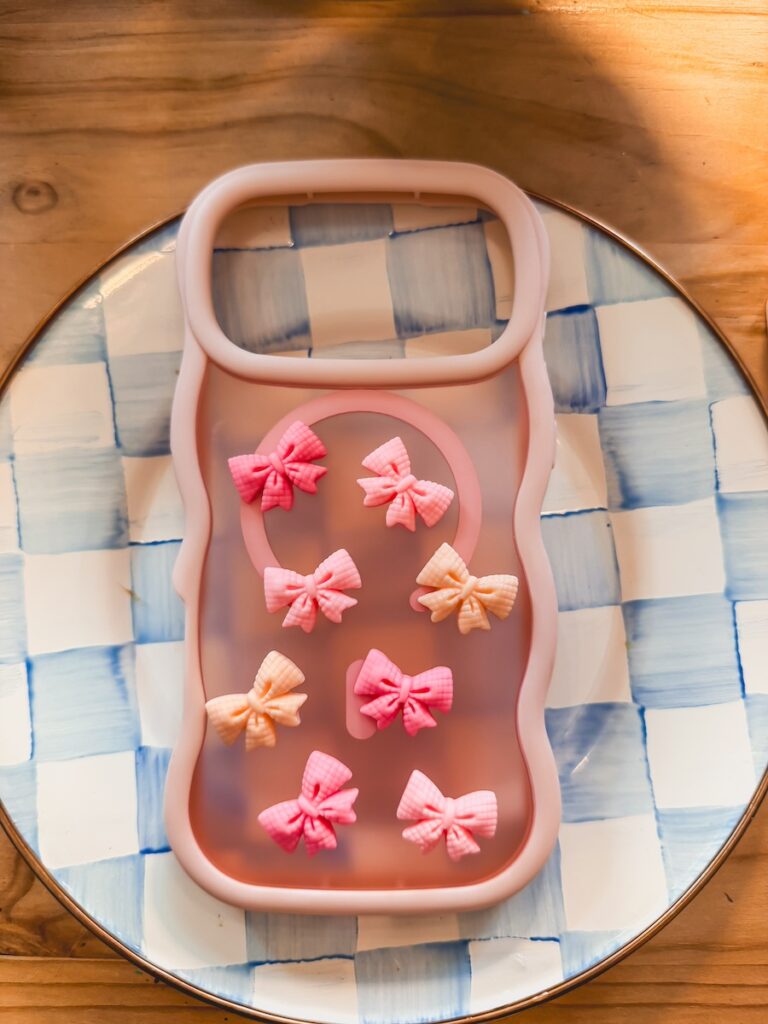
Start by laying the clear phone case flat on the table and picking out the charms and embellishments you want to use. I used a mix of dried flowers, rhinestones, pearls, seashells, glitter, and letter charms for a fun girly look.
Before adding any resin, arrange all of the pieces directly onto the phone case to create a mockup of your design. This helps you visualize spacing, layering, and placement before committing to the resin.
Once you love the layout, carefully remove the charms and set them aside in the same order so they’re easy to place back down later.
Step 2: Add the Resin to the Phone Case
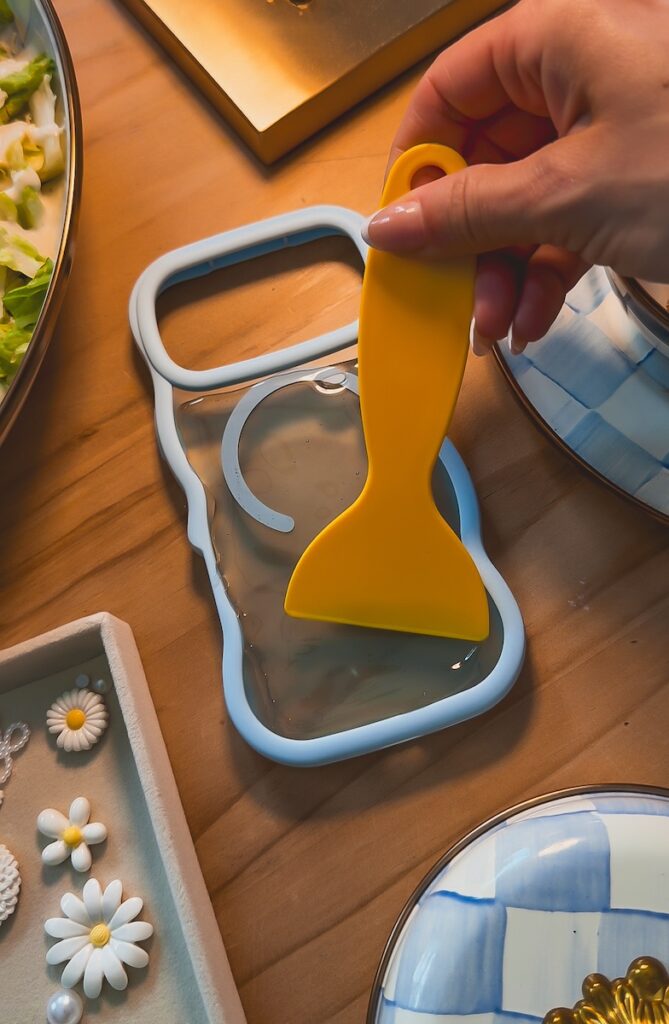
Next, apply a thin even layer of UV resin directly onto the clear phone case. You do not want the resin too thick or it can overflow the edges during curing.
Use a small applicator or silicone brush to gently spread the resin across the surface of the case.

Step 3: Remove Any Air Bubbles
After applying the resin, check closely for air bubbles. This step is important because bubbles can dry unevenly and affect the final glossy finish.
You can gently pop or remove the bubbles using a toothpick or by lightly moving the resin around until the surface looks smooth and clear.
Step 4: Place the Charms Back Into the Resin
Once the resin is smooth, carefully place all of the charms and resin decals back onto the phone case according to your original mockup design.
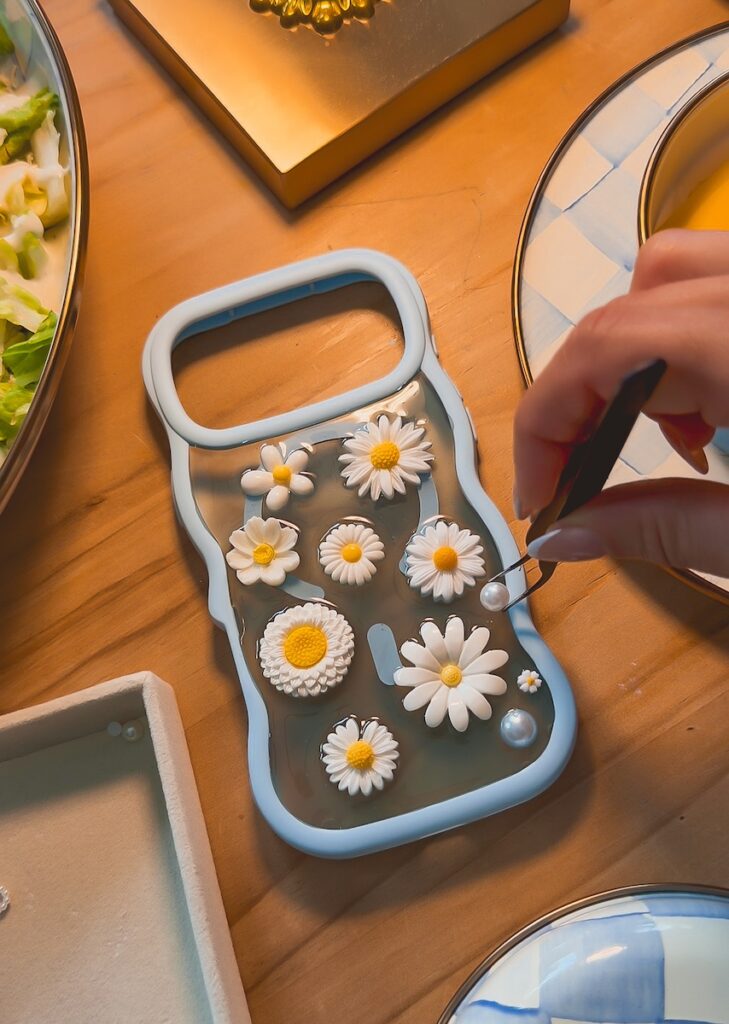
Tweezers work really well for placing smaller rhinestones, pearls, and flowers exactly where you want them.
At this stage, you can also add extra glitter, gold flakes, or tiny filler pieces to complete the design.
Step 5: Cure the Resin with the UV Light
After the design is complete, cure the phone case using the UV light included in the resin kit.
Place the phone case under the UV light according to the kit instructions until the resin fully hardens and sets. Most UV resin kits cure pretty quickly, which makes this such a fun and easy craft for parties and girls nights.
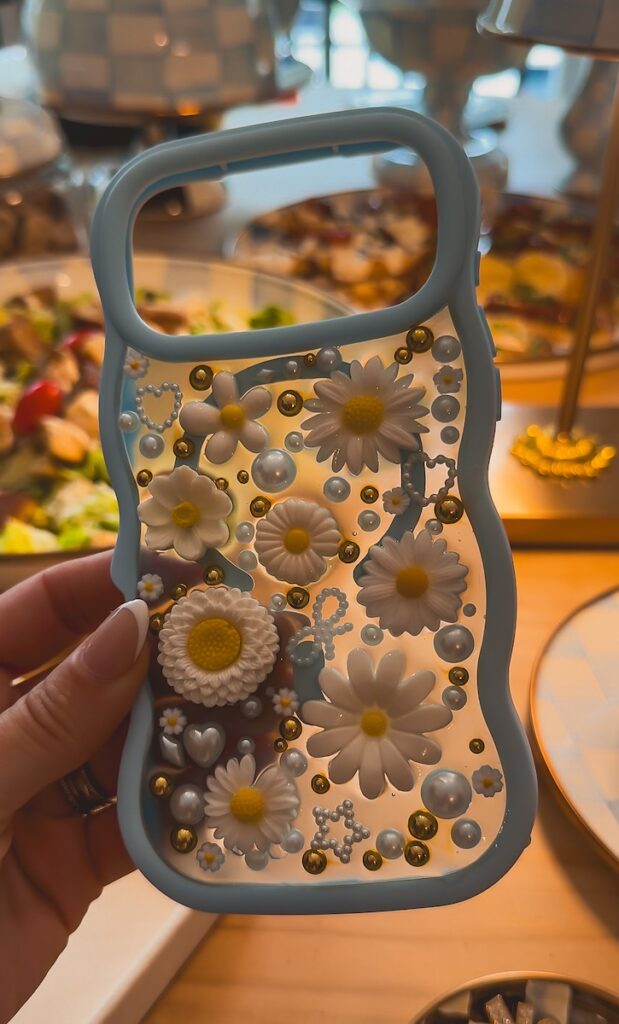
Once cured, the phone case will have a glossy, durable finish that seals all of the embellishments into place beautifully.
Watch How to Make a DIY Resin Phone Case
Fun Resin Phone Case Theme Ideas
One of the best parts about hosting a DIY resin phone case girls craft night is that everyone can completely customize their phone case to match their own style and aesthetic. Setting out a wide variety of charms, rhinestones, flowers, glitter, and embellishments makes the crafting experience feel even more fun and creative.
I also love encouraging guests to pick a “theme” for their phone case before they start designing because it helps inspire color palettes, charm choices, and overall layouts. Whether you want something girly and glam, beachy and colorful, or trendy and minimalist, there are so many fun ways to personalize these resin phone cases.
Here are some cute resin phone case theme ideas to inspire your girls craft night setup:
- Coquette-Inspired Resin Phone Cases – Think bows, pearls, pink rhinestones, lace-inspired details, tiny hearts, and delicate floral charms. This theme is perfect if you love the ultra-girly, feminine aesthetic that has been trending all over TikTok and Pinterest. Pair soft pinks, whites, pearls, and gold accents together for a dreamy boutique-inspired look.
- Beachy Summer Resin Phone Cases – Use mini seashells, ocean-inspired glitter, pearls, blue rhinestones, and tropical colors to create the cutest summer phone case designs. These are especially fun for summer sleepovers, beach vacations, or poolside girls nights. Adding iridescent glitter and tiny faux starfish can make the cases feel even more coastal-inspired.
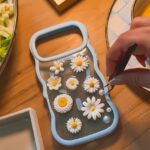
- Minimalist Floral Resin Phone Cases – If you love a more elevated and neutral aesthetic, pressed flowers paired with gold flakes create such a beautiful high-end look. These cases feel classy, timeless, and sophisticated while still being trendy. Stick with neutral flowers, soft greenery, and minimal embellishments for a clean modern design.
- Y2K-Inspired Resin Phone Cases – Bright colors, smiley faces, chunky glitter, funky letter charms, colorful gems, and playful decals make these cases so nostalgic and fun. This theme is perfect for teens and tweens who love bold colorful accessories and early 2000s trends.
- Mermaid-Inspired Resin Phone Cases – Use iridescent glitter, pearls, seashells, holographic charms, and soft ocean colors to create magical mermaid-inspired designs. Mixing pastel blues, purples, and pinks with shimmer details gives the cases such a fun dreamy look.

Tips for Hosting a Successful Craft Night
Hosting a DIY resin phone case girls craft night is honestly one of the easiest ways to create a fun, memorable, and interactive girls night at home. A little prep ahead of time makes the entire night run so much smoother and helps everyone feel relaxed and creative once they start crafting.
Because resin crafts can get messy quickly, having an organized setup and a few extra supplies on hand really helps keep the night stress free. Here are my best tips for hosting the ultimate resin phone case craft night setup.
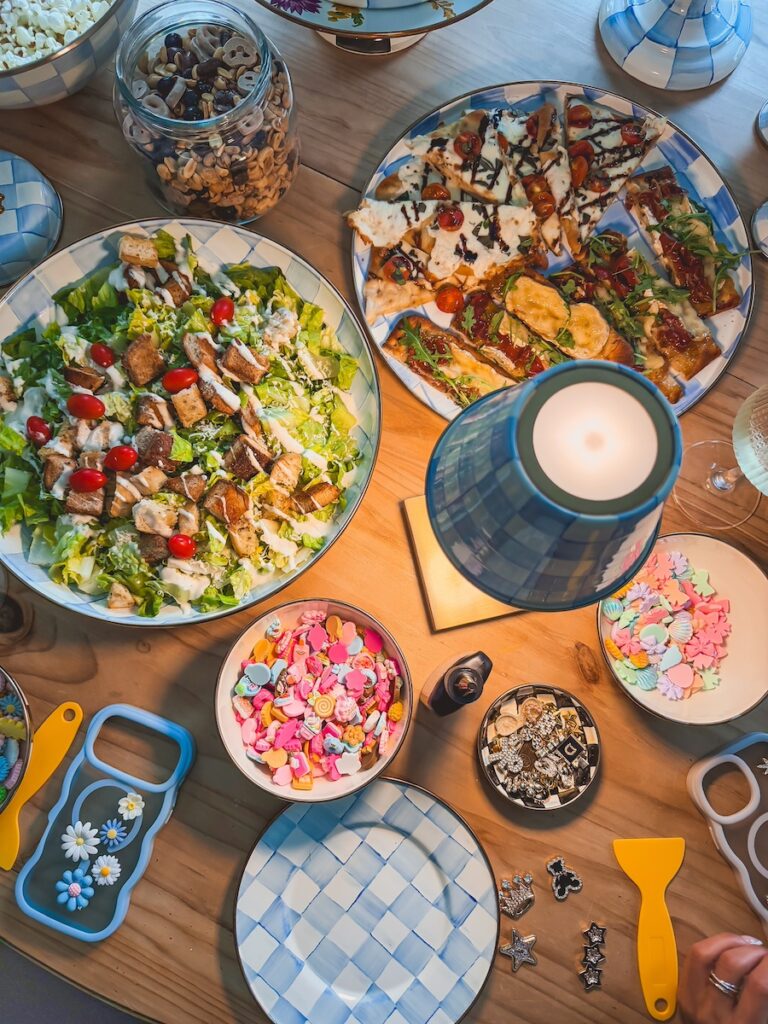
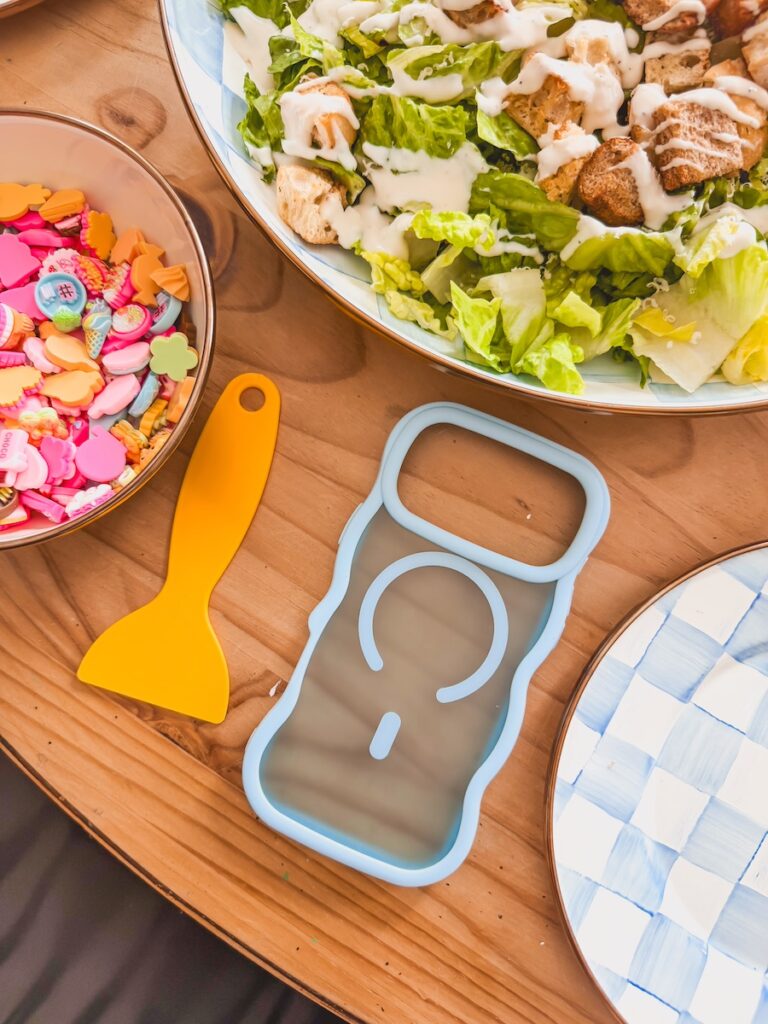
- Set Everything Out Buffet-Style – One of the easiest ways to make the craft night feel interactive and elevated is by displaying all of the resin charms, flowers, pearls, rhinestones, glitter, and embellishments in separate bowls around the table. Not only does this make it easier for guests to browse through the supplies, but it also turns the entire setup into part of the decor. I loved mixing the bowls of resin supplies throughout my serving pieces from the new Sky Check collection from MacKenzie-Childs because it made the table feel colorful, creative, and organized all at the same time.
- Have Extra Embellishments Available – Trust me when I say everyone will gravitate toward the same popular charms and rhinestones. Pearls, bows, flowers, and glitter tend to go fast, so ordering extra embellishments ahead of time is definitely worth it. Having lots of variety also helps everyone create a completely unique design instead of all the phone cases looking similar.
- Create Inspiration Examples Before Guests Arrive – One thing that really helped was having a few sample phone cases already laid out on the table for inspiration. Some people instantly know what aesthetic they want while others need a little inspiration to get started.
- Use Disposable Table Covers for Easy Cleanup – Resin can get sticky and messy very quickly, especially during group crafts. I highly recommend using disposable tablecloths, parchment paper, or craft mats underneath the workspace so cleanup is easy once the party is over. This also helps protect your table from accidental resin drips.
- Keep Baby Wipes and Paper Towels Nearby – This might sound small, but it makes such a difference during the craft night. Having wipes and paper towels nearby helps clean sticky fingers, resin drips, and glitter spills quickly before things get messy.
- Use Tweezers for Smaller Charms – Tiny rhinestones, pearls, flowers, and glitter pieces are much easier to place using tweezers. Setting out a few pairs around the table makes the process way less frustrating, especially for more detailed designs.
- Keep the Food Easy to Grab While Crafting – Since everyone’s hands are busy during the craft, smaller finger foods and snack-style foods work best. I served truffle fries, sliced flatbreads, popcorn, and trail mix because everyone could easily snack while working on their resin phone cases without interrupting the crafting process..
- Have Good Lighting for Crafting and Photos – Lighting makes a huge difference both for creating the phone cases and for taking photos afterward. Resin details, rhinestones, and glitter look so much prettier in bright natural lighting. If possible, set up near windows or add extra lighting so everyone can really see the details while designing their cases.
- Allow Plenty of Time for Crafting – One of the biggest mistakes people make with craft nights is rushing the activity. Resin phone cases are so much more fun when everyone can relax, snack, socialize, and take their time designing. I would definitely plan for a slower-paced evening so nobody feels rushed through the process.

Where to Find Everything
I linked all of the resin kits, clear phone cases, charms, embellishments, and supplies in a shoppable Amazon storefront to make recreating this girls craft night super easy.
I’ll also be linking all of my favorite Sky Check hosting pieces from the new MacKenzie-Childs collection because they truly made the cutest setup for this party.
Frequently Asked Questions
Is UV resin beginner friendly?
Yes, UV resin is actually one of the best types of resin to use for beginners, especially for group craft nights, tween parties, or girls nights at home. Unlike traditional epoxy resin that can take hours to fully cure, UV resin hardens very quickly under a UV light which makes the process much easier and less intimidating for first-time crafters.
I also love using UV resin for parties because guests do not have to wait overnight for their projects to dry. Everyone can create their resin phone case, cure it under the UV light, and leave the party with a finished phone case the same night.
If you’re new to resin crafting, starting with a beginner-friendly UV resin kit from Amazon is definitely the easiest option.
How long do resin phone cases take to cure?
Most UV resin phone cases cure fairly quickly depending on the thickness of the resin and the specific UV resin kit you use. Typically, thinner layers of resin cure within just a few minutes under the UV light.
For best results, I recommend applying thinner layers instead of one super thick layer because thinner layers cure more evenly and help prevent bubbling. If you decide to add a final glossy top coat, you’ll want to cure that additional layer separately as well.
One of the reasons this craft works so well for girls nights and parties is because the curing process is fast enough that guests can complete their projects during the event instead of waiting hours for everything to harden.
Can kids make resin phone cases?
Yes, kids and teens can absolutely make resin phone cases, but adult supervision is definitely recommended, especially for younger children. Since UV resin involves sticky materials and a UV curing light, having adults nearby helps make the process smoother and safer.
This craft works especially well for tweens and teens because they tend to enjoy customizing their designs and creating something trendy and personalized for their phones. You can also simplify the process for younger kids by pre-sorting embellishments and helping them apply the resin.
If you’re hosting a tween birthday party or sleepover, I would recommend setting up the stations ahead of time and walking everyone through the steps together before they begin crafting.
What type of phone case works best for resin crafts?
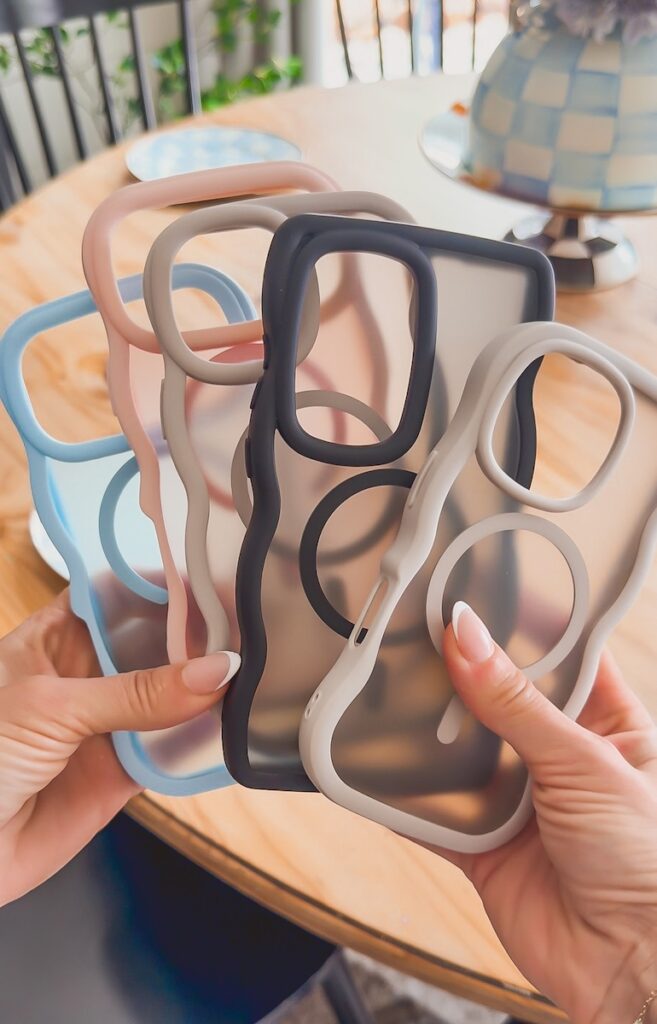
Clear hard-shell phone cases work best for resin phone case crafts because they allow the embellishments, glitter, pearls, flowers, and charms to fully show through once the resin cures.
I personally recommend using simple transparent cases without heavy texture or patterns because smooth surfaces make it much easier for the resin to spread evenly and cure properly. Ordering the same style case in different phone models also helps keep the setup cohesive while still making sure everyone has the correct fit for their phone.
Before ordering, it’s always a good idea to ask guests for their phone models ahead of time so you can make sure everyone has the right case during the party.
Do resin phone cases last?
Yes, when properly cured, resin phone cases are surprisingly durable and hold up really well for everyday use. The UV resin creates a glossy protective layer that seals the embellishments into place and helps prevent charms or decorations from falling off.
To help the phone cases last longer, I recommend applying a smooth even top coat of resin over the finished design. This helps create a polished finish while also protecting the rhinestones, pearls, flowers, and glitter underneath.
Like any decorative phone case, the cases can still scratch or chip if dropped repeatedly, but overall they hold up very well and honestly look so high-end once finished.
How do you prevent bubbles in UV resin?
Air bubbles are one of the most common issues when working with resin, but thankfully they’re usually easy to fix. After applying the resin to the phone case, take a minute to look closely for any trapped bubbles before placing the charms down.
You can gently pop bubbles using a toothpick, silicone tool, or by slowly moving the resin around until the surface looks smooth and even. Applying thinner layers of resin instead of thick heavy layers also helps reduce bubbling significantly.
Taking your time during this step really helps the finished phone cases look more polished and professional.
DIY Resin Phone Case
Ingredients
- Clear hard-shell phone cases
- UV resin kit with UV curing light
- flowers
- Pearls
- Rhinestones
- Letter charms
- Mini seashells
- Glitter
- Gold flakes
- Decorative resin decals
- Tweezers
- Silicone applicator or small craft brush
- Toothpicks
- Disposable gloves
- Disposable table covering or parchment paper
Instructions
- Start by setting up your crafting station with all of the resin supplies, embellishments, and phone cases organized into bowls or trays. Cover the table with parchment paper or a disposable tablecloth to protect the surface from resin drips and glitter.
- Lay the clear phone case flat on the table and begin selecting your embellishments. Arrange the dried flowers, rhinestones, pearls, glitter, seashells, and charms directly onto the phone case to create a mockup of your design before using any resin.
- Once you are happy with the layout, carefully remove all of the embellishments and keep them nearby in the same arrangement so they are easy to place back down later.
- Apply a thin even layer of UV resin directly onto the phone case using a silicone applicator or small craft brush. Be careful not to apply the resin too thick or it may overflow the edges during curing.
- Before placing the embellishments back onto the case, closely inspect the resin for air bubbles. Use a toothpick or small tool to gently pop or remove any bubbles so the final finish looks smooth and glossy.
- Carefully place all of the embellishments back into the resin according to your original mockup design. Tweezers work especially well for placing smaller pearls, rhinestones, flowers, and glitter pieces more precisely.
- Once the design is complete, place the phone case under the UV curing light included in the resin kit. Cure according to the package instructions until the resin fully hardens and sets.
- For an extra glossy and durable finish, apply an additional thin top coat of resin over the entire design and cure again under the UV light.
- Allow the phone case to fully cool and harden before handling or packaging.
Video
Notes
- Less resin is better than too much resin. Thin even layers cure more smoothly and help prevent bubbling.
- Use tweezers for detailed placement of pearls, rhinestones, and tiny embellishments.
- Keep baby wipes and paper towels nearby for easy cleanup during the craft night.
- UV resin cures quickly which makes this craft perfect for parties and girls nights.
- Clear hard-shell phone cases work best for resin projects because the embellishments fully show through.
- Adult supervision is recommended for younger children while working with resin and UV lights.