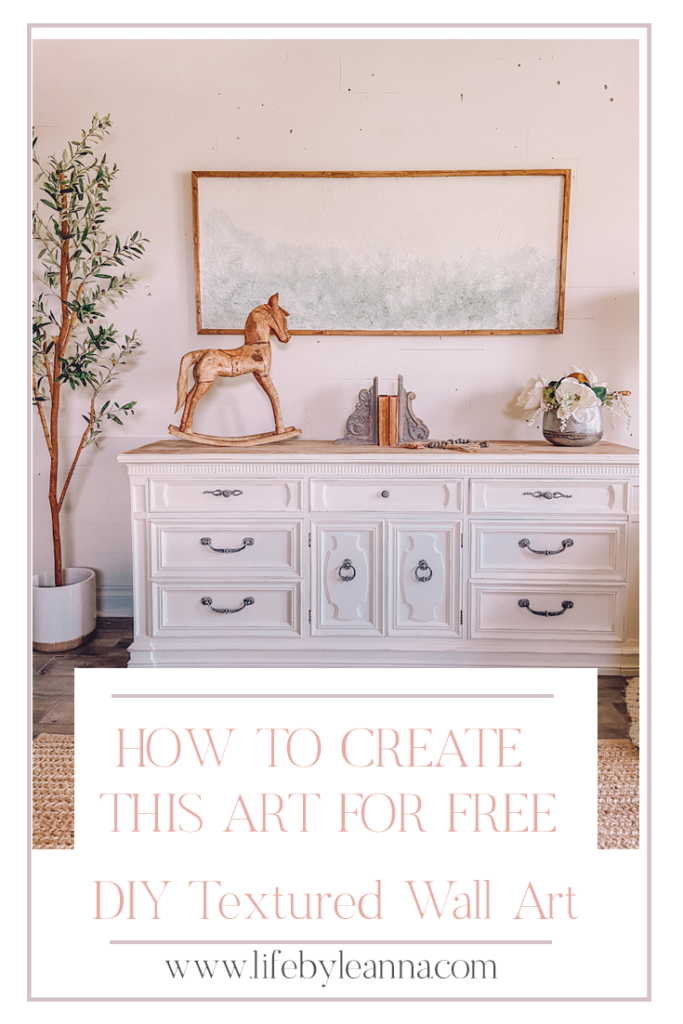
4 Easy Steps to Create DIY Textured Wall Art
How to create DIY Textured Wall art for less!
I really am horrible at picking out art. I don’t like to commit to a piece of art that costs thousands of dollars because knowing myself, I’ll get tired of it in a few years time. Hence, we have very little wall art in our home. However, after taking on a small instagram challenge to refresh a space, I decided to tackle a long wall in my bedroom. This wall needed a big piece of art so I decided to create my own DIY Textured Wall art.

What I love about this DIY Textured wall art is that you can not mess it up!! I promise you! I also bet you have all the supplies you need already at home.
Supplied to make a DIY Textured wall art
- Old wood sign to use as the frame and “canvas”
- Painters Putty
- Putty knife
- Painter’s tape
- Paint brush
- Your paint color of choice
DIY Textured Wall Art Tutorial
STEP 1 : Tape off your Frame
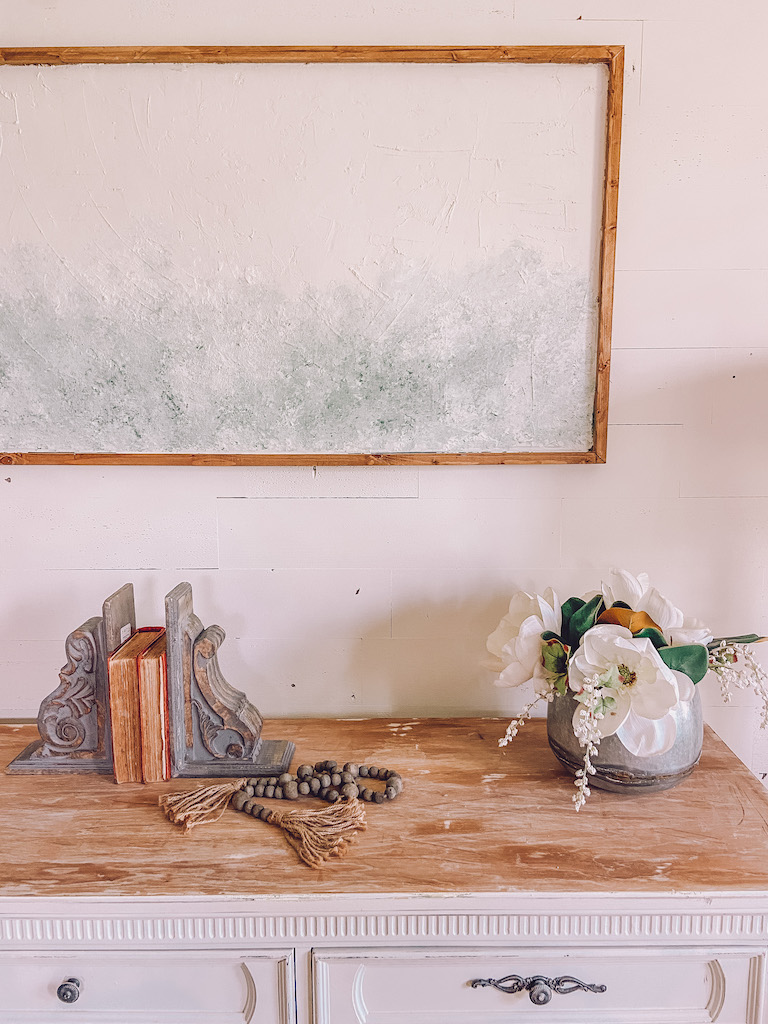
I had a chalkboard wood sign that I had made a few months ago and it was the perfect size that I needed for my wall. I decided to keep the sign on the front and simply use the back for my canvas. And guess what…..I can still use the chalkboard on the other side if I want.. it is now two signs for one!
The first step is to tape off the frame to protect it from the painters putty. Tape around all edges with the blue painters tape.
STEP 2 : Apply Painters Putty
The next step is to apply the painters putty. You could also use other products to create textured art such as caulk, plaster or joint compound. Use a putty knife to apply the painters putty over your entire sign.
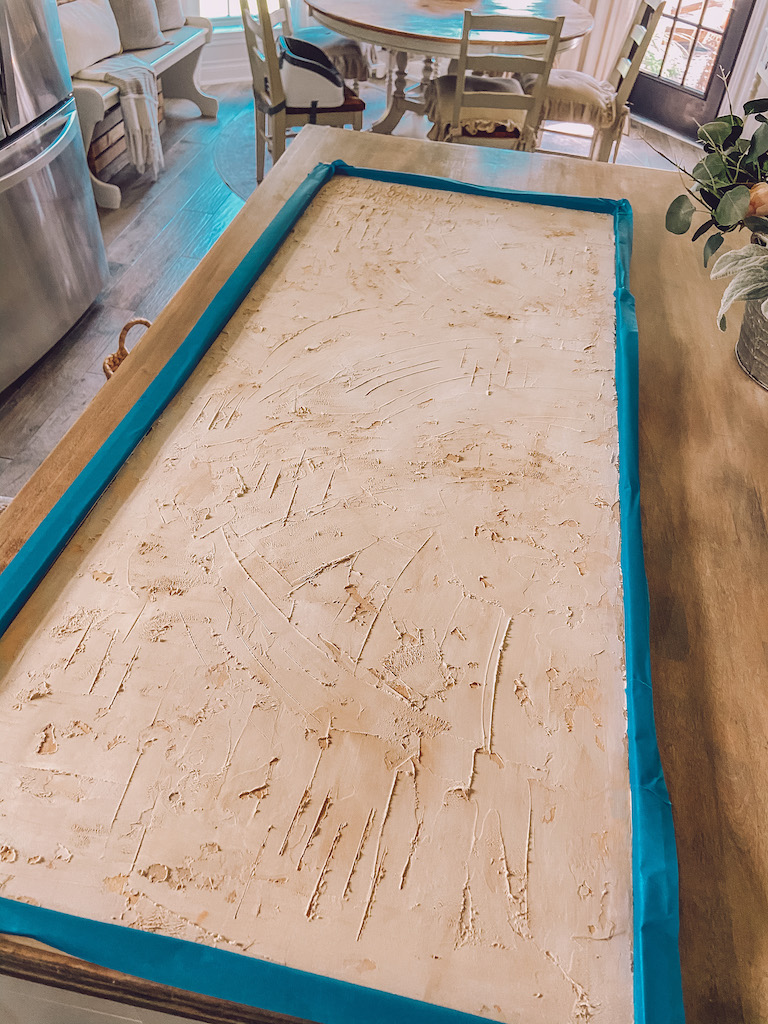
I actually ran out of Painters Putty. I did not have enough to cover the entire sign but it still turned out! If I had more, I would have been able to create more texture.
There really is no wrong way to do this! Create different looks and patterns with your putty knife to make texture and dimension.
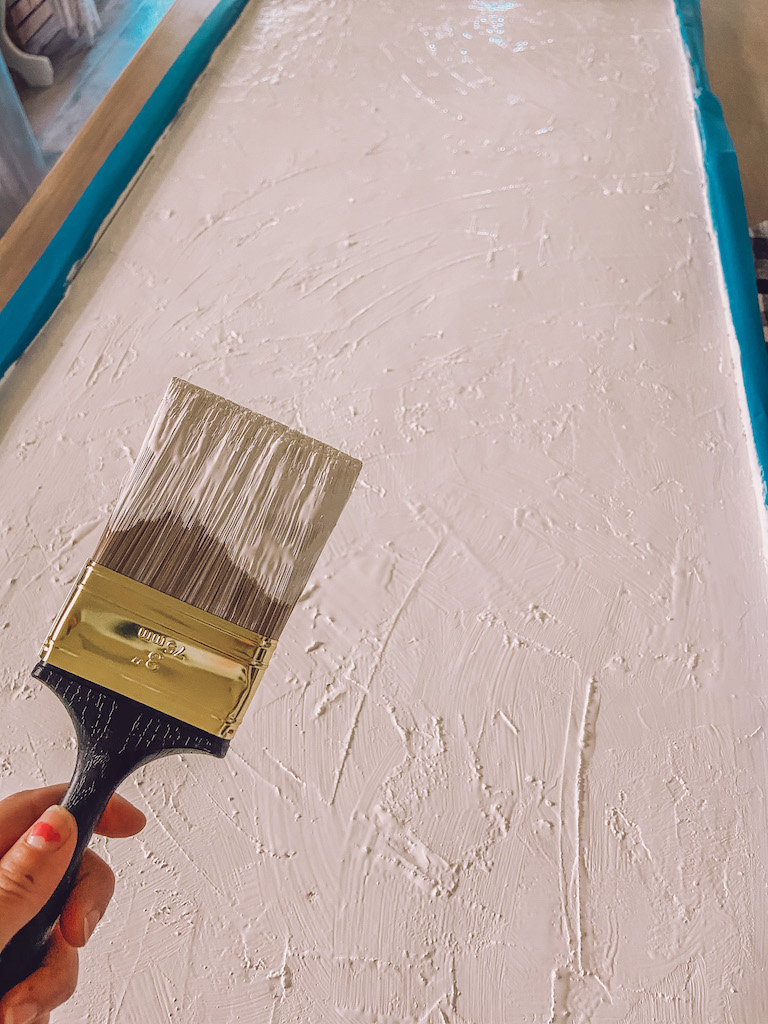
STEP 3: PAINT
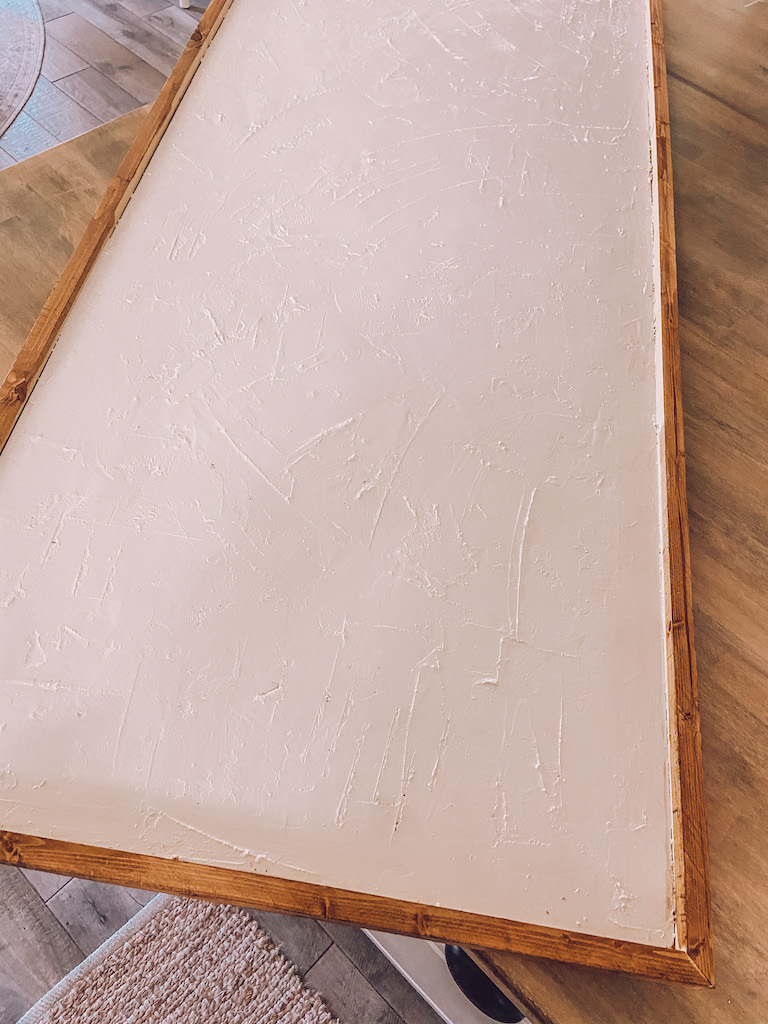
Once the painters putty is completely dry, paint it with your base coat. I used Alabaster by Sherwin Williams because it was what I had on hand. I really think painting it in black would be very cool too!
You can either leave your sign like this, or you can decide to paint your artwork.

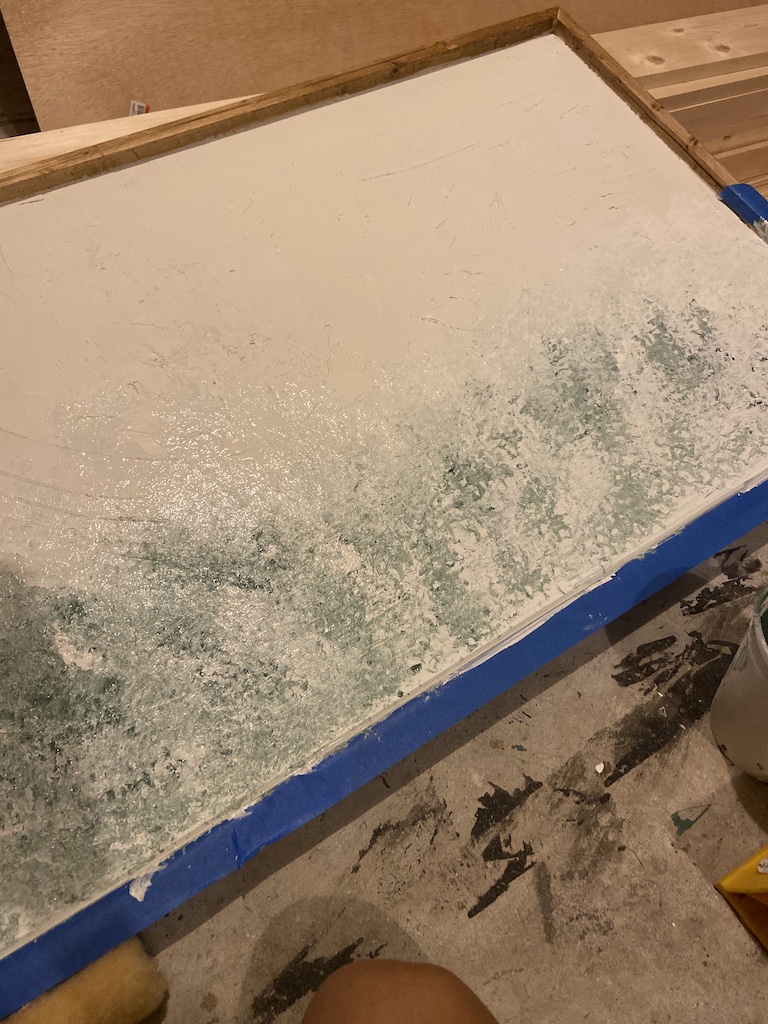
STEP 4: Paint Your Art
There are so many different ways you can take your DIY textured wall art to the next level. There are lots of fun ideas on Pinterest! I decided to add a bit of green to mine! To add some color, I used a small sponge and sponge painted green onto the bottom. I think used the white paint to blend in the green into the canvas. A little bit of this and a little bit of that… again you really can’t go wrong! The end result was more perfect then I could have imagined!!
The best thing about this easy wall art was that it was for FREE! The ideas are endless and I can’t wait to make another one soon!

I have never thought to use plaster to create wall art. My sister is wanting to have some original art in her home, and is trying to think about what to do. It would be interesting to try something like this in her home.