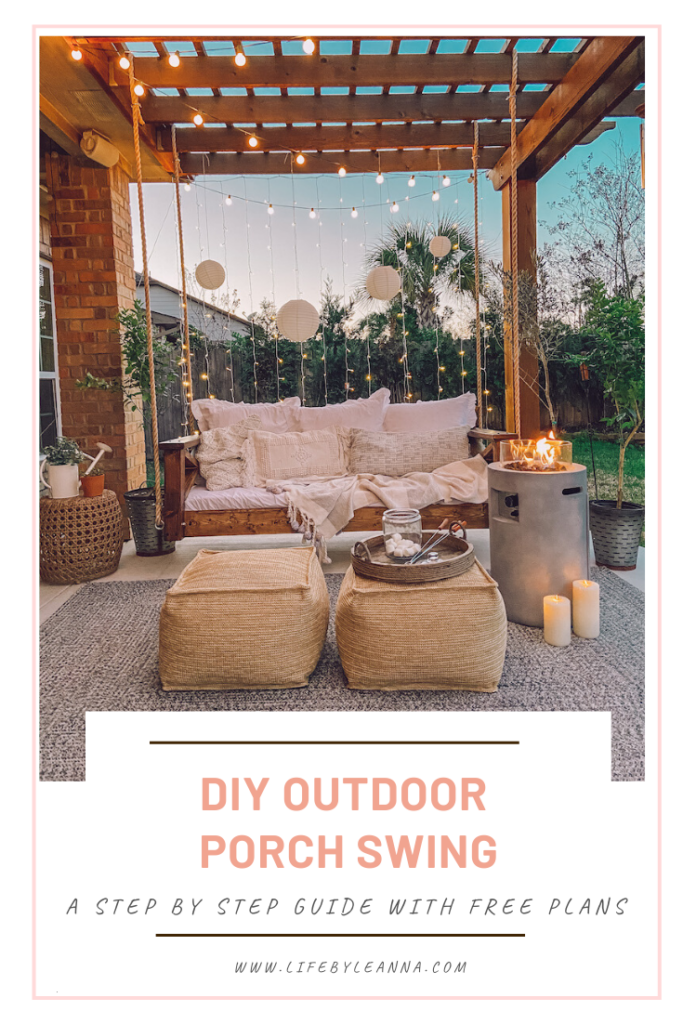
DIY Porch Swing – A Step by Step Guide for under $300
How to build a DIY porch swing

The most frequently asked blog post is now up! My very handy hubby helped me to create this post and I am extremely grateful. I have to admit this is mostly a foreign language to me but he assures me if you follow the plans you’ll be good!
We built this swing based on the dimensions of a small single mattress. You can also make this swing on a smaller scale, using a crib mattress. I always wanted a porch swing in our backyard but was not willing to pay the price to buy one! We knocked this project out over a few weekends and I could not be any happier! Hopefully these DIY porch swing plans help you create a swing where you will create memories for years to come.

Materials to build a DIY Porch Swing
Untreated pine (home depot or Lowes);
- 4×4 x 8ft (1)
- 2×6 x 8ft (2)
- 2×4 x 8ft (7)
- 1×6 x 8ft (3)
- 1×4 x8ft (4)
Other Material:
- 4” , 3” , & 2” wood screws
- 4 stainless eye bolts
- 1” rope
- ‘early american’ stain.
- Water-based polyurethane
- Braid Nailer
- Large black aesthetic wood screws on hand that we added just for looks (made by OWT)
Directions on how to build a DIY Porch Swing
DIY Porch Swing Plan
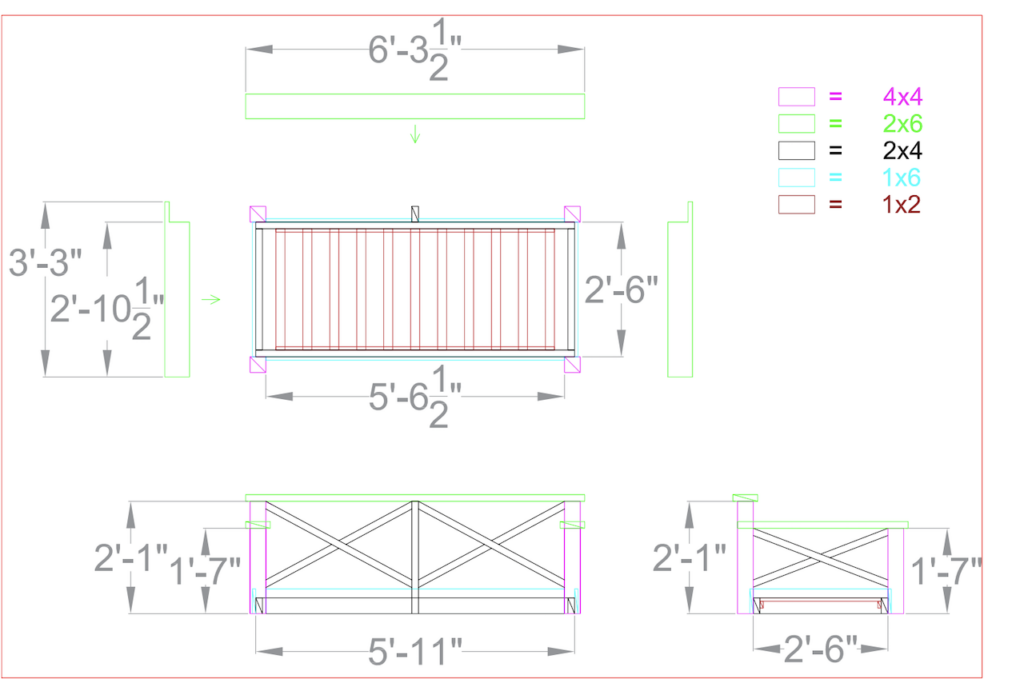
Refer to the plans above while following the instructions
Instructions
- Lay out the 2×4 base frame. Drill and screw it together with two 4” screws in each corner
- Cut and attach 1×6 outer baseboards with a brad nailer or drill and screw 2” screws
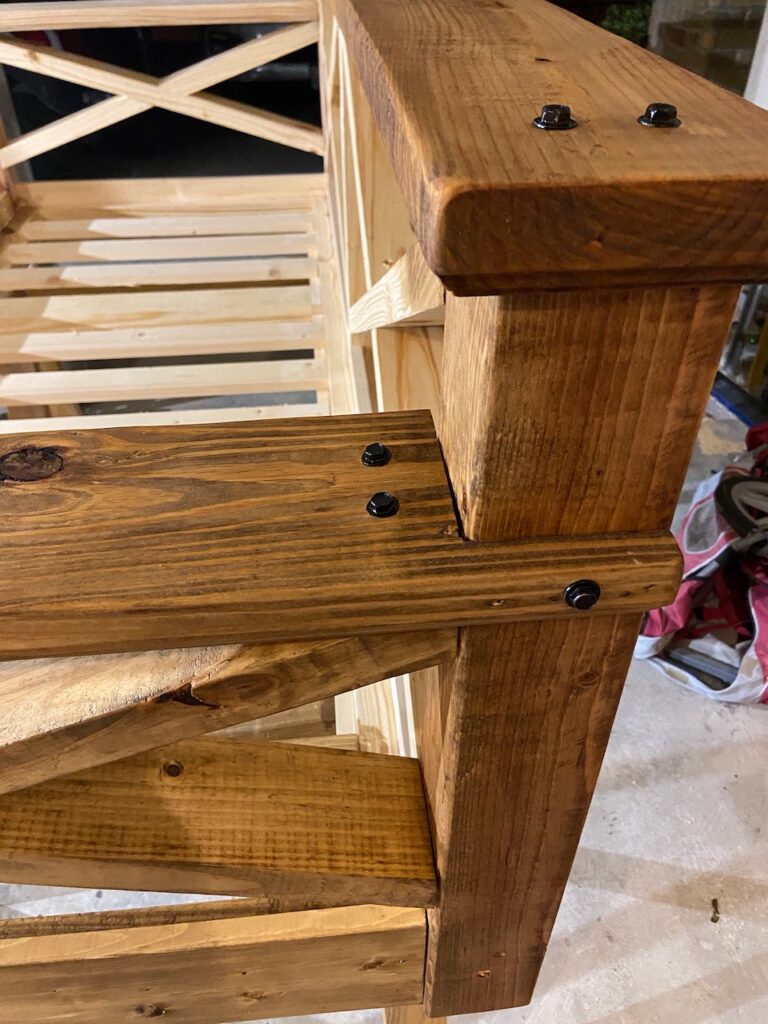
- Install the 4×4 corner posts using 4” wood screws, drill and screw from inside the base frame
- Install the vertical 2×4 at the back center of the swing. Again by drilling and screwing from the inside of the frame (outwards).
- Cut, and screw the 4 cross frames using 2×4’s.
Note: the cross frames are the trickiest part because of the angles. If you prefer vertical slats around the sides of the swing instead of the cross frames, it can be easier to build

- Cut the two arm rest shapes out of 2×6. We used a router to soften the edge. The front of the arm rest sits on top of the front 4×4 post. Drill and screw from the top of the armrest down into the 4×4 with two 4” screws. At the back of the arm rest, drill and screw from the outside of the 2×6, into the 4×4 with two 4” screws.
- Cut and Install the 2×6 for the top back rest. Drill and Screw using 4” screws down into the rear 4×4 posts.
- Cut several lengths of 1×2 to serve as the slats that will hold the mattress. Cut two longer pieces of 1×2 and screw them to the front and back, inside of the 4×4 frame. These will support the slats. Make sure the slats sit flush with the 4×4 frame.
- Drill and install the stainless eye bolts near the bottom of each 4×4 corner post.
- Stain with MinWax Early American, and apply 3 coats of Polyurethane to Protect.

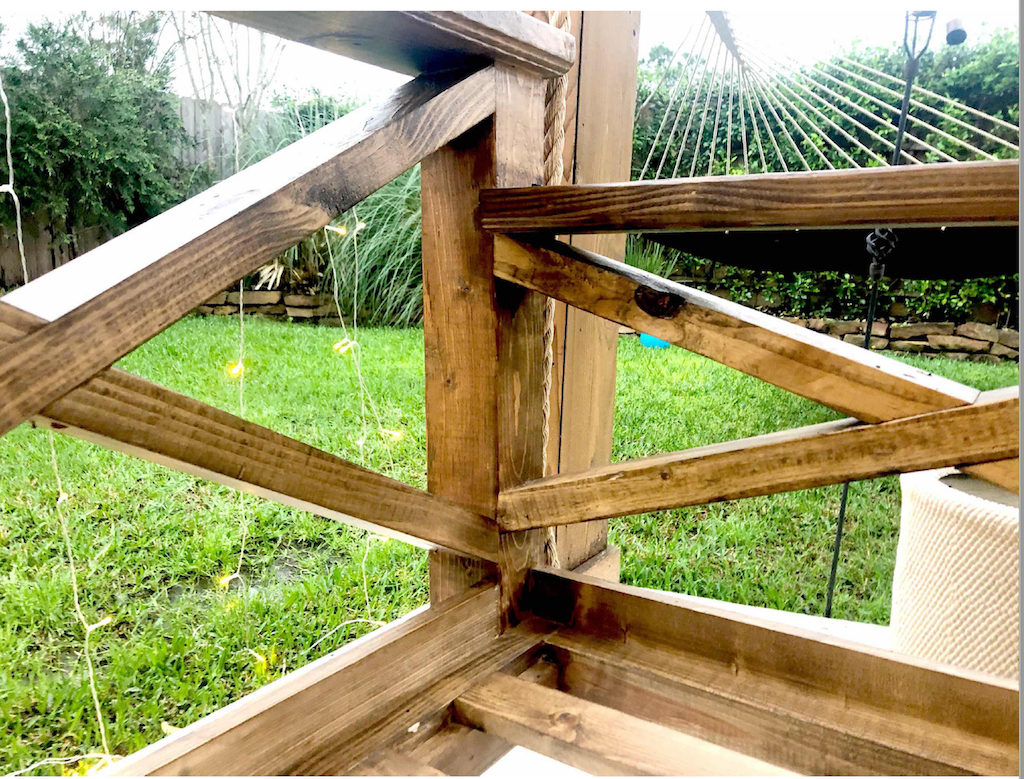

- Hang using thick 1′ rope secured with rope clamps.
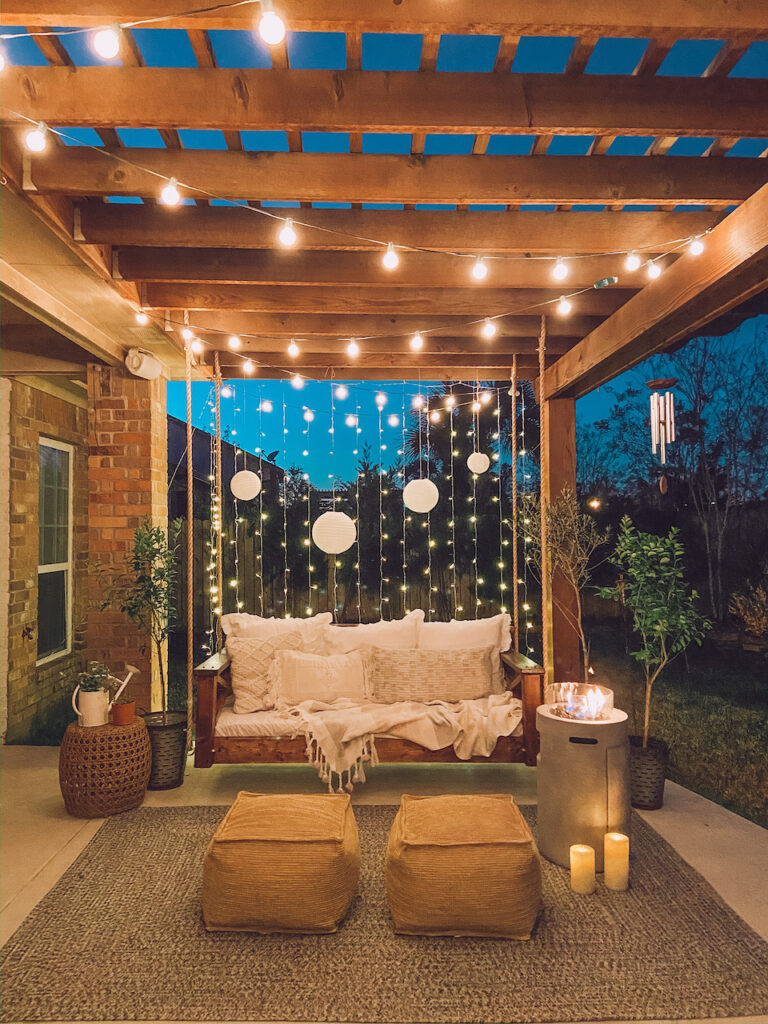
Since we hung this swing, I have spent almost every day outside! I feel like I am in a tropical vacation in my backyard!
Happy building!
xoxo,
Leanna


How thick is the mattress you put in? I love this!
Have the lights behind the swing been a problem with the littles when they’re playing? Are they anchored at the bottom? They add so much evening charm.
Thank you for such complete video reviews of the processes, too! Much appreciated.
Nope not at all, they don’t really go back there. And the lights are not anchored at the bottom and have been fine through all the rain storms.
Did you wrap your mattress in plastic?
yes it has a plastic mattress cover then a fitted sheet!
Can you link some mattresses or cushion to fit this size swing?
its a single size mattress – smaller then a twin but bigger then a crib
Thank you for this tutorial! One question— any advice on the pillows for the back? Are they Euro size? Do you have any recommendations? Many thanks ????!
they are euro pillows! they aren’t outdoor pillows but anything that is white can be bleached easily!