DIY Herringbone Sponge Wall Tutorial
DIY Herringbone Sponge wall, How to sponge paint a herringbone pattern, a fun and easy tutorial to transform any wall in your home
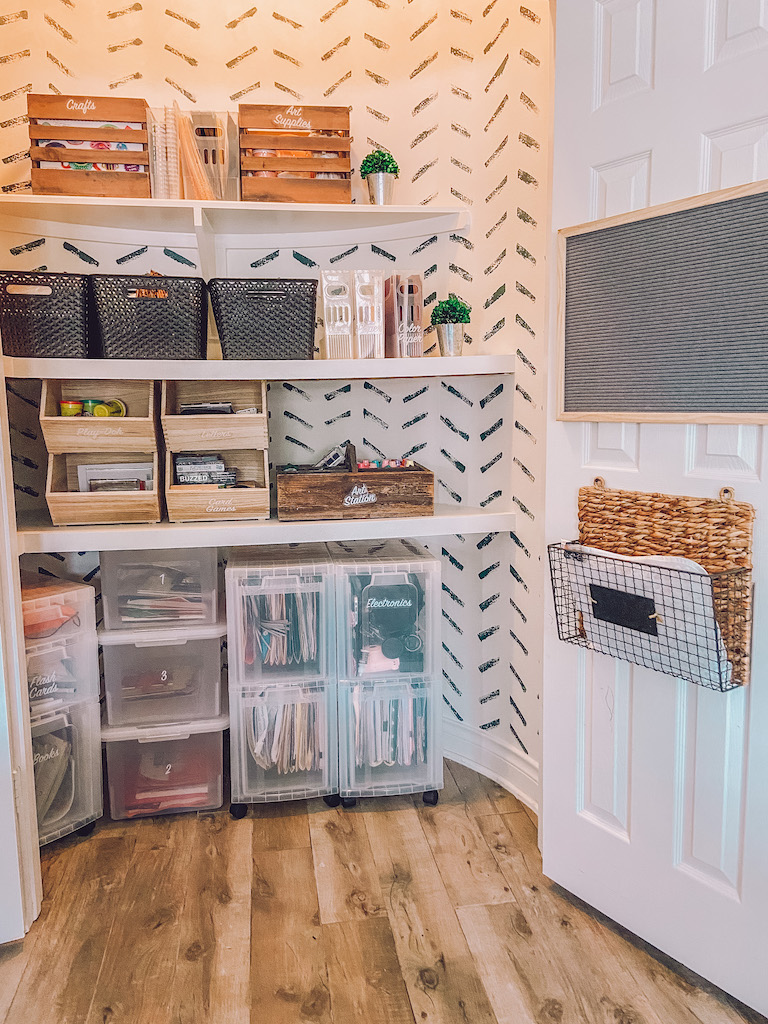
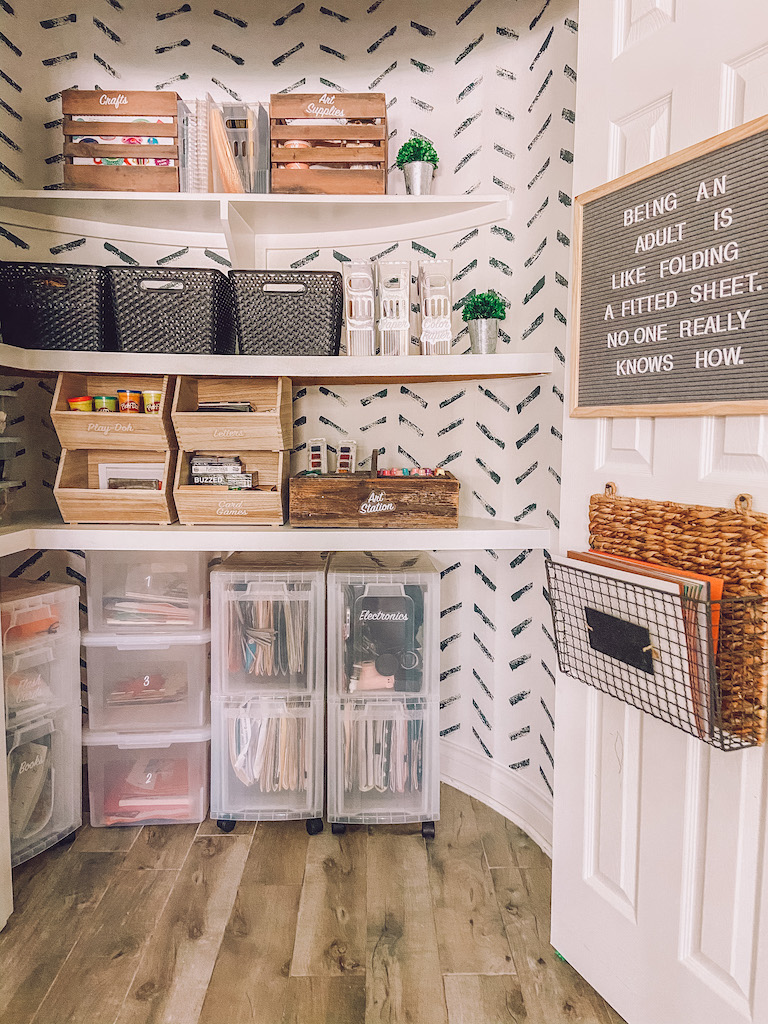
I have been seeing so many fun sponge walls recently on Pinterest and Instagram and have LOVED how easy they transform any space! However, even though I knew I wanted to tackle this simple project, it took me a while to figure out what I wanted to sponge paint! After I organized my office closet, a light bulb went off….. the walls just needed a little something! I knew doing a sponge painted wall would be the perfect addition!

I will be doing an entire post on how I organized the office closet, so don’t worry!!! If you LOVE to organize like I do, or are looking for organizational tips in your own home, check out these posts here:
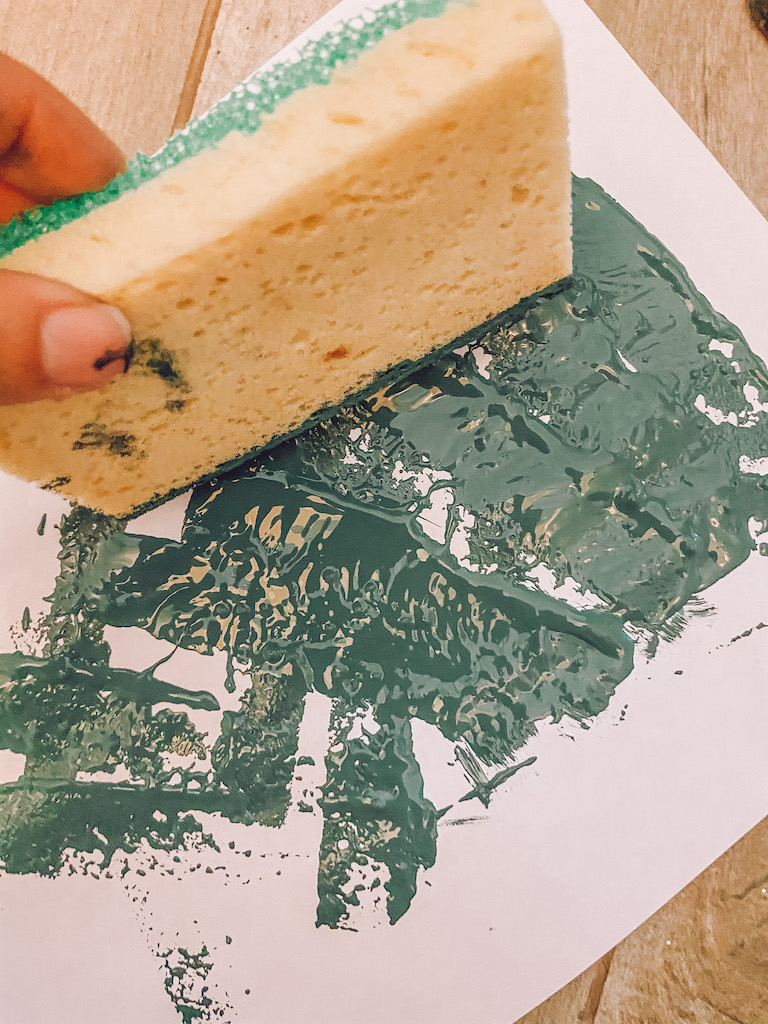
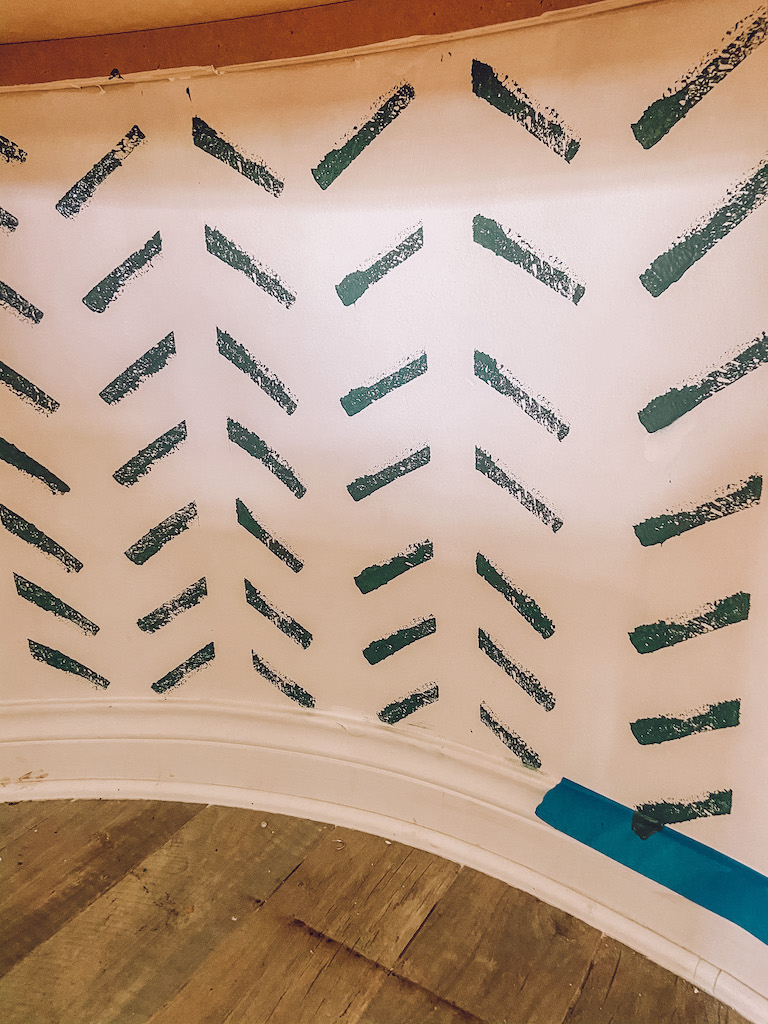
This project was SO easy! All you need is paint and a sponge!!! What I love about a sponge wall is that you can do lots of different patterns! I decided to do the herringbone pattern.
The office closet only took a few hours to finish and it really brought this closet to life! Even Simon was impressed at how cool it looked! I used a herringbone wallpaper treatment in Olivers bathroom, and this is an easy and cost effective alternative. It is actually way easier to do the the sponge wall then to hang wallpaper in my opinion!

How to DIY Sponge Paint a Wall
Materials Needed
- Sponge
- Paint – I used Benjamin Moore in Salamander
- Painters Tape
- Tray for the paint
- Extra paper plate or piece of paper

Directions:
- Add paint to the painters tray
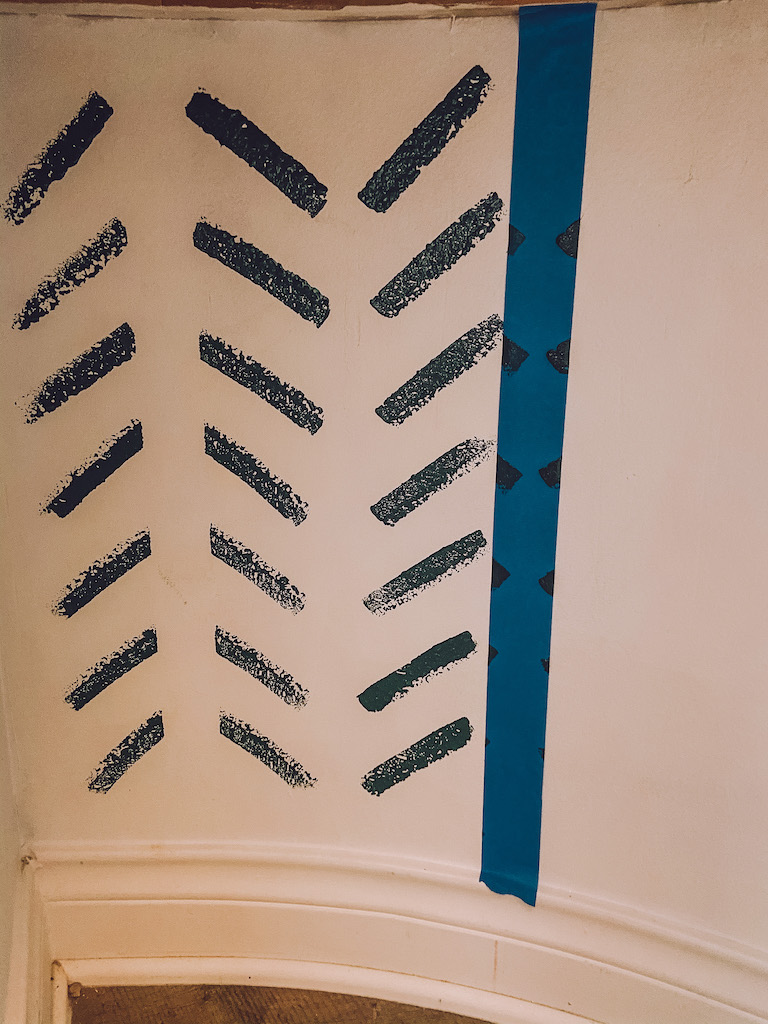
- Tape off the wall trim with blue painters tape
- Start at either the top or bottom of the wall, I started at the bottom and worked my way up.
- Use the side of the sponge and dip into the paint carefully
- Dap off the extra paint. The secret to sponge painting is to make sure you don’t apply too much paint to the sponge! Apply paint to the sponge and dab the extra off on a piece of paper or paper plate before applying to the wall.
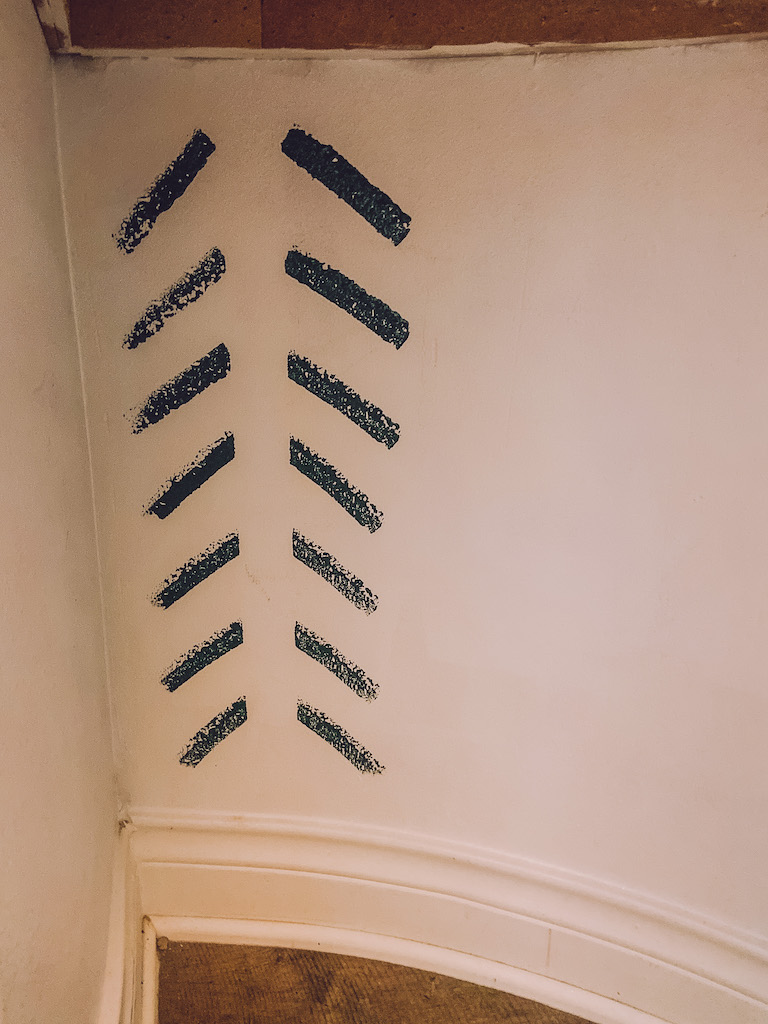
- Apply the sponge to the wall with the pattern you choose. If you choose herringbone, apply the sponge at an angle. Do one side of the herringbone first. To make keep the pattern on a straight line, use painters tape down the middle of the herringbone.
- To do the next line, make sure to add a space. Keep the space consistent throughout the pattern.
- Repeat until finished
This easy tutorial to DIY herringbone sponge wall was so fun! I completed the entire thing while Oliver took a nap! Let me know if you decide to sponge paint a wall in your home!
For your shopping convenience I listed some of the products I used to organize the office closet below:
xoxo,
Leanna

Your sponge wall is amazing !!!