How to Build DIY Barn Doors for Under $300
If you are wondering how to build DIY sliding barn doors, we are sharing the full tutorial in this blog post! This post will show you the step by step tutorial on how to make a barn door for your home. We will also share the FREE DIY barn door plans. Add this easy DIY to your to do list!
I have to say my hubby is the best ;). Without him, ya’ll wouldn’t be getting free engineering plans! Today I am sharing the full tutorial on how to build DIY Barn Doors so you can build beautiful barn doors in your own home. We are even including the FREE plans!!! Barn doors can cost a small fortune to custom build and the design is relatively simple to do on your own. Sliding barn doors can easily transform any room in your home, and can also make a doorway appear much bigger than it is in reality!
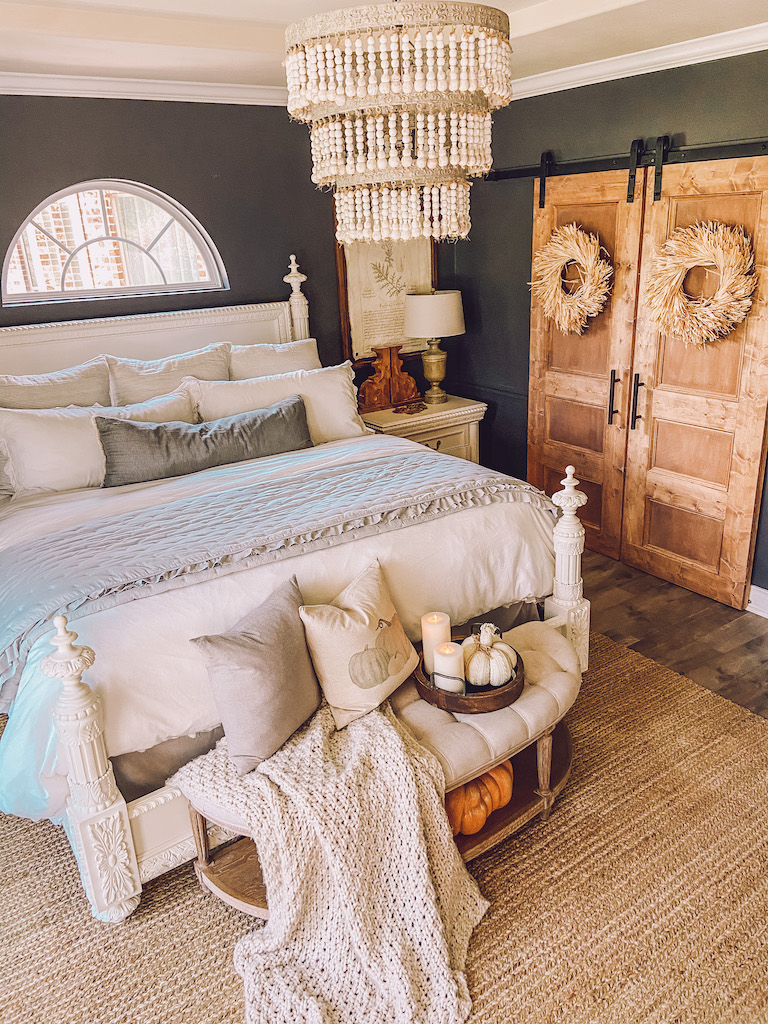
We made these DIY barn doors in our bedroom and I am just obsessed with how they turned out! I decided to stain them to look like antique barn doors and I think they look so pretty! You can also paint them too!

How to Build DIY Barn Doors
Materials to Buy
- 4ft x 8ft x 1/2” thick smooth Plywood Sheet (x1)
- 1”x6” x 10ft Pine Board (x8)
- 1/2” x 2” x 8ft (x2) – or you can cut this piece from the 1”x6”
- Picture Frame Trim of your choice
Hardware
Steps to Build DIY Barn Doors:
- Lay 1X6 front face boards on flat surface, cleanest wood surfaces against the ground.
- Brad nail 1/2” x 2 edge boards. Be sure to keep face board joints closed and tight.
- Brad nail 1/2′ plywood sheet : it is ok to leave a gap between the plywood sheet and edge boards
- Flip the door over to inspect the front face. Use a hammer to tap close any excessive gaps at the joints, then add more brad nails to solidify the frame. Flip Door back over with front face against the ground to continue.
- Lay the back face boards over the door with the cleanest wood surfaces facing up. This time brad nail in place.
- Add the horizontal boards and brad nail in place. Lightly tap close any joint gaps before adding more nails.
- Use a miter saw to cute the framing trim and brad nail in place. Apply brad nails on angle toward the outer frame.
- Add the hardware – just drill a few holes in he precise locations. The instruction on how to install comes with the hardware kits.
FREE DIY Sliding Barn Door Plans

Watch this instructional DIY Video for more details!
How to Stain Wood to Make it Look Antique
Are you ready for the coolest stain technique ever? I wanted these doors to appear that they were old antique pieces that came from an old victorian house. To achieve this look I did a few simple steps!
Supplies
Directions
- Apply the Early American Stain very lightly. Add a VERY small amount of stain to the rag and apply in the direction of the wood grain.
- Before the stain is dry, apply the weathered oak stain. Use a very small amount and apply in the direction of the wood grain. Note: If you are doing a large area, work in small sections when using two stains from the above steps.
- Let the stain dry competely – about 12 hours.
- Apply the white wax on top of the stain. Apply in the direction of the stain using a cotton rag.


What did y’all do with the existing frame Ming for the doors that came with the house?