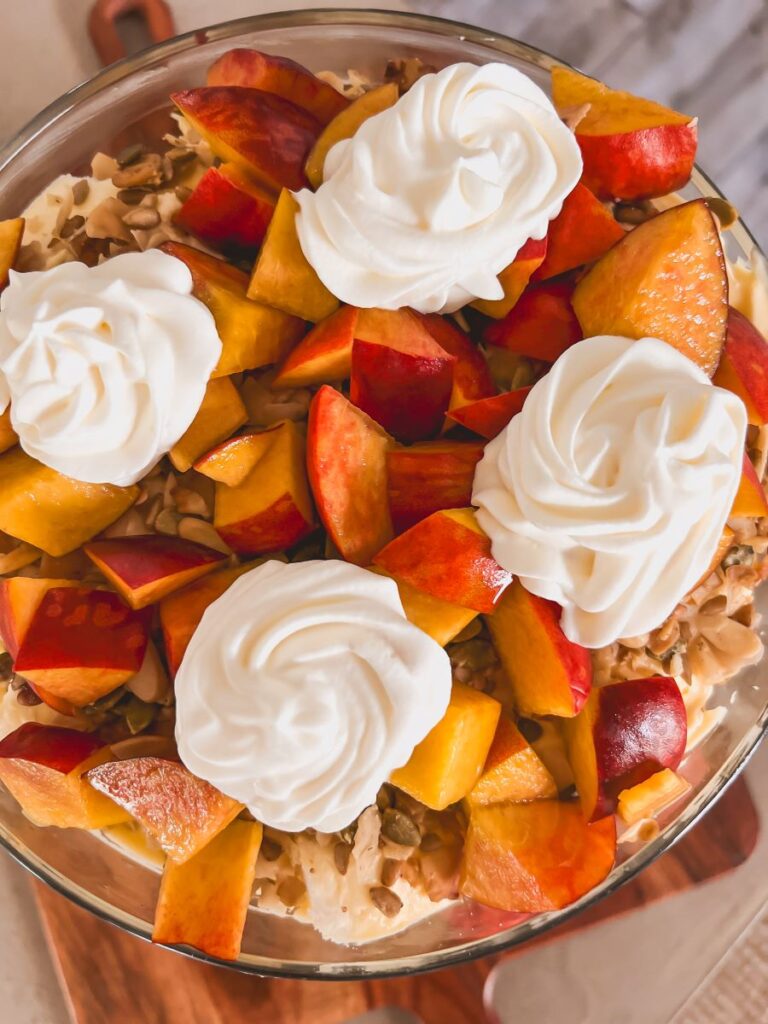
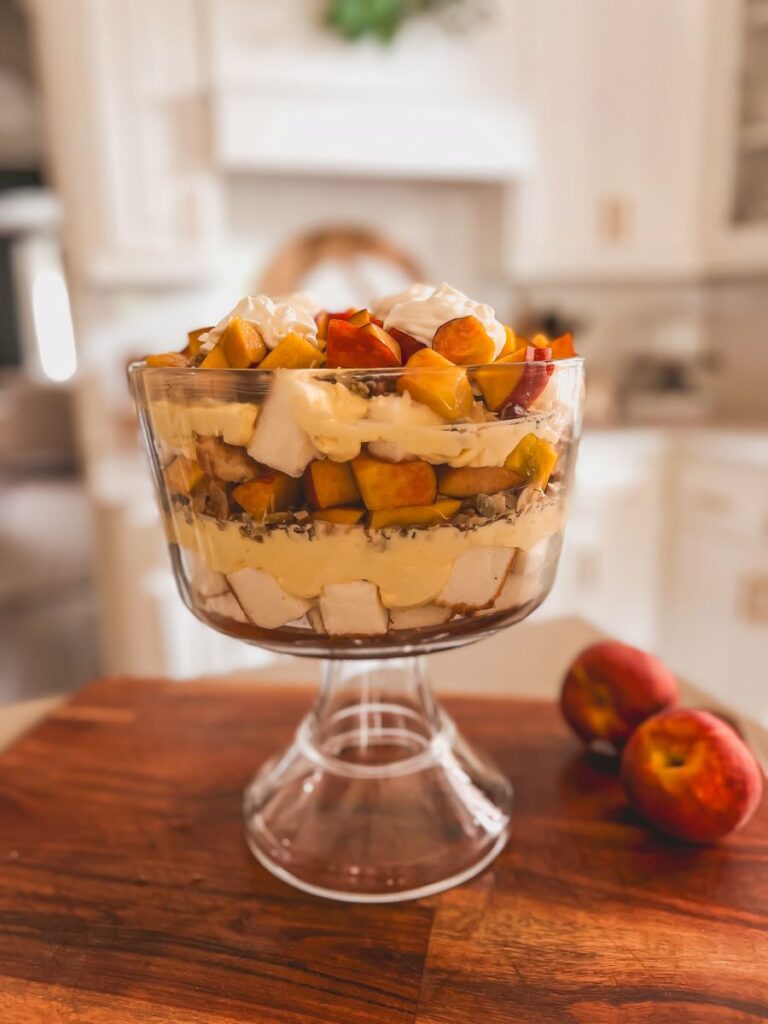
You’ll Love This Easy, No-Bake Peach Trifle!
This No-Bake Peach Trifle is such a crisp and refreshing summer treat to enjoy on a hot day! The warm spices combined with the peaches create such a flavorful bite that you won’t want to put down.

Just don’t add beef sautéed with peas and onions to your dessert trifle. 🙂

Ingredients
This delicious Peach Trifle recipe is courtesy of hummingbirdthyme.com!
Crumble Layer:
- 1 1/4 cup Nutrail Granola (you can also use rolled oats)
Peach Layer
- 2 lb Peaches (4 large, or 6 medium), pitted and sliced into 1/2″ thick wedges
- 2 Tbsp Lemon Juice
- 1/4 cup Brown Sugar (light or dark)
- 1/4 cup Granulated Sugar
- 1/2 tsp Cinnamon
- 1/4 tsp Nutmeg
Whipped Cream Layer
- 8 oz. Mascarpone Cheese, room temperature
- 16 oz. Heavy Cream
- 3/4 cup Confectioner’s Sugar, sifted
- (optional) 1/2 tsp Natural Vanilla
Cake Layer
- 1 package Angel Food Cake or Pound Cake
- Optional substitution: You can also use 1 pkg (7oz.) Lady Fingers (Savoiardi)
(Optional) For Garnish:
- One fresh peach, pitted and sliced
- Roasted Pecan halves or pieces
- Mint leaves
Directions
Follow these simple steps or each layer!
Peach Layer:
- Make sure your peach slices are thin, no more than 1/2″ thick. Stir all ingredients together. Set aside at least 30 minutes while the crisp cools and you make the whipped cream topping.
Mascarpone Whipped Cream:
- Whisk together the Mascarpone and sifted Confectioners Sugar. Set aside.
- Using a mixer or hand mixer, beat the cream until it is at the “soft peak” stage. Add in the mascarpone-sugar mixture and whip until peaks are more firm.
Layer the trifle:
- Cover the bottom of your trifle dish with the Angel Food Cake or lady fingers
- Spoon 1/3 of the Peach Mixture over the top, making sure to add some of the exuded liquid as well.
- Spoon and spread 1/3 of the Whipped Cream mixture over the peaches.
- Sprinkle 1 cup of the granola topping over the whipped cream.
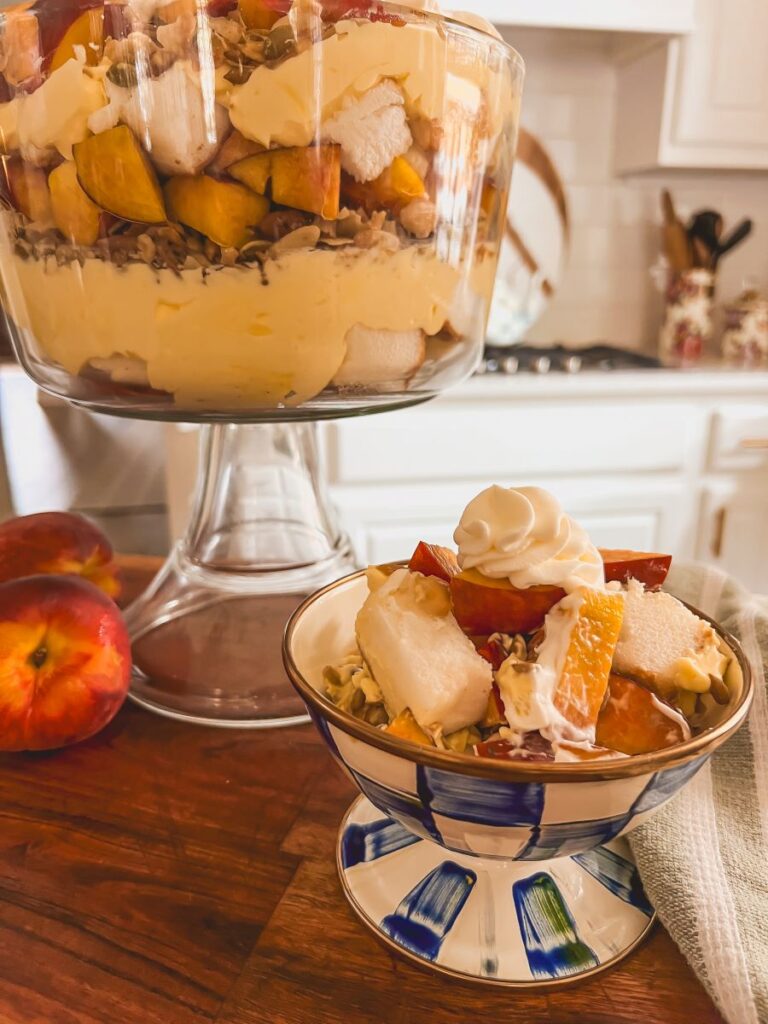
- Repeat the layers 2 more times. Garnish as desired.
- Refrigerate several hours or overnight.
Here’s a Quick Video Tutorial!
Perfect Presentation Platters
Trifle Dish: My trifle dish is from Target for a great price!
Individual Bowls: I used this blue-and-white checkered ice cream dish by MacKenzie-Childs, which also comes in black, gray, or pink. Amazon also has this beautiful set of rose-colored dessert dishes for a great price!
Chopping Boards: I use round wooden serving boards all the time, both for prep and serving. Some of my favorites are this white striped wooden board from Kirklands, this mango wood board from Target, this marble and wood rectangular tray from JC Penney, or this round marble and wood option from World Market. Finally, this MacKenzie Childs checkered board is a bit of an investment, but I use it all the time and also display it as decor in my kitchen.
Kitchen Links: I get asked all the time about the products in the background of my kitchen. Much of it is from MacKenzie-Childs, which I have slowly grown a collection of over the years! My favorites are this checkered chopping board, my black and white checkered teapot, and the gray and white checkered utensil holder. I also have this enamel canister that you can find in small, medium, or large.
Can I Prep This Peach Trifle Ahead of Time?
Yes! This dessert tastes even better the second day as all of the flavors marinate. You can make this up to two days in advance (and it will need to refrigerate for several hours before serving.)
Storing Leftovers
Cover the Peach Trifle with Saran Wrap or foil and place in the refrigerator. This should stay fresh for 3-4 days!

Enjoy!
I hope you loved this Peach Trifle as much as I did! For similar and equally delicious layered dishes, be sure to check out my Simple Patriotic Berry Trifle, adorable and Easy No-Bake Trifle, or this beautiful 7-Layer Spring Salad. Have a wonderful day, friends!
PrintYou’ll Love This Easy, No-Bake Peach Trifle!

This No-Bake Peach Trifle is such a crisp and refreshing summer treat to enjoy on a hot day! The warm spices combined with the peaches create such a flavorful bite that you won’t want to put down.
Ingredients
Crumble Layer:
-
- 1 1/4 cup Nutrail Granola
Peach Layer
-
- 2 lb Peaches (4 large, or 6 medium), pitted and sliced into 1/2″ thick wedges
-
- 2 Tbsp Lemon Juice
-
- 1/4 cup Brown Sugar (light or dark)
-
- 1/4 cup Granulated Sugar
-
- 1/2 tsp Cinnamon
-
- 1/4 tsp Nutmeg
Whipped Cream Layer
-
- 8 oz. Mascarpone Cheese, room temperature
-
- 16 oz. Heavy Cream
-
- 3/4 cup Confectioner’s Sugar, sifted
-
- (optional) 1/2 tsp Natural Vanilla
Cake Layer
-
- 1 package Angel Food Cake or Pound Cake
-
- Optional substitution: You can also use 1 pkg (7oz.) Lady Fingers (Savoiardi)
(Optional) For Garnish:
-
- One fresh peach, pitted and sliced
-
- Roasted Pecan halves or pieces
-
- Mint leaves
Instructions
Peach Layer:
-
- Make sure your peach slices are thin, no more than 1/2″ thick. Stir all ingredients together. Set aside at least 30 minutes while the crisp cools and you make the whipped cream topping.
Mascarpone Whipped Cream:
-
- Whisk together the Mascarpone and sifted Confectioners Sugar. Set aside.
- Using a mixer or hand mixer, beat the cream until it is at the “soft peak” stage. Add in the mascarpone-sugar mixture and whip until peaks are more firm.
Layer the trifle:
-
- Cover the bottom of your trifle dish with the Angel Food Cake or lady fingers
- Spoon 1/3 of the Peach Mixture over the top, making sure to add some of the exuded liquid as well.
- Spoon and spread 1/3 of the Whipped Cream mixture over the peaches.
- Sprinkle 1 cup of the granola topping over the whipped cream.
- Repeat the layers 2 more times. Garnish as desired.
- Refrigerate several hours or overnight.