Halloween Marshmallow Cereal Bars with Count Chocula
hese Halloween Marshmallow Cereal Bars with Count Chocula are an easy no-bake Halloween treat made with gooey marshmallows and chocolate cereal, then dipped in green candy melts and decorated like little Frankensteins. They’re cute, chewy, and perfect for Halloween parties or a fun spooky-season recipe to make with kids.

There’s something about seeing Monsters cereal back on store shelves that makes it officially feel like Halloween season. As soon as Count Chocula comes home with us, my kids are ready for all things spooky—and I’m ready to start making Halloween treats.
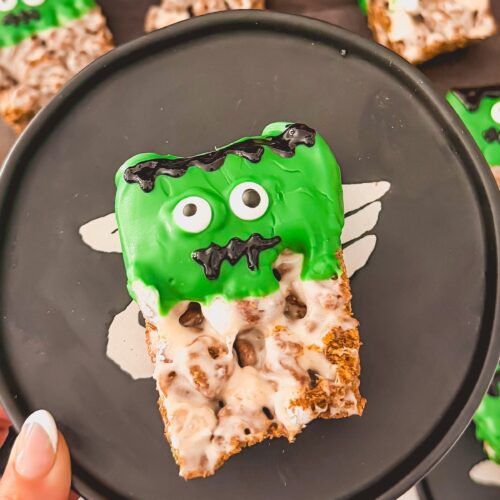
This year, I turned Count Chocula into these adorable Frankenstein marshmallow cereal bars. The base is buttery, gooey, and crunchy, and then each bar gets dipped in green candy coating and finished with candy eyes and a silly Frankenstein face. They look like you spent forever making them, but they’re actually incredibly easy. And because every little monster can look different, they’re such a fun Halloween recipe to make with kids.
If you’re planning a Halloween party, serve these alongside my Monster Burgers, Halloween Snack Pudding Cups and Halloween Ice Cream Bar for an easy spooky spread everyone will love.
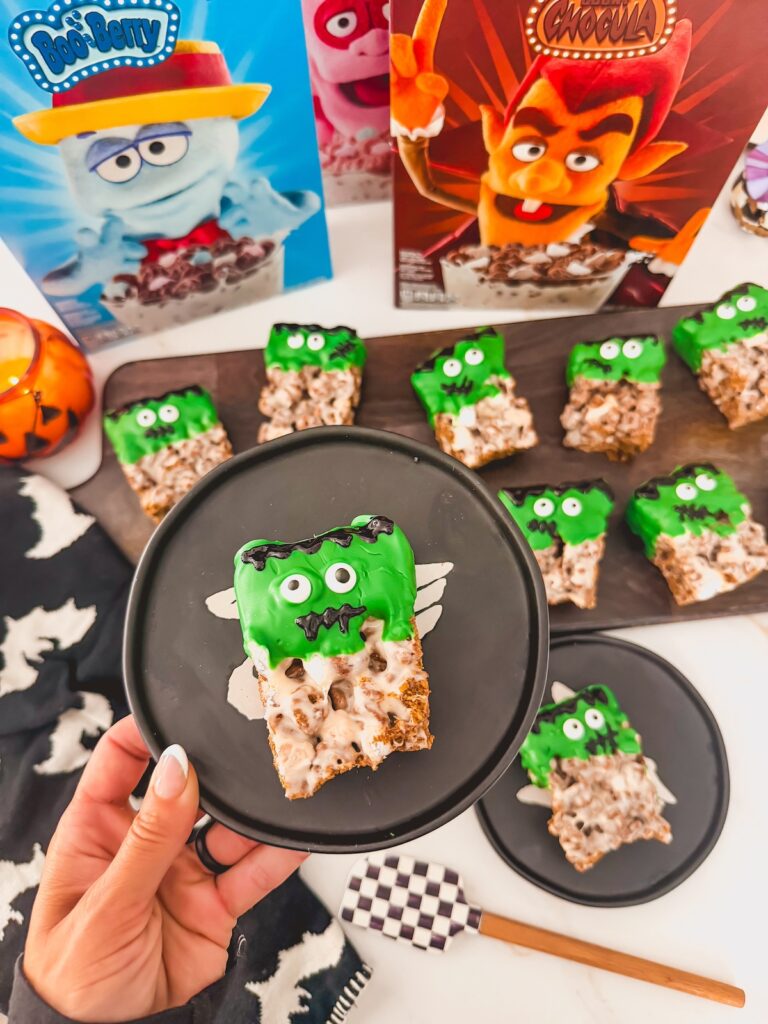
Why You’ll Love These Halloween Cereal Bars
These easy Halloween cereal bars check all the boxes for a fun spooky-season treat.
- No baking required. Everything comes together on the stovetop before the bars are decorated.
- Easy ingredients. You only need cereal, marshmallows, butter, vanilla, salt, and a few decorating supplies.
- Soft and gooey. Melting the marshmallows over low heat keeps the bars chewy instead of hard.
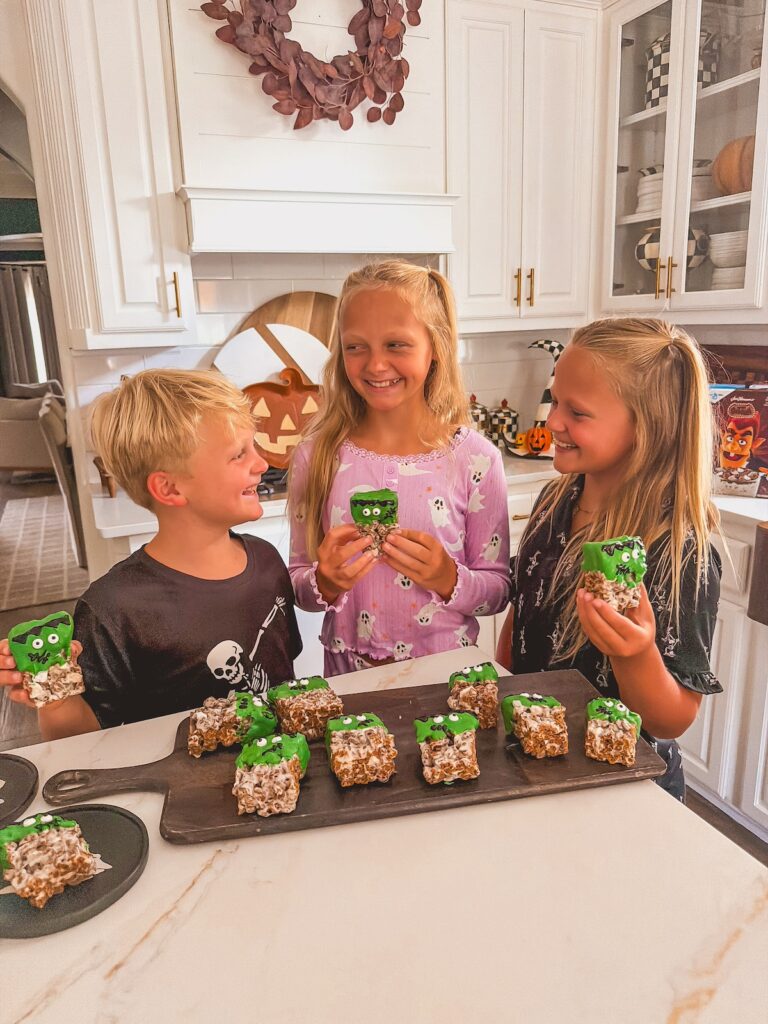
- Perfect for kids. Let everyone decorate their own Frankenstein face.
- Great for Halloween parties. They’re easy to pick up and serve without plates or utensils.
- Easy to customize. Make them with Count Chocula, Franken Berry, Boo Berry, or even a combination of Monsters cereals.
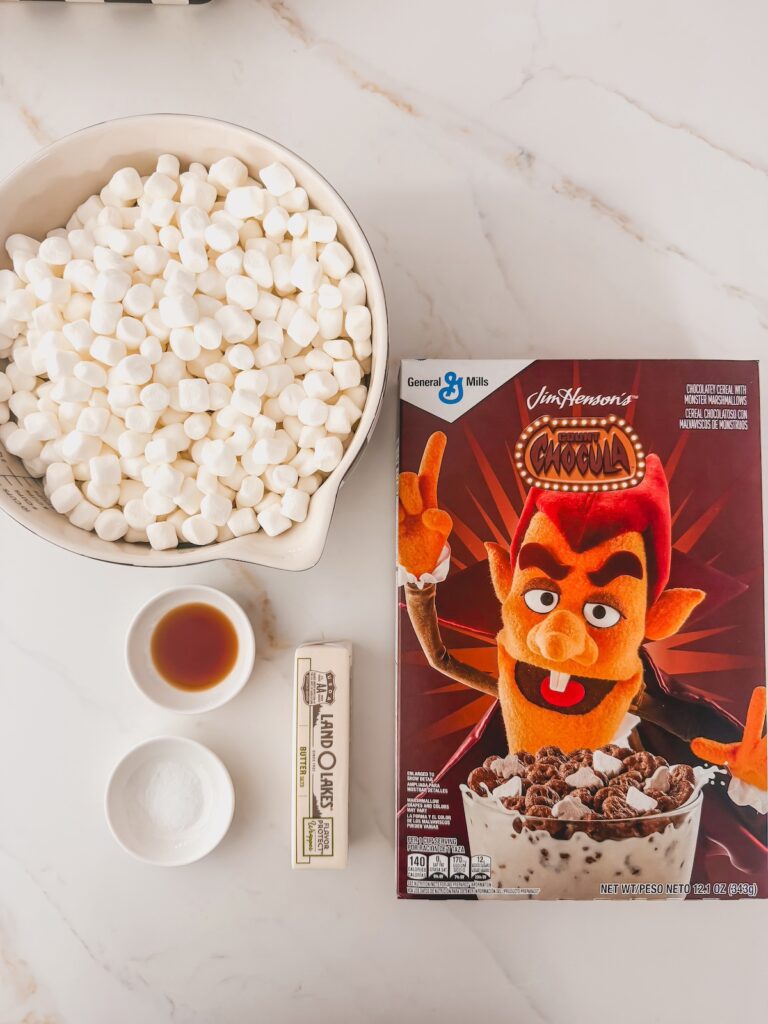
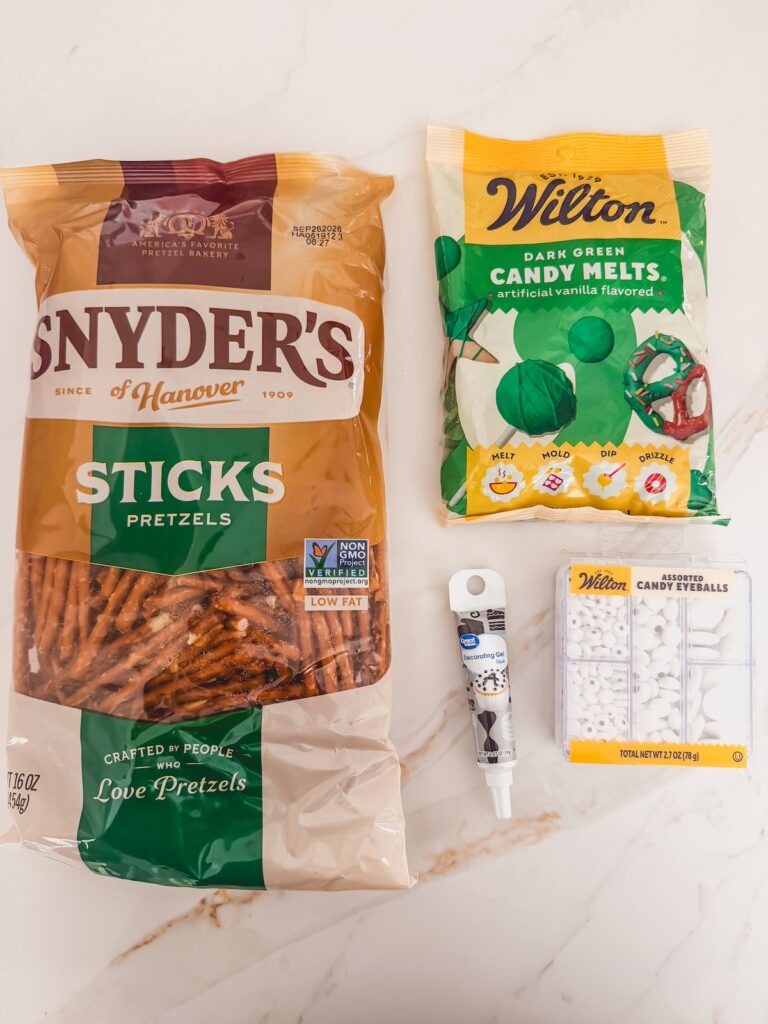
Ingredients for Halloween Marshmallow Cereal Bars
You only need a handful of ingredients to make these Count Chocula cereal bars. You’ll find the exact measurements in the recipe card at the bottom of the post.
- Count Chocula Cereal: This chocolatey Monsters cereal replaces traditional crispy cereal and gives the bars their fun Halloween flavor and crunch.
- Mini Marshmallows: The marshmallows melt down to create the sweet, gooey mixture that holds the cereal bars together.
- Butter: Adds flavor and helps create a smooth melted marshmallow mixture.
- Vanilla Extract: A little vanilla makes a big difference and gives the marshmallow mixture a richer flavor.
- Salt: Just enough to balance the sweetness of the marshmallows and chocolate cereal.
- Green Candy Melting Wafers: Dipping the tops of the bars in green candy melts instantly transforms them into little Frankensteins.
- Candy Eyes: The easiest way to bring your monsters to life.
- Black Decorating Gel: Use this for Frankenstein’s hair, mouth, stitches, eyebrows, and any other details you’d like to add.
How to Make Halloween Marshmallow Cereal Bars
These Frankenstein cereal treats start with a simple stovetop marshmallow cereal mixture before getting their spooky makeover.
Step 1: Prepare a 9×13-Inch Pan
Lightly grease a 9×13-inch baking pan or line it with parchment paper.
If you’re using parchment, leave a little extra hanging over two sides of the pan. You can use it as handles to lift the entire batch out before cutting.
Step 2: Melt the Butter and Marshmallows
Melt the butter in a large pot over low heat.
Add the mini marshmallows and stir frequently until they’re completely melted and the mixture is smooth.
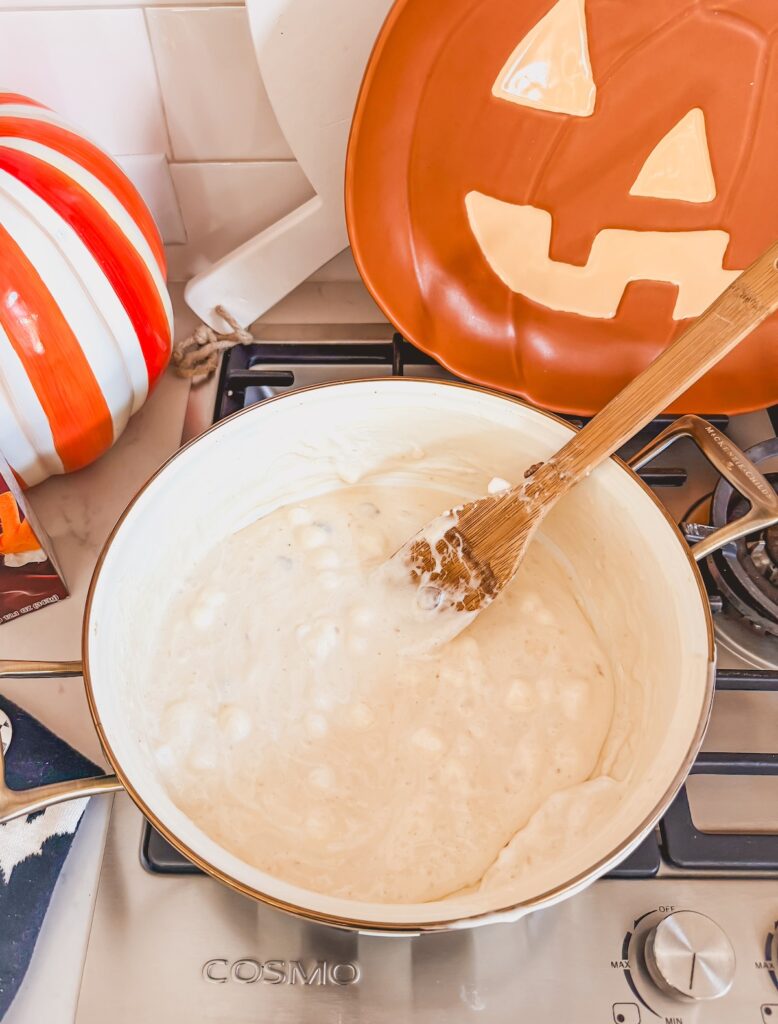
Avoid turning up the heat to make this step go faster. High heat can cause the finished marshmallow cereal bars to become harder once they cool.
Step 3: Add Vanilla and Salt
Remove the melted marshmallow mixture from the heat and stir in the vanilla extract and salt.
Step 4: Add the Count Chocula Cereal
Immediately add the Count Chocula cereal and gently fold everything together until the cereal is evenly coated in the marshmallow mixture.
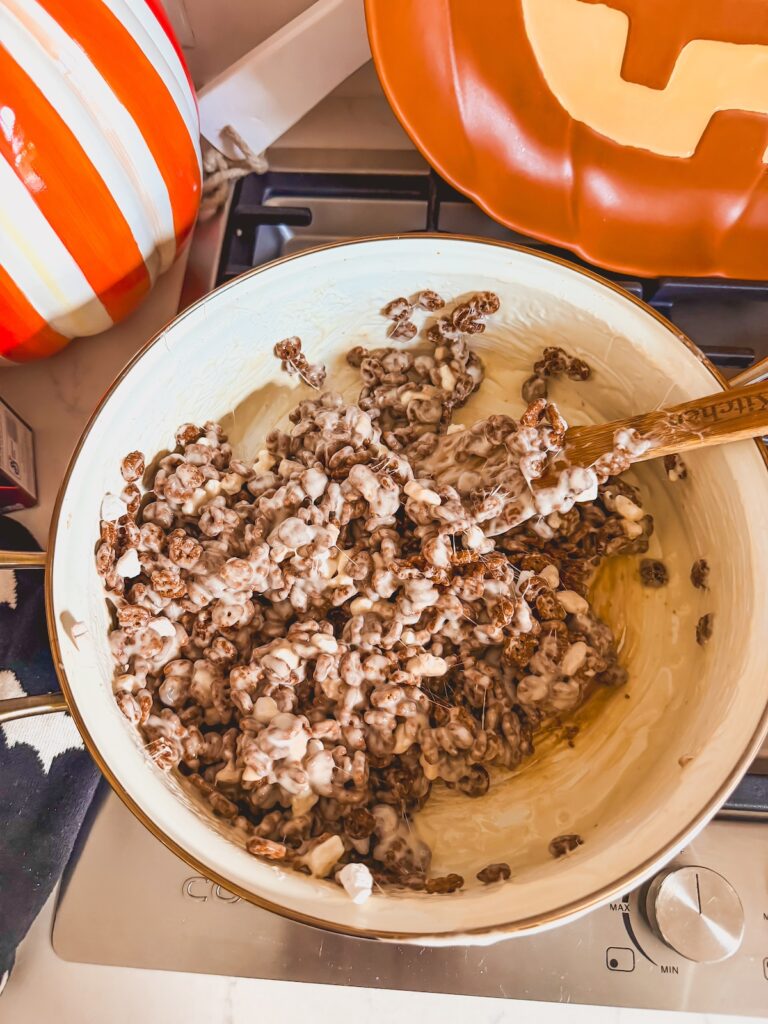
Work fairly quickly because the mixture will become harder to stir as it cools.
Step 5: Press Into the Pan
Transfer the mixture into your prepared 9×13-inch pan.
Lightly grease a spatula or your hands and gently press the cereal mixture into an even layer.
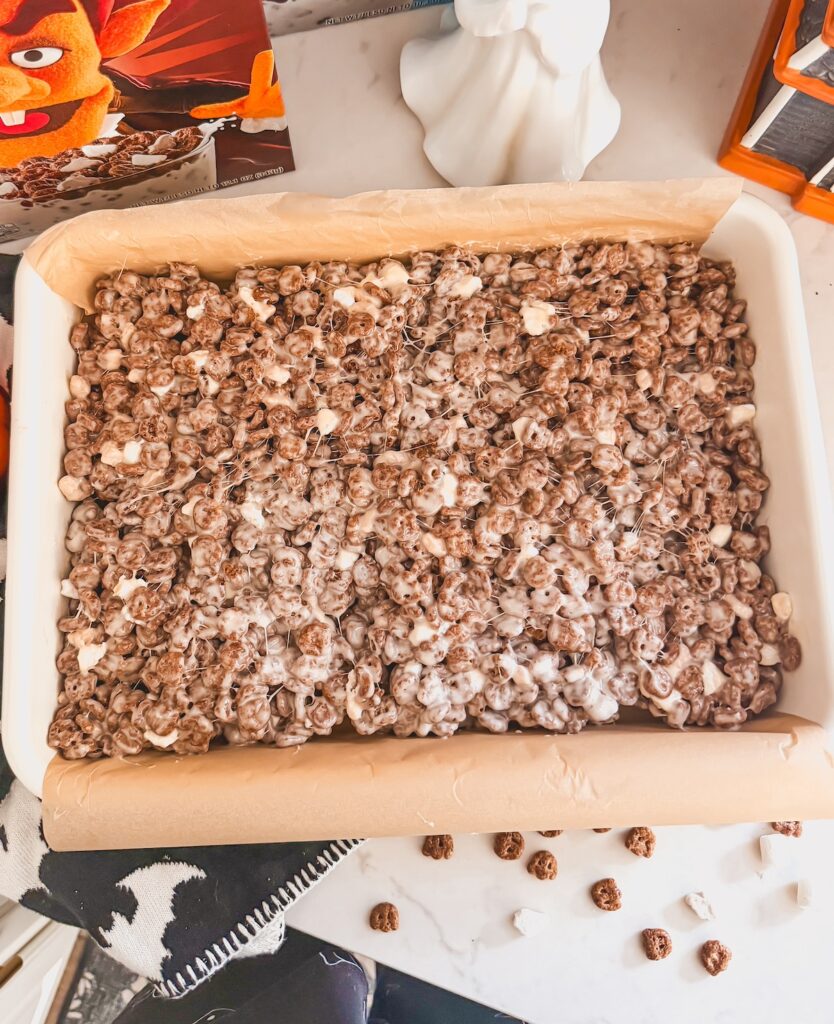
The key word here is gently. Packing the cereal down too firmly can give you dense, hard bars instead of soft and chewy ones.
Let the bars cool completely before cutting.
Step 6: Cut Into Rectangles
Lift the cooled cereal mixture from the pan and cut it into rectangular bars.
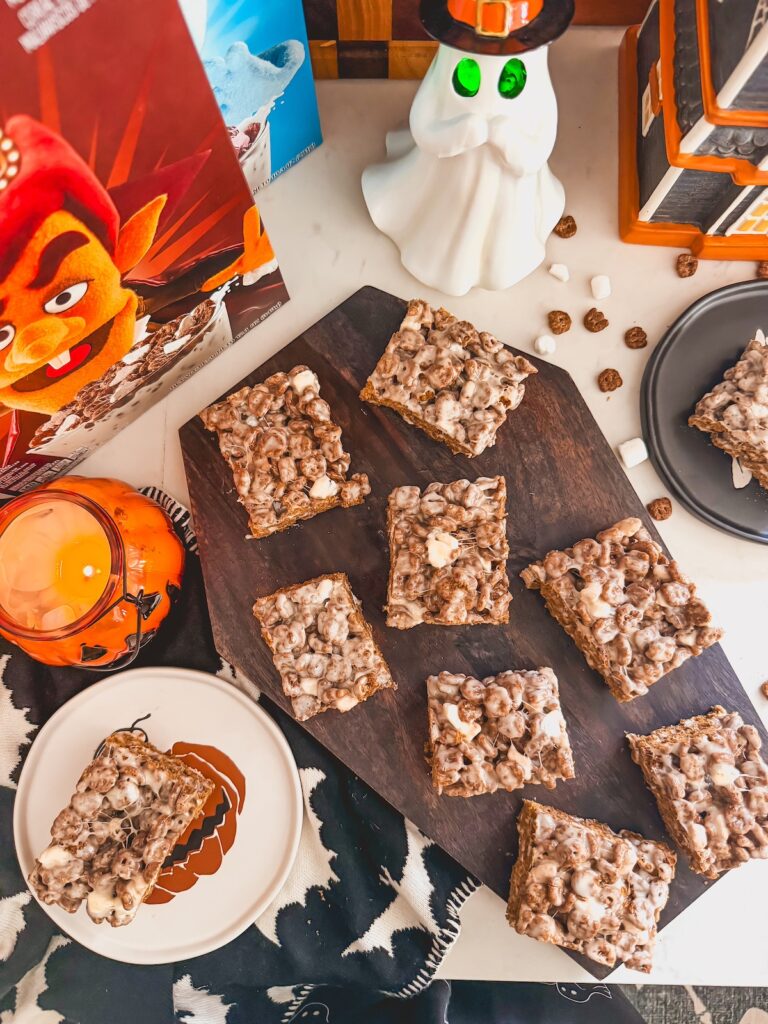
Instead of cutting them into squares, I like making them slightly taller because the rectangular shape gives you plenty of room to create Frankenstein’s face.
Step 7: Dip in Green Candy Melts
Melt the green candy wafers according to the package directions.
Dip the top portion of each cereal bar into the melted green coating and allow any excess to drip back into the bowl.
Place the dipped bars onto parchment or wax paper.
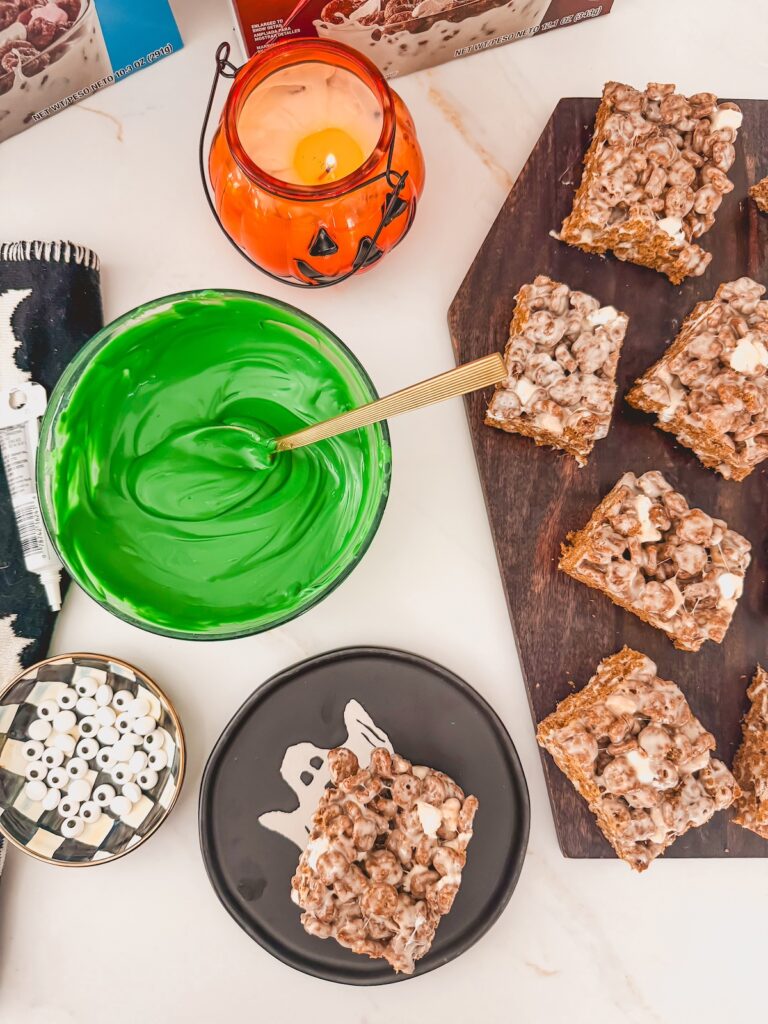
Step 8: Add the Candy Eyes
While the green candy coating is still wet, gently press two candy eyes onto each bar.
This lets the candy coating act like glue, so you don’t need anything extra to attach them.
Step 9: Make the Frankenstein Faces
Once the green coating has set enough that it won’t run, use black decorating gel to add Frankenstein’s hair, mouth, stitches, or eyebrows.
Don’t worry about making them identical. Different expressions are part of what makes these Frankenstein Halloween treats so cute!
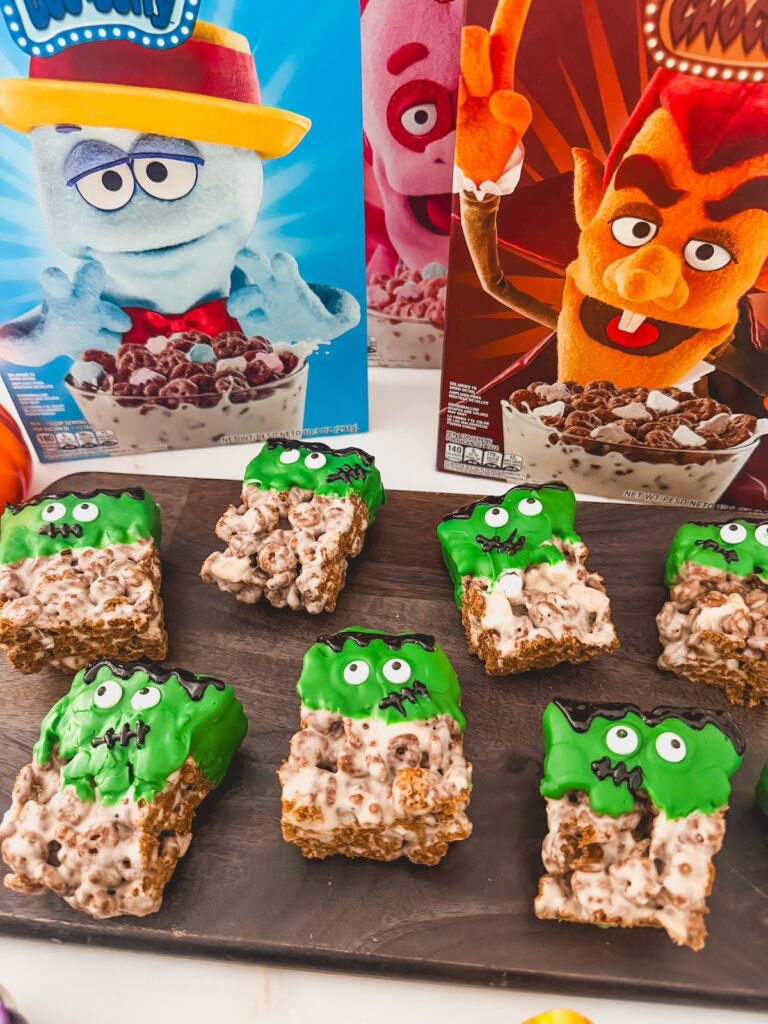
Allow the decorations to set before serving.
How to Keep Marshmallow Cereal Bars Soft
The best marshmallow cereal bars should be soft, chewy, and gooey—not hard or overly sticky.
A few simple tricks make a big difference:
- Use low heat. Slowly melt the butter and marshmallows rather than trying to speed things up with higher heat.
- Remove the pot from the heat before adding the cereal. There’s no reason to continue cooking the mixture once the marshmallows have melted.
- Don’t pack the mixture into the pan. Gently press it into an even layer without smashing the cereal.
- Measure the cereal carefully. Too much cereal can leave the bars dry, while too little can make them overly sticky.
- Keep them covered. Once the bars have cooled, store them in an airtight container so they don’t dry out.
Decorating Frankenstein Cereal Bars
The decorating is what turns these simple Count Chocula marshmallow bars into an adorable Halloween dessert.
- I love using green candy melting wafers because you don’t have to worry about tempering chocolate or getting the right shade with food coloring.
- Dip only the top portion of each rectangle so some of the Count Chocula cereal remains visible underneath.
- Add the candy eyes while the coating is wet, then use your black decorating gel to create different faces.
Try adding:
- Spiky Frankenstein hair
- A crooked smile
- Stitches
- Eyebrows
- A straight monster mouth
- Different-sized candy eyes
This is also a great time to get the kids involved. Set everything out and let them design their own monsters.
Monster Cereal Variations
Count Chocula isn’t the only Monsters cereal you can use for this recipe.
- Franken Berry Cereal Bars: Swap the Count Chocula for Franken Berry for a fruity berry-flavored version.
- Boo Berry Cereal Bars: Use Boo Berry to make another fun variation.
- Monster Mash Cereal Bars: Combine Count Chocula, Boo Berry, and Franken Berry in the same batch for the ultimate Monsters cereal treat.
- You can even change the candy melt colors and create completely different Halloween monsters.
Easy Halloween Treat to Make with Kids
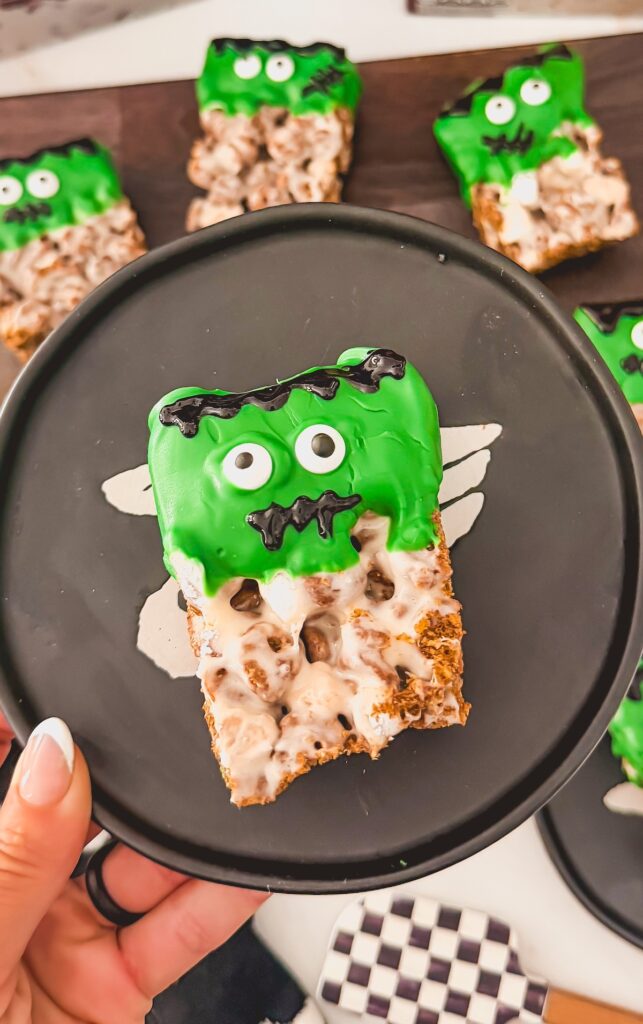
One of my favorite things about these Halloween marshmallow cereal bars is that kids can actually help make them.
- An adult can handle melting the butter and marshmallows on the stove, and then the kids can take over once the cereal bars have cooled.
- Set up a little decorating station with the bars, melted green candy wafers, candy eyes, and decorating gel.
- Let everyone dip and decorate their own Frankenstein. There’s really no wrong way to do it, which makes this a much more relaxed Halloween activity than a dessert that requires perfect piping or decorating.
Make-Ahead Instructions
These Halloween cereal bars are easy to make ahead for a party.
- You can prepare the marshmallow cereal base first, press it into the pan, and keep it tightly covered at room temperature until you’re ready to cut and decorate.
- You can also completely assemble the Frankenstein bars a day before you need them.
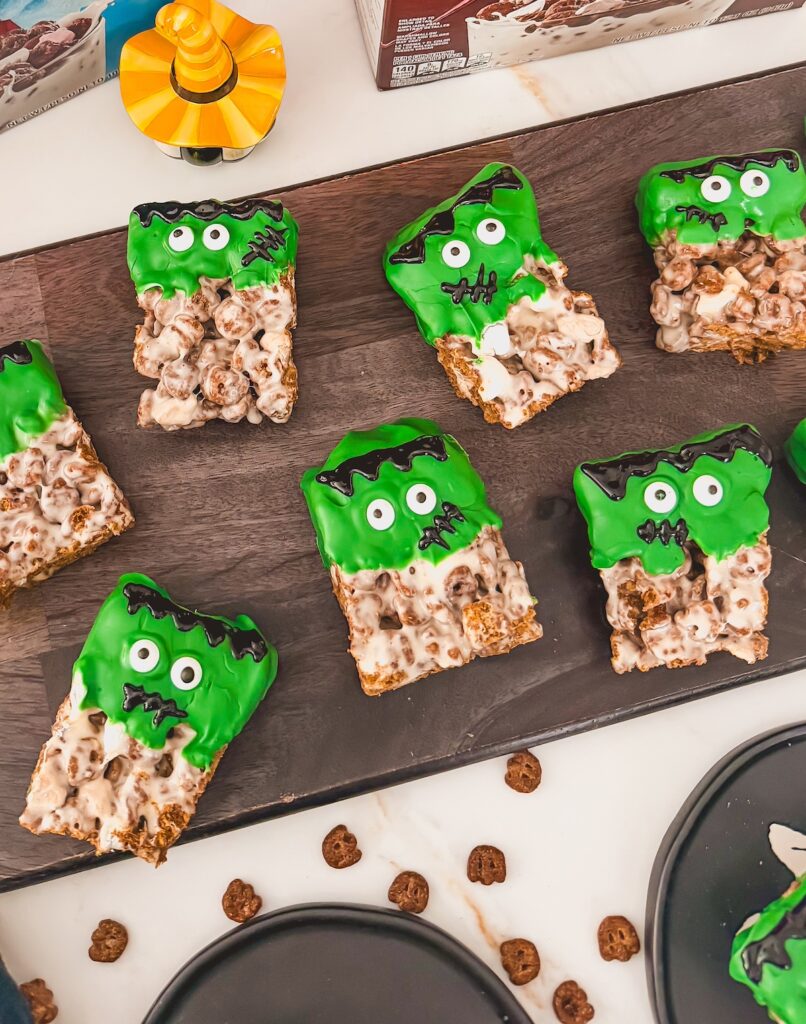
- Once the candy coating and decorating gel have set, place them in an airtight container with parchment or wax paper between the layers.
How to Store Count Chocula Cereal Bars
- Store leftover marshmallow cereal bars in an airtight container at room temperature.
- For the best soft and chewy texture, enjoy them within about 2–3 days.
- If you need to stack the decorated bars, place parchment or wax paper between each layer to protect the Frankenstein faces.
- I don’t recommend refrigerating them. Refrigeration can make marshmallow cereal bars firmer and affect their chewy texture.
What to Serve at a Halloween Party
These Frankenstein cereal bars are perfect for a Halloween party because they’re already portioned into individual treats.
Create a spooky snack table and serve them alongside my:
You can also place each Frankenstein bar in a clear treat bag once the decorations have completely set for an adorable Halloween party favor.
Frequently Asked Questions
Why did my marshmallow cereal bars turn out hard?
Hard cereal bars are often caused by overheating the marshmallows or pressing the mixture too firmly into the pan. Melt the marshmallows slowly over low heat and gently press the mixture into your pan.
How do you keep marshmallow cereal bars from sticking to the pan?
Lightly grease your 9×13-inch pan before adding the cereal mixture, or line it with parchment paper. You can also lightly grease your spatula or hands before pressing the mixture into the pan to keep the sticky marshmallow mixture from clinging to them.
Why are my marshmallow cereal bars falling apart?
If your cereal bars aren’t holding together, there may be too much cereal compared to the amount of melted marshmallow. Make sure the cereal is completely coated before transferring it to the pan, and allow the bars to cool and set completely before cutting.
You’ll Also Love
Looking for more easy Halloween recipes? Try these next:
Halloween Marshmallow Cereal Bars
Ingredients
Marshmallow Cereal Bars
- 3 tablespoons unsalted butter
- 14 ounces mini marshmallows
- 1 teaspoon vanilla extract
- ¼ teaspoon salt
- 9½ –10 cups Count Chocula cereal
For Decorating
- 12 ounces green candy melting wafers
- Candy eyes
- Black decorating gel
Instructions
- Lightly grease a 9×13-inch baking pan or line it with parchment paper.
- Melt the butter in a large pot over low heat.
- Add the mini marshmallows and stir frequently until completely melted and smooth.
- Remove the pot from the heat. Stir in the vanilla extract and salt.
- Add the Count Chocula cereal and gently fold until all of the cereal is evenly coated in the marshmallow mixture.
- Transfer the mixture to the prepared pan. Lightly grease a spatula or your hands and gently press the cereal mixture into an even layer. Don’t pack it down too firmly.
- Allow the bars to cool and set for about 30 minutes.
- Lift the cereal mixture from the pan and cut into 20–24 rectangular bars.
- Melt the green candy wafers according to the package directions.
- Dip the top portion of each cereal bar into the melted green candy coating. Allow the excess to drip off, then place on parchment or wax paper.
- While the green coating is still wet, add two candy eyes to each bar.
- Once the green coating begins to set, use black decorating gel to draw Frankenstein hair, mouths, stitches, and other details.
- Allow the decorations to set completely before serving.