How to Create a Simple and Sweet Halloween Ice Cream Bar
When you’re pressed for time and want to set up something that looks fancy but takes no time at all, this Halloween Ice Cream Bar is perfect for parties, playdates, or just a fun night at home with your people!

Making fun memories doesn’t have to be costly or time-consuming. My kids LOVED this and it came together so quickly with minimal spending. You could even do this after Halloween with leftover candy!

Ingredients
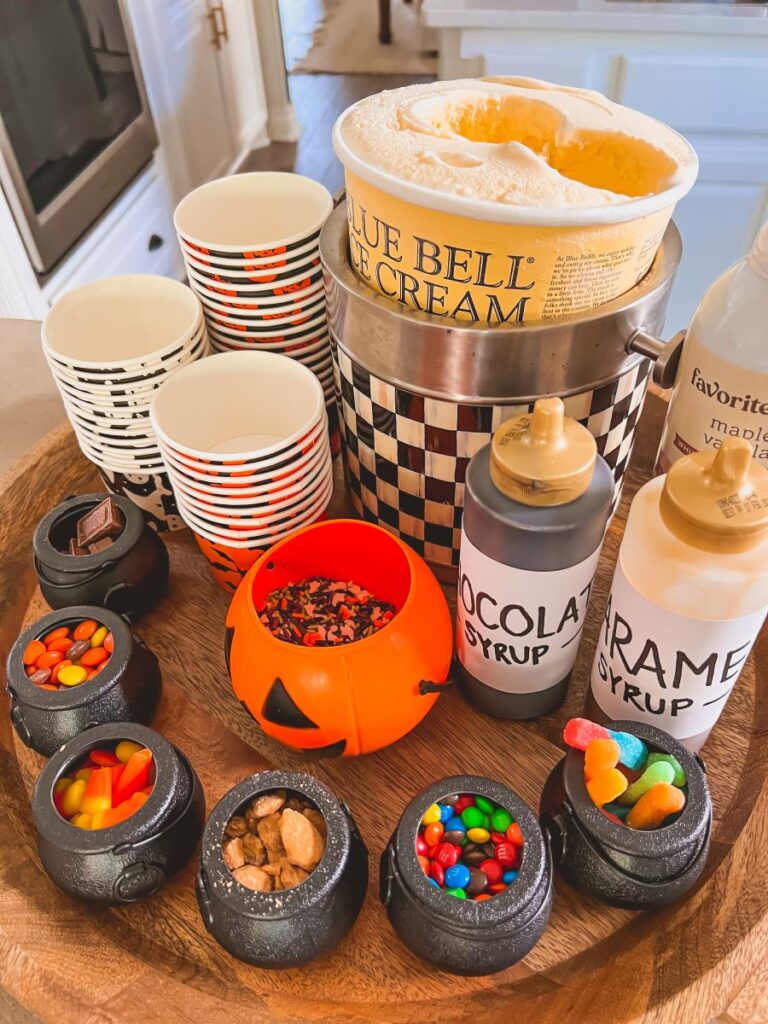
This is up to you! My Halloween Ice Cream Board includes:
- Favorite Ice Cream
- Whipped Cream
- Sauce – I used Chocolate and Caramel
- Festive Halloween Sprinkles
- Candy, such as Gummy Worms, M & M’s, Candy Corn, or Oreos
Favorite Supplies
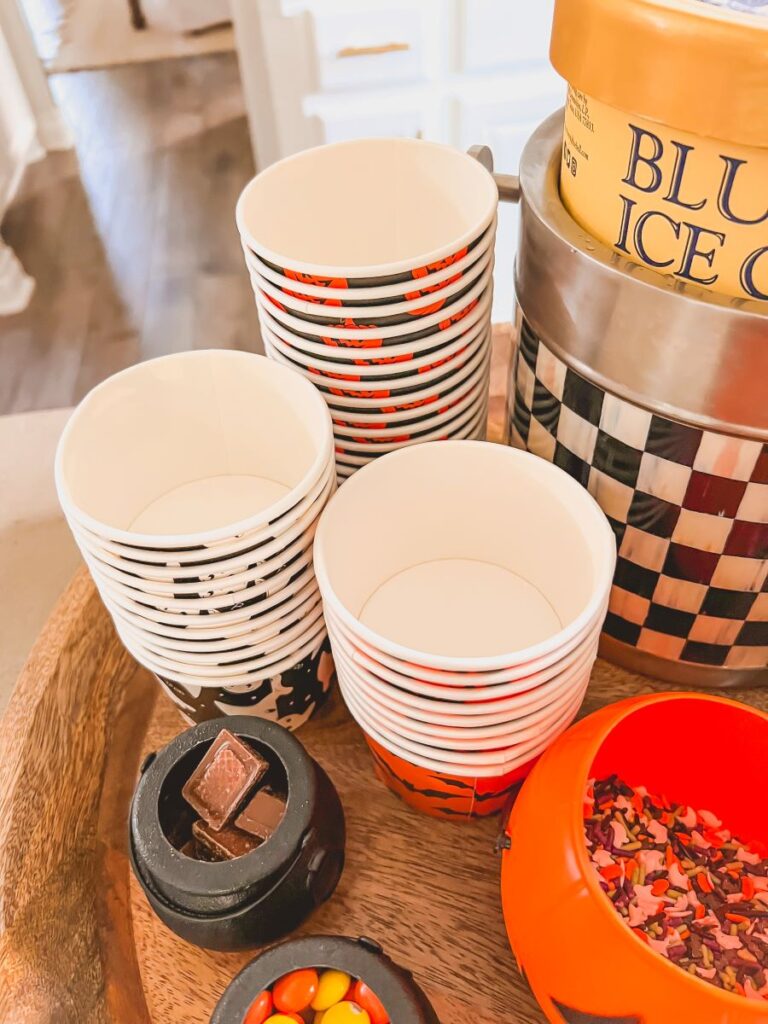
- Cauldrons: I have gotten so much use out of these black mini cauldrons (12 pack from Amazo) which also come in green from Walmart as a 24-pack.
- Cups: These disposable Halloween cups come in a 60-pack and have adorable Jack-O’-Lantern, ghost, and bat designs.
- Wooden Tray: I use this round wooden tray from Target all the time and love how versatile it is!
- Ice Cream Bucket: The Ice Cream Bucket is more of a splurge from MacKenzie-Childs, but her entire collection is so high-quality, timeless and makes wonderful gifts!
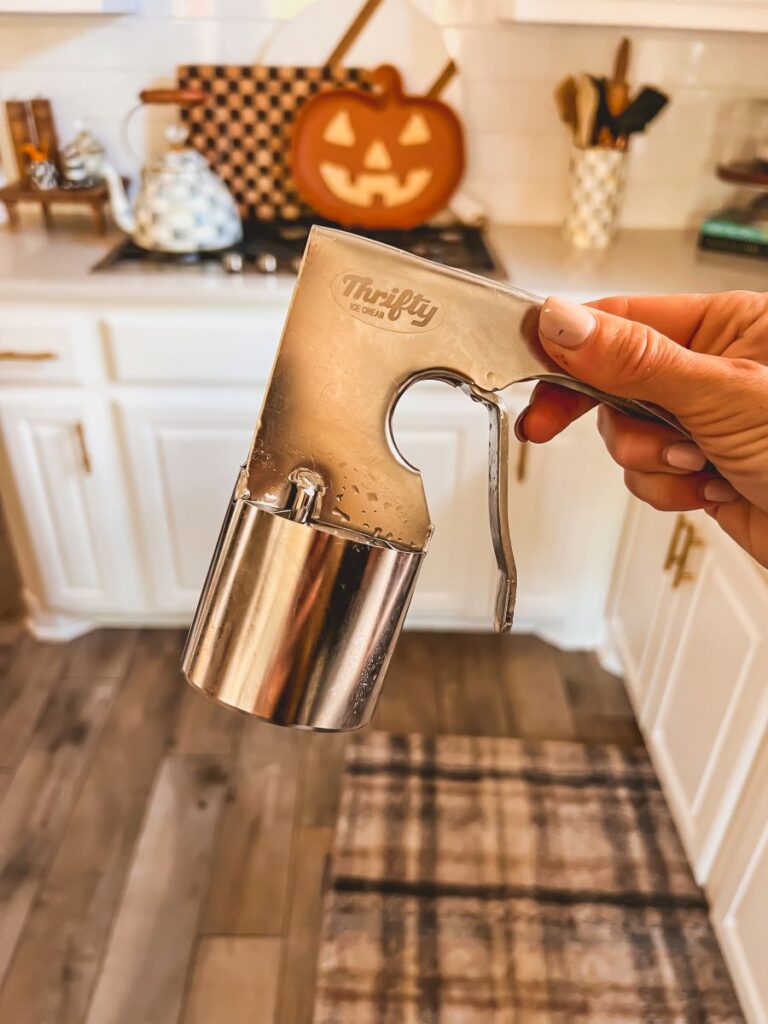
- Ice Cream Scooper: This scooper is so handy and fast! You won’t ever have to worry about ice cream getting on your hands as you try to remove it from a traditional scooper!
- Kitchen Links: I get asked all the time about the products in the background of my kitchen. Much of it is from MacKenzie-Childs, which I have slowly grown a collection of over the years! My favorites are this checkered chopping board, my black and white checkered teapot, and the gray and white checkered utensil holder. I also have this enamel canister that you can find in small, medium, or large.
- The Haunted House Candy Jar is also Pottery Barn!
I will definitely be saving extra cups for next year as well!

Directions
My favorite thing about this Halloween Ice Cream Bar is how EASY it is! You can use a wooden board like mine to make a defined space, or just set it up on a table or countertop. To help it look visually appealing, I like to;
- Start with the largest items in the back, such as the ice bucket or ice cream carton.
- Place the cups/bowls on one side and the toppings on the other side so it’s balanced. I like to put the chocolate and caramel sauce in their own bottles with cute labels but you can definitely skip this step.
- Layer in the smallest items in the front, such as the toppings in smaller containers.
- You can also decorate around the ice cream bar, such as with twinkle lights or more Halloween decorations.

Here’s a Quick Video Tutorial!
Can I Prep This Ahead of Time?
Yes! You can set up all of the non-refrigerated items ahead of time, like the cups and serving bowls. If you place the candy and toppings out, just cover them with Saran Wrap so they stay fresh. Leave the ice cream in the freezer until just before serving time!

Storing Leftover Halloween Ice Cream Bar Goodies
I like to keep the boxes for the candy so you can just put any leftover candy back in, or you can just place in a Ziploc bag. Freeze any leftover ice cream and refrigerate the sauces and whipped cream.
Happy Halloween!
With three little kids and a full-time job, recipes that *look* adorable that take no time at all are my favorite! For more easy ideas, be sure to check out this Halloween Popcorn Board, this Halloween Cheese Board, or this Kid’s Halloween Snack Board. Have a safe and fun Halloween, friends!

