How to Make Amazing No-Bake Peanut Butter Oat Cups
These No-Bake Peanut Butter Oat Cups are a healthy, delicious snack for the whole family! These are definitely a new favorite in our home that I will make again and again!

INGREDIENTS
Oat Layer
- 2 cups quick-cooking oats
- ½ cup honey
- ⅓ cup all-natural, creamy peanut butter
- Optional: 1-2 teaspoons water
Chocolate Layer
- 6 oz. dark chocolate chopped
- 2 teaspoons coconut oil
Peanut Butter Layer
- ½ cup all-natural, creamy peanut butter
- 1 teaspoon coconut oil
- ¼ cup mini chocolate chips
Directions:
- Line a metal muffin pan with paper liners or use a silicon muffin pan (no need to line the silicone pan).
- First, make the oat layer. Add the quick-cooking oats, honey, and peanut butter to a bowl and stir all of the ingredients together until combined. If it seems dry, add 1 to 2 teaspoons of water.
- Scoop about 2 tablespoons of the oats into the bottom of each muffin cup and firmly press them into the cup.
- Next, mix the chocolate layer. Transfer the chocolate and coconut oil into a microwave-safe bowl. Heat the chocolate on high for 20-second increments until the chocolate is melted. Be sure to stir the chocolate and coconut oil in between each increment.
- Scoop 2 teaspoons of the melted chocolate and add it on top of the oat layer. Swirl the muffin pan in a circle to easily distribute the chocolate over the oats. If there is any melted chocolate left in the bowl, evenly distribute the chocolate into each cup. Place the muffin pan in the freezer for 5 minutes.
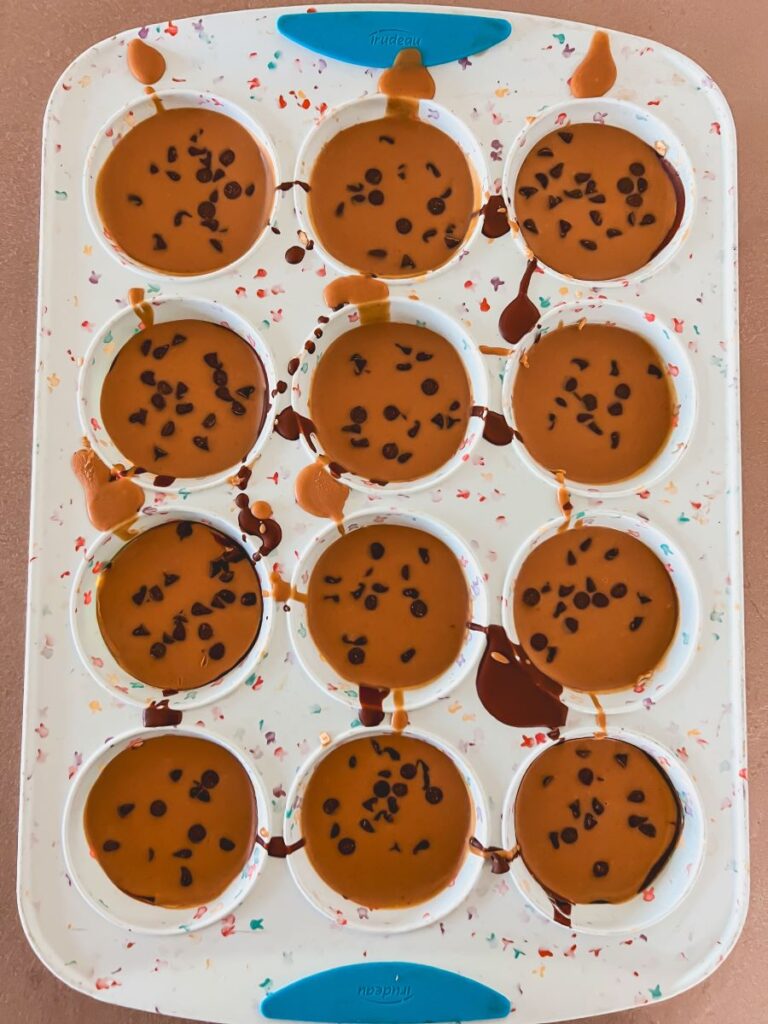
- Finally, make the peanut butter layer. Add the creamy peanut butter and coconut oil into a separate microwave-safe bowl and microwave the mixture for 15 seconds. Stir until well combined. Add 2 teaspoons of the peanut butter mixture to the top of the chocolate layer. Swirl the pan again to even out the peanut butter. Then, add mini chocolate chips to the top of each cup.
- Place the muffin tin in the freezer for at least 30 minutes to an hour to set.
- When the oat cups have set, remove them from the muffin pan and transfer them into a freezer bag and store the oat cups in the freezer.
Recipe adapted from Fit Foodie Finds
Here’s a Quick Video Tutorial!
Perfect Presentation Platters
These Peanut Butter Oat Cups would look cute on almost any type of platter! Here are some of my favorites:
White Platters: For a look like my white platter and a handy option you could use all year, this set of two white porcelain platters are my faves! If you’d prefer a marble look, this white marble pastry board from World Market is beautiful. For a less expensive option, this faux white marble tray from Walmart is also a great choice!
Cake Stands: For a great option with a lid, this wood and metal option is so useful to have on-hand. Also, this wooden stand from Walmart is super clean and modern looking. I also love this marble and acacia cake stand!
Kitchen Links: I get asked all the time about the products in the background of my kitchen. Much of it is from MacKenzie-Childs, which I have slowly grown a collection of over the years! My favorites are this checkered chopping board, my black and white checkered teapot, and the gray and white checkered utensil holder. I also have this enamel canister that you can find in small, medium, or large.
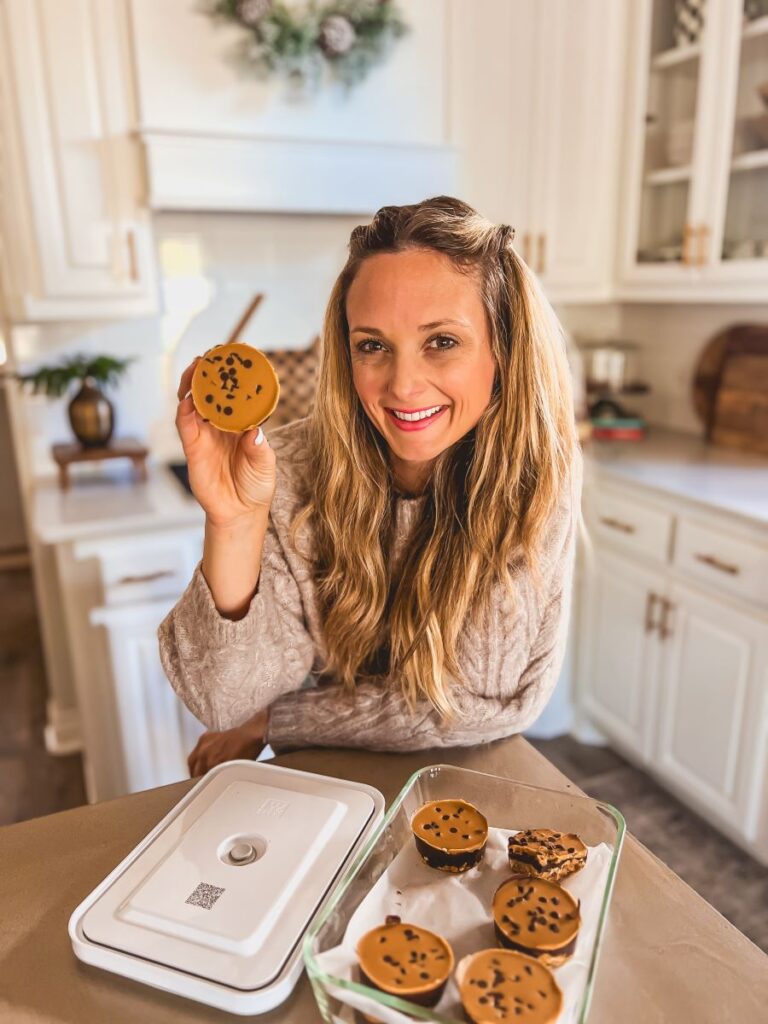
Can I Make These Ahead of Time?
Yes! Since they need time to freeze and set, these can be prepped anywhere from several hours in advance to several weeks.
Storing Leftover Peanut Butter Oat Cups
When storing these in the freezer, I’d recommend an airtight Ziploc container or a freezer bag. They should stay fresh for about three months.

Enjoy!
For more healthy recipe ideas, be sure to check out my recipes for Healthy Air Fryer Granola, this delicious Blueberry Peach Crisp, or these Healthy Banana Breakfast Cookies. Thanks for visiting my neck of the woods, sweet friends!
PrintNo-Bake Peanut Butter Oat Cups
These No-Bake Peanut Butter Oat Cups are a healthy, delicious snack for the whole family! These are definitely a new favorite in our home that I will make again and again!
Ingredients
Oat Layer:
-
- 2 cups quick-cooking oats
- ½ cup honey
- ⅓ cup all-natural, creamy peanut butter
- Optional: 1-2 teaspoons water
Chocolate Layer:
-
- 6 oz. dark chocolate chopped
- 2 teaspoons coconut oil
Peanut Butter Layer:
-
- ½ cup all-natural, creamy peanut butter
- 1 teaspoon coconut oil
- ¼ cup mini chocolate chips
Instructions
-
- Line a metal muffin pan with paper liners or use a silicon muffin pan (no need to line the silicone pan).
-
- First, make the oat layer. Add the quick-cooking oats, honey, and peanut butter to a bowl and stir all of the ingredients together until combined. If it seems dry, add 1 to 2 teaspoons of water.
-
- Scoop about 2 tablespoons of the oats into the bottom of each muffin cup and firmly press them into the cup.
-
- Next, mix the chocolate layer. Transfer the chocolate and coconut oil into a microwave-safe bowl. Heat the chocolate on high for 20-second increments until the chocolate is melted. Be sure to stir the chocolate and coconut oil in between each increment.
-
- Scoop 2 teaspoons of the melted chocolate and add it on top of the oat layer. Swirl the muffin pan in a circle to easily distribute the chocolate over the oats. If there is any melted chocolate left in the bowl, evenly distribute the chocolate into each cup. Place the muffin pan in the freezer for 5 minutes.
-
- Finally, make the peanut butter layer. Add the creamy peanut butter and coconut oil into a separate microwave-safe bowl and microwave the mixture for 15 seconds. Stir until well combined. Add 2 teaspoons of the peanut butter mixture to the top of the chocolate layer. Swirl the pan again to even out the peanut butter. Then, add mini chocolate chips to the top of each cup.
-
- Place the muffin tin in the freezer for at least 30 minutes to an hour to set.
-
- When the oat cups have set, remove them from the muffin pan and transfer them into a freezer bag and store the oat cups in the freezer.
Recipe adapted from Fit Foodie Finds
